


Compression
Unless you’re going for a particularly wild and ‘organic’ drum sound, you’re almost certainly going to want to apply compression to at least the grouped kit, if not also the individual drum tracks within it. The reason for this is that the volume levels of hits on any given drum can be highly variable, as can the sound of the kit as a whole. A compressor reduces the dynamic range of a signal – that is, the difference between its loudest and quietest parts – by automatically lowering the volume by a user-defined amount whenever it crosses a user-defined threshold. The end result is a more consistent dynamic profile befitting the sonic sensibilities of modern music, but the attack and release knobs on your compressor also provide the means by which to increase the all-important punch of the drums by controlling the onset of gain reduction after the initial transient (the very short initial burst of sound at the start of the hit).
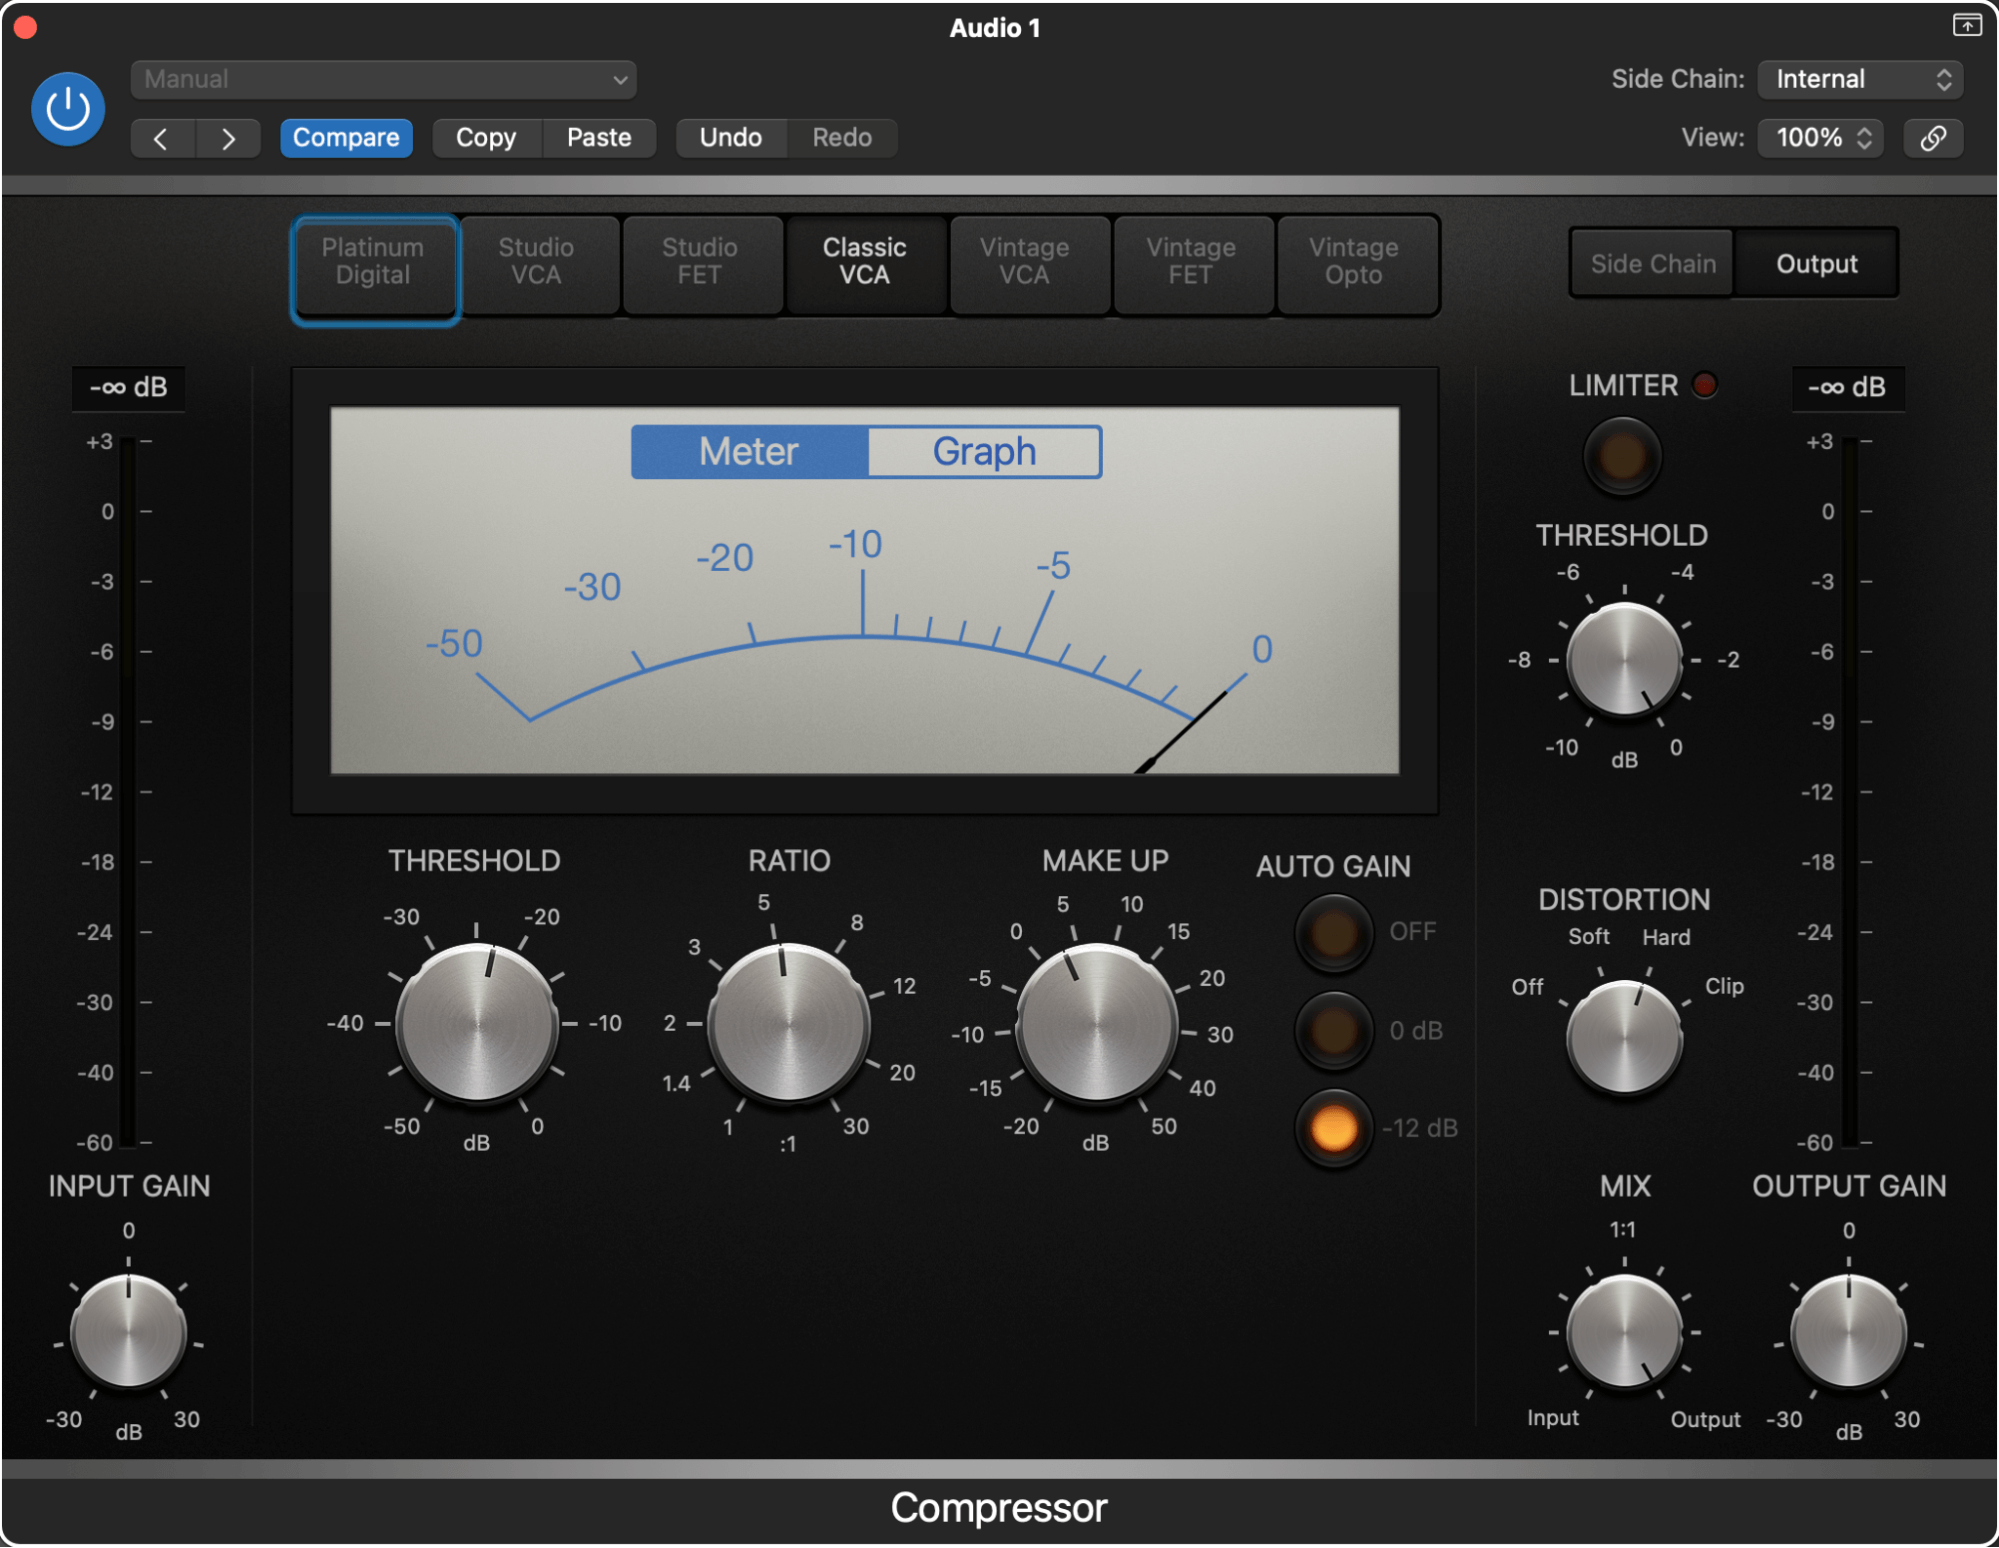
So, compression is used on individual drums to dynamically shape them within the overall mix, as well as on the drums bus, where it can be utterly transformative in terms of ‘gluing’ the kit into the cohesive, unified instrument that it should ultimately come across as. Make no mistake, this is a vital technique for all producers to learn and master. Read more about compression and other styles of dynamics processing here.
Equalisation
With compression deployed to give your drums dynamic consistency and weight, equalisation – or EQ – performs a loosely equivalent function in the frequency domain. An EQ plug-in enables selected frequency ranges of widely variable width to be boosted (raised in volume) or attenuated (lowered in volume), in order to reduce wanted resonances and prevent clashes with other instruments, as well as emphasising those frequencies that aren’t prominent enough.
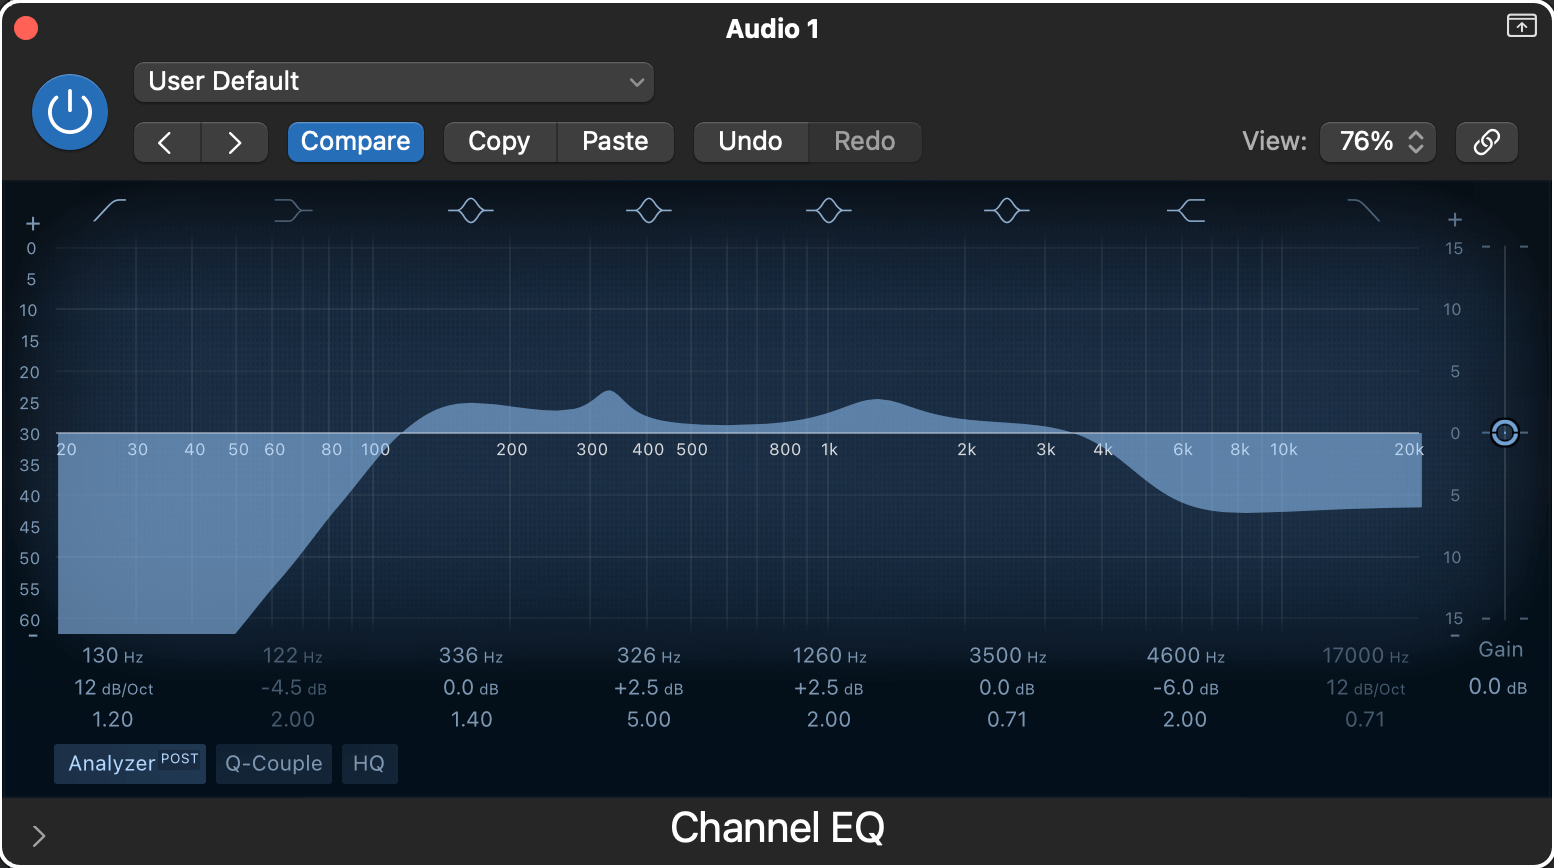
Your standard EQ plugin will offer a number of frequency bands (usually six or so) to work with, each able to switch between a number of filter types (‘filter’ being the name of the circuit that does the equalising). A shelving EQ, for example, affects all frequencies above or below the ‘corner’ frequency to which it’s set, while a parametric EQ band lets you get incredibly precise with the placement and bandwidth of an upward or downward spike or hump in the response curve.
One recent EQ development of particular note is the dynamic EQ, which operates rather like a cross between a compressor and an equaliser, dynamically adjusting the gain of each frequency band in response to the volume level of the input signal. Dynamic EQ is very useful when you need to boost or attenuate certain frequencies in a drum mix only when they become problematic, leaving them unaffected the rest of the time – alleviating harshness in an occasionally-struck cymbal, for example, without also constantly dialling out the same frequencies in the snare.
Learn more about EQ here.
Distortion
One ubiquitous drum processing effect that’s often overlooked by inexperienced producers is distortion. To the uninitiated, that word might bring to mind nothing but screaming rock guitar solos and super aggressive vocals, but actually, ‘distortion’ refers to the addition of harmonic colour, grit and density to any sound, to any degree, through the use of various specific circuit-saturating or amplifier-overdriving processes.
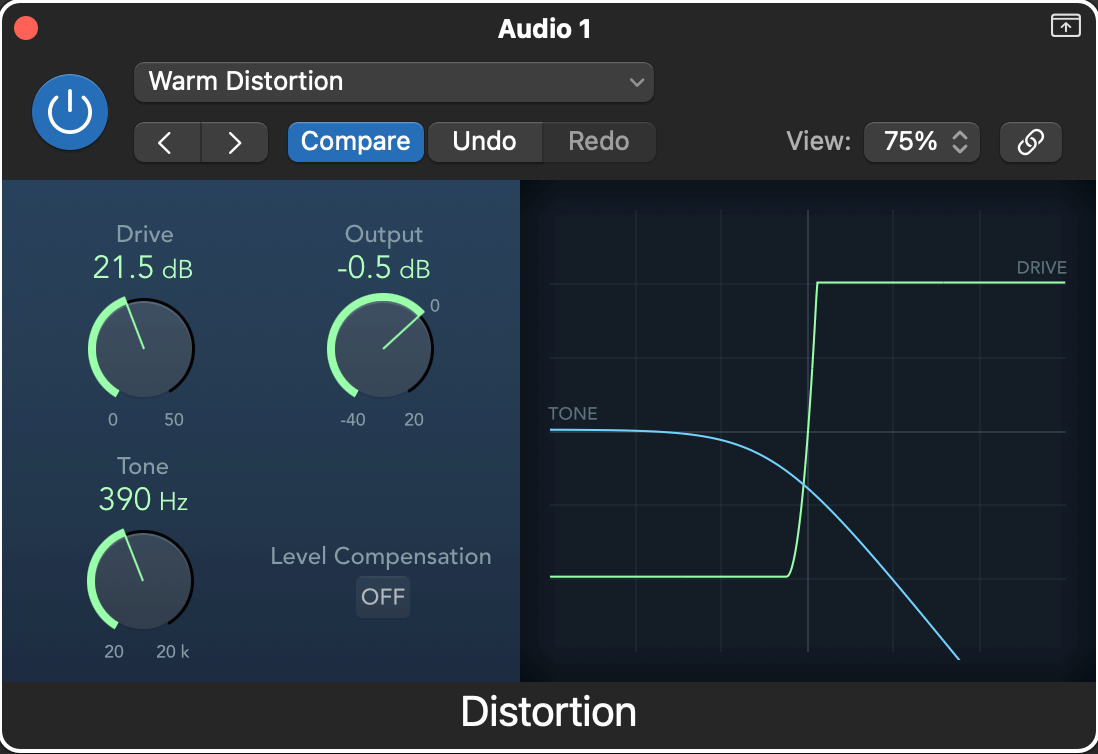
When it comes to drums, distortion is ideal for giving kicks presence, fattening up snares, and toughening the aggregate kit via insertion into the drums bus. Just a touch of tape- or tube-style saturation can be all it takes to profoundly elevate an overly clean drum sound; and when you fancy getting really aggressive, extreme settings, edgier distortion types (hard clipping or waveshaping, for example) and heavy-handed compression (which can all too easily push things into the glorious realm of distortion) are well worth playing around with.
Go deeper into distortion with our beginner’s guide.
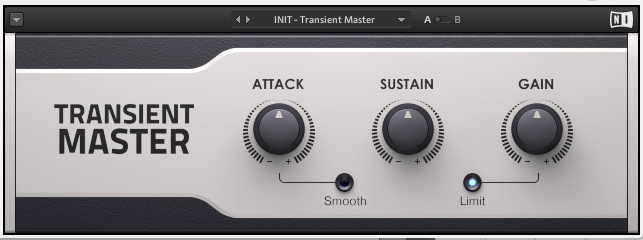
Transient shaping
While a compressor may well be all you need to sculpt the transients of your kicks, snares, hi-hats and toms, there is another, dedicated effect you can call on to make tweaking those attack levels even easier. A transient shaper plugin will generally present one knob each for the transient and sustain portions of the signal, which you simply raise or lower to change their respective volumes, with determination of where the transient ends and the sustain begins handled automatically under the hood.
Care must be taken not to go overboard with this one, though, as over-boosted transients can cause major issues in the mix.
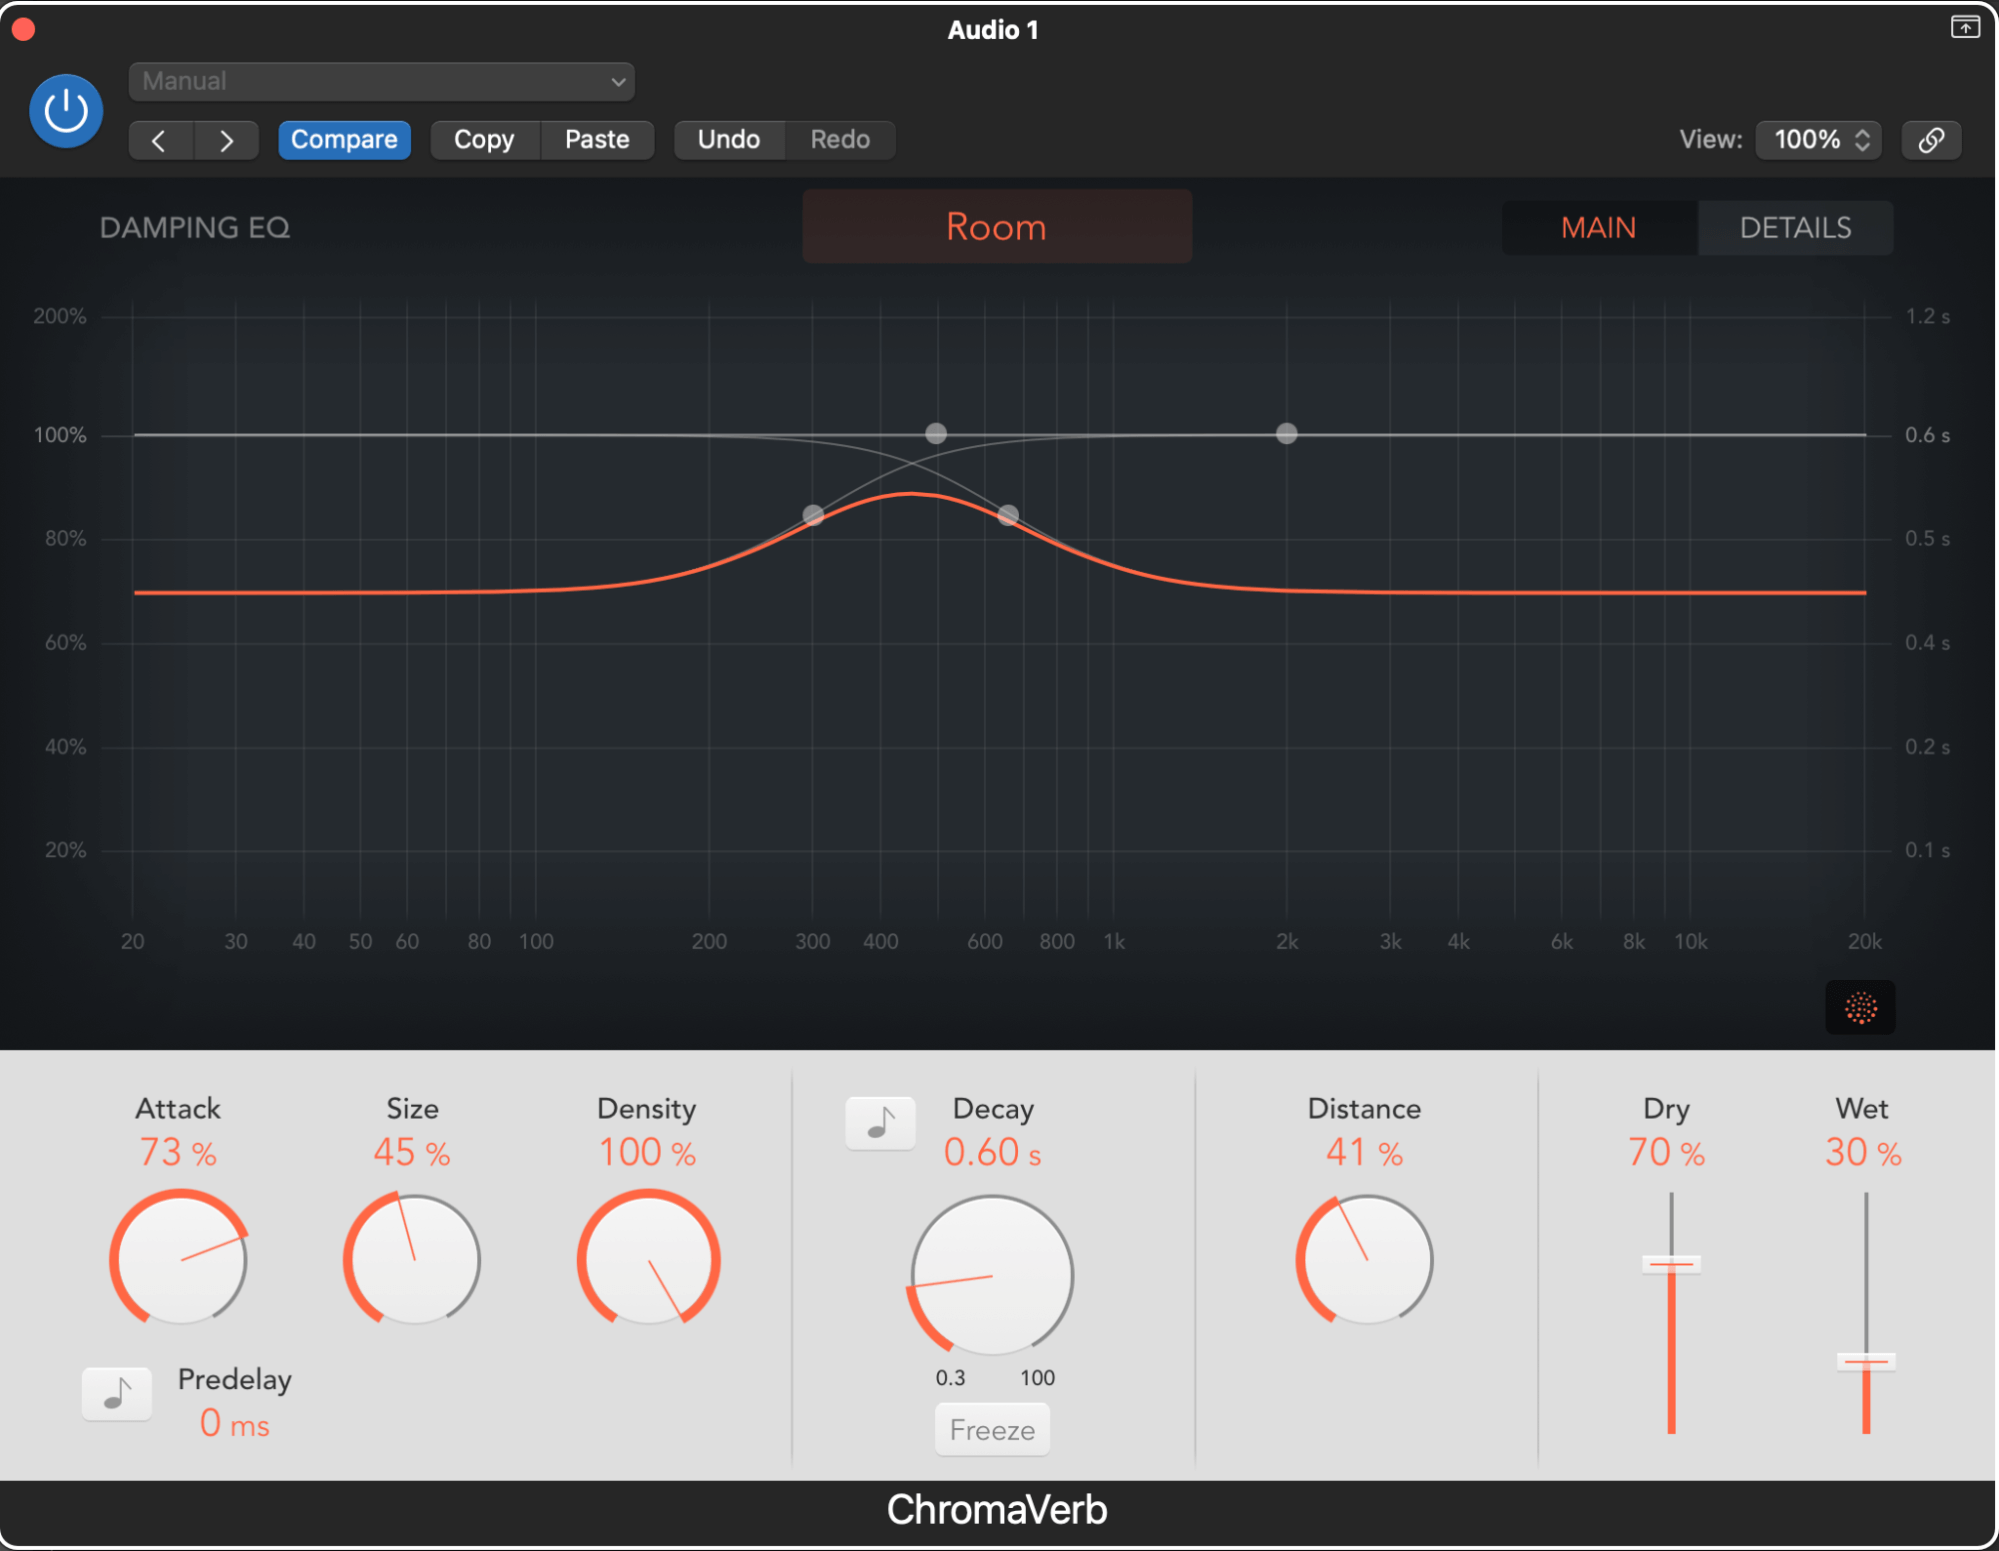
Reverb
There’s certainly no law stating that every drum track should have reverb applied to it, but unless you’re shooting for a deliberately ultra-dry sound, even a barely perceptible layer of spatial ambience can make all the difference to the character of your kit, so it should always be considered. And, of course, when you are actively seeking to place your drums in a space other than that in which they were recorded, today’s reverb plug-ins give you an dazzling diversity of options with which to do so, from physical room and plate emulations to otherworldly shimmers and ambiences of limitlessly flexible scale.
Generally speaking, reverb is best employed on an auxiliary effects return channel, enabling individual drum sounds to be sent to it by varying amounts. And as a rule, low frequency reverb is to be avoided, as it clutters the bottom end of the mix and rarely sounds nice; so if you’re going to apply reverb to the kick drum, keep it short and filtered. Techno and other dance styles might make exceptions to this, but even then, err on the side of caution with any reverb below around 200Hz or so.
And that’s the bread-and-butter drum effects in a nutshell! While these five processes form the bedrock of drum kit mixing, there are plenty more to be discovered when you want to get more overtly creative with your percussion, including delay, chorus, phasing, gating, vocoding, bitcrushing and more. Don’t be afraid to experiment!

Our Products
-

2in | 2out Audio Interface
-

10in | 6out Audio Interface
-

10in | 14out Audio Interface
-

20in | 24out Audio Interface
-
10in | 14out Audio Interface + Monitor Controller
-
10in | 4out Guitar Interface
-

2in | 2out Audio Interface
-

4in | 4out Audio Interface
-

Everything you need to start recording
-

24in | 24out Audio Interface
-

8 Channel Smart Preamp with AD/DA
-

8 Channel Mic Pre & ADC
-

8 Channel Mic Pre + Tone Control
-

Modular Analogue Recording Console
-

Small Format Analogue Recording Console
-

Small Format Analogue Recording Console
-

Immersive Audio Interface and Monitor Controller
-

Desktop Monitor Controller
-
Surround Sound Monitor Controller