


Taking advantage of a technology that’s been around since the earliest days of music production, sidechaining has become a go-to signal processing technique in recent years, playing a major role in defining the sound of modern dance music, in particular.
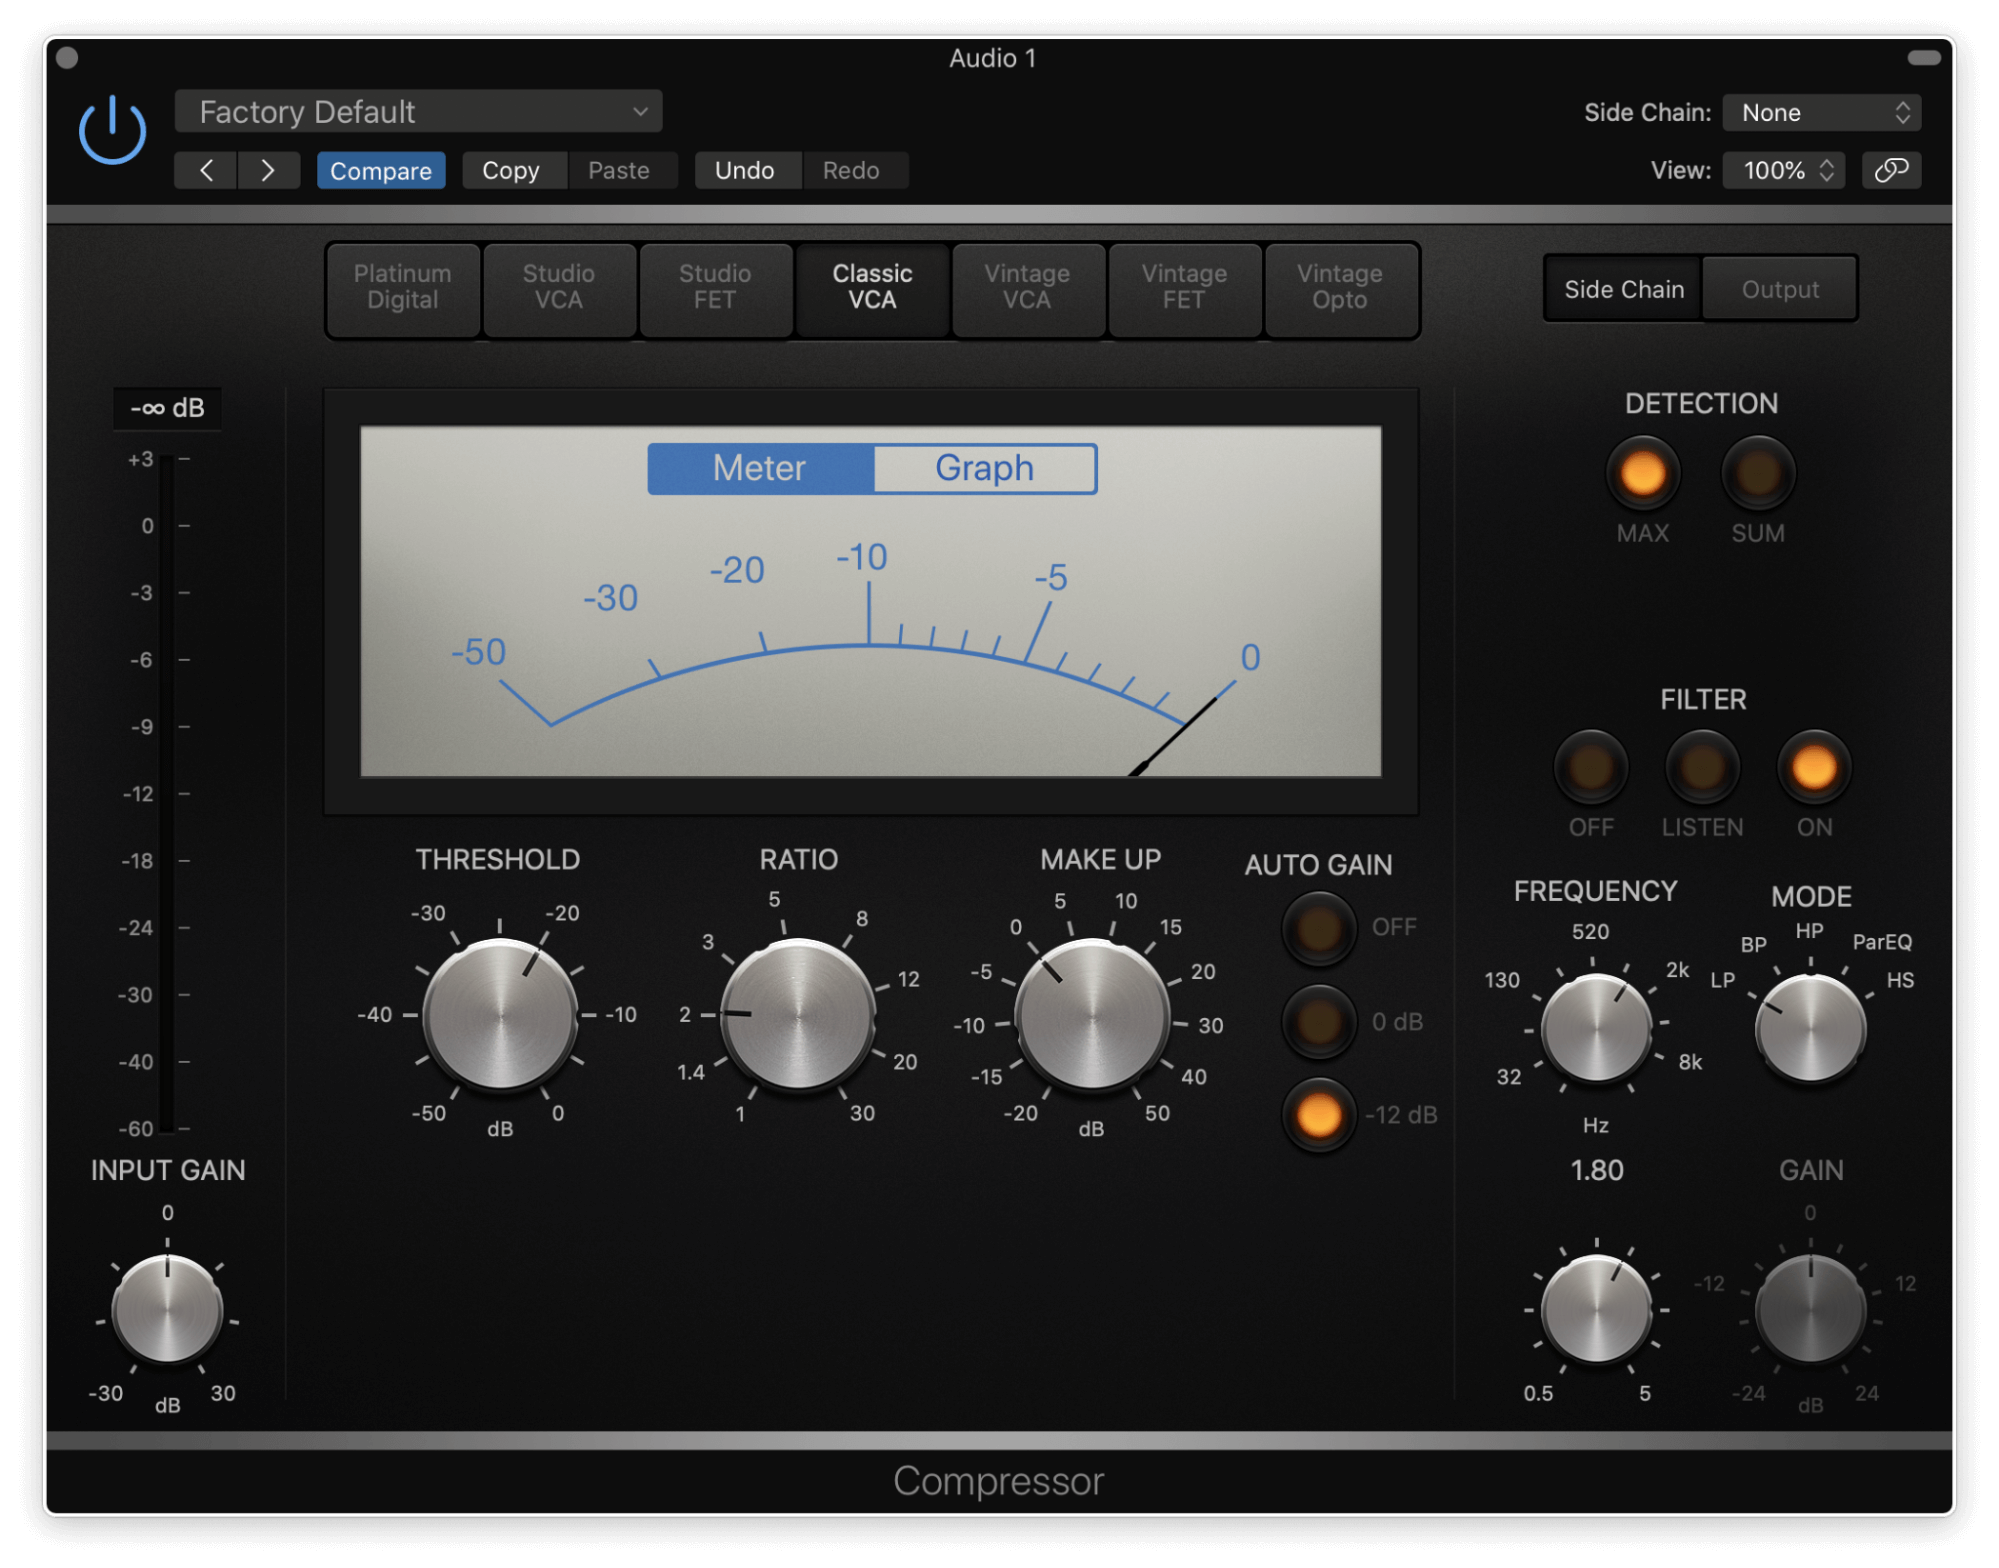
Sidechaining generally refers to the act of controlling a compressor (although filters and certain other effects are also fair game) applied to one sound with the dynamic profile (ie, volume level over time) of another. The term comes from the sidechain circuit built into every compressor: a vital and central component that tracks the dynamics of the signal in order to guide the compression applied to it. In its default configuration, a compressor sidechain is triggered by – or ‘keyed’ – off the input signal itself, lowering its volume whenever it crosses the set compression threshold, according to the specified compression ratio. By routing a completely separate signal into the sidechain, though, the compressor reduces the volume of the source sound whenever that signal crosses the threshold instead.
In a nutshell, when you need one sound to ‘get out of the way’ of another (guitars vs vocals, synth pads vs leads, etc) in real time, sidechain compression is a highly effective way to make it happen.
Keep on ducking
The classic example of sidechaining is ducking (ie, turning down) the bass in a track every time the kick drum hits, so as to prevent the low end from becoming overblown by both arriving together at full volume, and create space for the all-important kick. It’s very easy to set up: simply insert a compressor into the bass channel, route the kick drum signal (either via a send or a duplicate track) into the compressor’s sidechain input, then set the compressor’s ratio control to anywhere between 5 and 10:1, and the threshold to a point where the kick drum exceeds it by a good amount. Whenever the kick drum sounds, the bass will immediately drop in volume, and the sonic result will be a profound increase in the punch and weight of the kick, and the low-frequency clarity of the mix as a whole. Adjust the threshold and ratio to tailor the depth of the ducking, and play with the attack and release controls to adjust the time it takes the compression to kick in when the kick hits, then let go when it’s gone. If the dynamic profile of the kick isn’t well suited to the ducking you’re after and tweaking the compressor settings can’t make it work, find a kick drum that does work and use that instead by duplicating the pattern of the real kick with it and muting it in the mix so that it serves as a ‘silent’ sidechain trigger.
That’s perhaps the most frequently encountered deployment of sidechaining these days, but there are many more uses for this highly creative technique. Here are just a few of them…
1. Making space for vocals
Another common use case for sidechaining is separating vocals from other elements in the mix that might clash with them in terms of frequency range and perceived prominence, such as guitars, keyboards and synths. The setup is the same as for the kick/bass example above, with the sidechain input of a compressor on the vocal keyed off the offending instrument(s); but here the idea is to keep the effect subtle, giving the vocal just enough of a lift that it becomes fully focal and unimpeded, without the listener being particularly aware that any compression is taking place.
2. Adding rhythmic interest to pads and other sustained sounds
Sidechaining isn’t just great for getting instruments and vocals sitting comfortably together in the mix, it can also be called on for purely creative purposes as a sound design tool. Stick your compressor on a smoothly sustaining synth pad or string, and key it off a drum loop (silent or in the mix) to imprint the rhythm of the beat onto it, creating a groovy gating effect. Or, if the complex vagaries of drum loops are too free-wheeling for you, take full control of the rhythm by sidechaining it to a silent MIDI-triggered percussion line of some sort: a hi-hat, a snare drum, a woodblock… anything will do. This is a great one for sidechained filtering, too, rhythmically steering the cutoff instead of the volume – all you need is an auto-filter plugin with a sidechain input.
3. Frequency-conscious sidechaining
Your compressor plugin may well feature a sidechain filter, with which the sidechain input can be made to respond to a particular frequency range. This is helpful when you only want certain elements within the keying signal to trigger compression: the kick drum in a full drum loop for bass ducking, say; or perhaps only the hi-hats for pad gating; or even the mids and highs in a full mix for vocal clearance.
4. Ducking reverbs and delays
Long reverbs and delays can all too easily overwhelm their source sounds if left to their own devices. Follow your delay or reverb plugin up with a compressor keyed off the same source sound, however, and the reverb tail or echoes will politely duck out of the way whenever the dry signal is present. Not only will this work wonders for tidying up the mix, but it also has high creative potential, opening up all sorts of strange and ghostly effects through tweaking of the compression settings.
Finally, with sidechain compression having caught on as such a popular mixing and sound design tool, it’s perhaps no surprise that several imaginative software developers have come up with various dedicated ducking plugins that offer the same functionality (and then some!) without a compressor in sight. Perhaps the best known of these is Kickstart 2, by Cableguys in collaboration with EDM legend Nicky Romero, which makes absurdly light work of automatically ducking basslines and other sounds in sync with the host DAW, or triggered by audio (via an actual sidechain input) or MIDI; but also well worth investigating are Xfer Records LFOTool, Polyverse Music Gatekeeper, and Kickstart 2’s big brother, VolumeShaper 6.


Our Products
-

2in | 2out Audio Interface
-

10in | 6out Audio Interface
-

10in | 14out Audio Interface
-

20in | 24out Audio Interface
-

24in | 32out Audio Interface
-

2in | 2out Audio Interface
-

4in | 4out Audio Interface
-

24in | 24out Audio Interface
-

Everything you need to start recording
-

8 Channel Smart Preamp with AD/DA
-

8 Channel Mic Pre & ADC
-

8 Channel Mic Pre + Tone Control
-

Modular Analogue Recording Console
-

Small Format Analogue Recording Console
-

Small Format Analogue Recording Console
-

Immersive Audio Interface and Monitor Controller
-

Desktop Monitor Controller