


What is parallel processing?
Quite simply, parallel processing is the simultaneous routing of a single audio signal to two separate channels for independent alteration of either or both with effects, before recombining them as a final composite sound. That might seem quite complex, but it really isn’t: in fact, the dry/wet mix knobs on the majority of if not all your effects plugins represent the most basic form of parallel processing, enabling adjustment of the balance of unprocessed (dry) and processed (wet) signals at the output – albeit without discrete control over their respective volume levels, or further processing of either in isolation once they’ve left the effect. So, while such plugins are rightly considered ‘insert effects’, they actually feature internal parallel processing schemes – very convenient!
Beyond dry/wet mixing within a single plugin or hardware processor, the most ubiquitous and versatile form of parallel processing is the deployment of effects on auxiliary busses in a send/return configuration. This is a more full, ‘purist’ implementation of the concept compared to dry/wet mixing within an effect, as the total separation of dry and wet signals onto their own mixer channels allows for the application of other effects and processing (panning, EQ, compression, etc) to each one on its own. It’s also the only way to implement parallel processing using any plugin or device that doesn’t offer onboard dry/wet mix control, although those are rare these days.

What sorts of things can you do with parallel processing?
The main creative benefit of parallel processing is the ability to dial in as much of the processed wet signal alongside the unaltered dry signal as required, which makes it possible to transform the texture, flavour or spatial context of an instrument, vocal or other part without sacrificing any of its original character, as you inevitably would with a regular insert effect applied 100% wet.
For example, let’s say you want to apply some distortion to a recorded vocal track – just enough to give it a bit of edge. Inserting a distortion plugin directly into the channel 100% wet means that the entire signal is processed no matter what: while you can control the amount of saturation brought to bear using the distortion amount control, even at its lowest settings, you’re still distorting the entirety of the vocal slightly. Process it in parallel, however – whether through the dry/wet mix knob or by putting the plugin on a send/return auxiliary bus – and you get both the fully distorted version and the fully dry version for balancing to taste, thereby allowing as much or little of the unaffected natural vocal sound as you like to underpin its distorted counterpart.
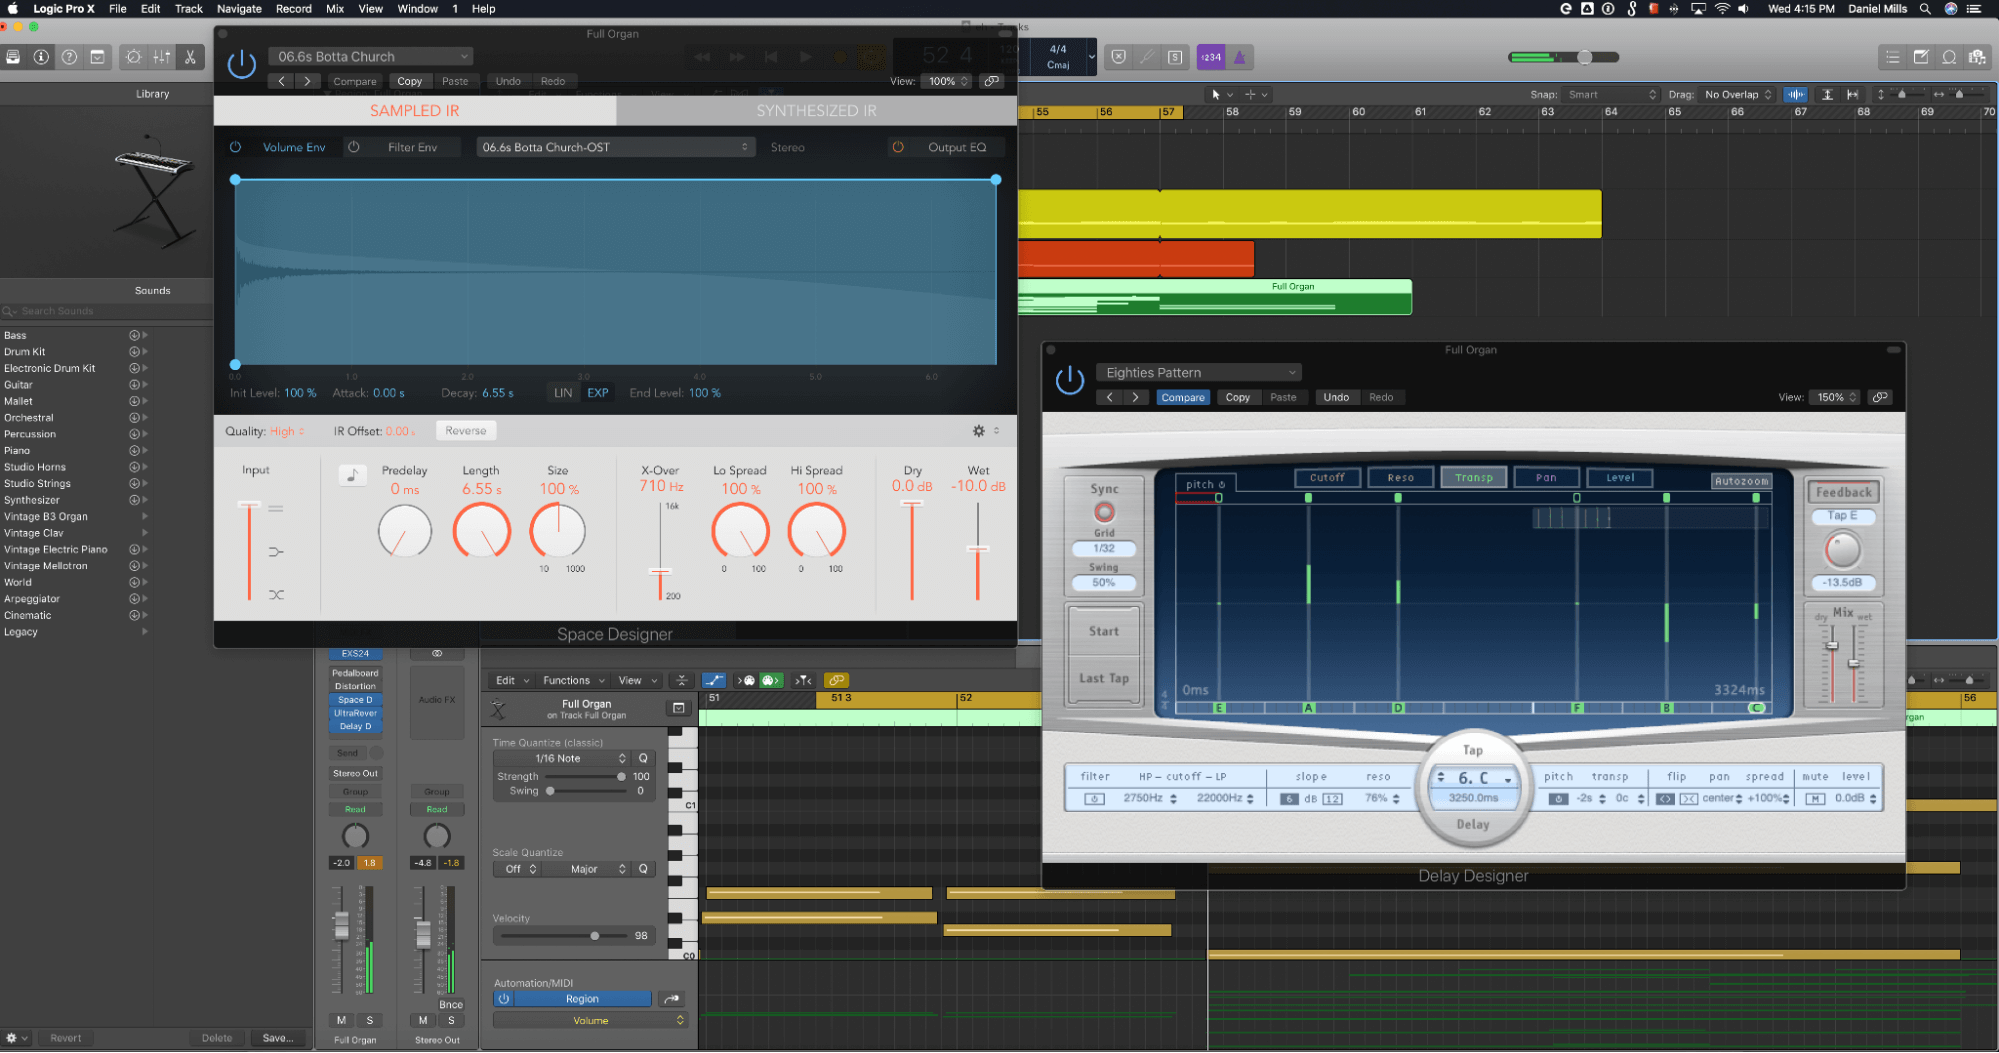
Another very common parallel processing use case is for delay-based effects (that is, reverb, delay, chorus and flanging) which are generally meant to exist ‘around’ the dry signal, remaining audibly separate from it to a greater or lesser extent, rather than being imposed directly onto it – a cinch to set up using a send/return circuit.
And finally, no guide to parallel processing would be complete without mentioning the ever-fashionable dynamics shaping technique known as ‘New York-style’ compression. Primarily used to get drums sounding awesome, this involves sending the drum bus to a compressor set to a very high ratio, low threshold, and fast attack and release times (ie, very heavy compression), then blending that with the dry signal for the perfect combination of transient punch and power, and compressed thickness, weight and sustain.

How do you apply parallel processing?
As we’ve described, setting up for parallel processing can be as effortless as inserting an effect into the channel of the part to be treated and tweaking the dry/wet control, or as slightly more circuitous as inserting it into an auxiliary bus and routing the source signal to it by twisting the send knob on its mixer channel; and which option to go for will depend on the nature of the effect(s) being applied. For parallel compression or distortion, for example, where you’re looking to transform the sound itself, as opposed to placing it within an effect-generated ‘environment’, an insert keeps things simple (although the ability to adjust the volume of the transient-retaining dry signal independently is undeniably useful for New York-style compression).

For reverb, delay and the like, on the other hand, where you’re mixing a variable amount of effect with the fully dry source signal, an auxiliary is intuitively the better choice, not only for its clear separation of dry and processed elements, but also the facility to add more effects to the chain without affecting the dry signal – an EQ and compressor after a reverb, perhaps, or a modulated filter after a delay. And of course, when combining multiple so-called ‘insert’ plugins for parallel processing as a self-contained chain, they’ll also need to be stacked up on an auxiliary, as any dry signal output from the first plugin ceases to be dry as soon as it hits the second – ie, there’s no way to keep the dry signal actually ‘dry’ through a series of dry/wet-mixed insert effects
Another important plus with send effects is that you can tap any number of channels off to an auxiliary bus via their send controls. With reverb and delay often applied to many tracks within a mix, being able to use a single plugin to process multiple source signals, instead of one inserted into each channel, is hugely advantageous in terms of CPU overhead, plugin management and sonic consistency.
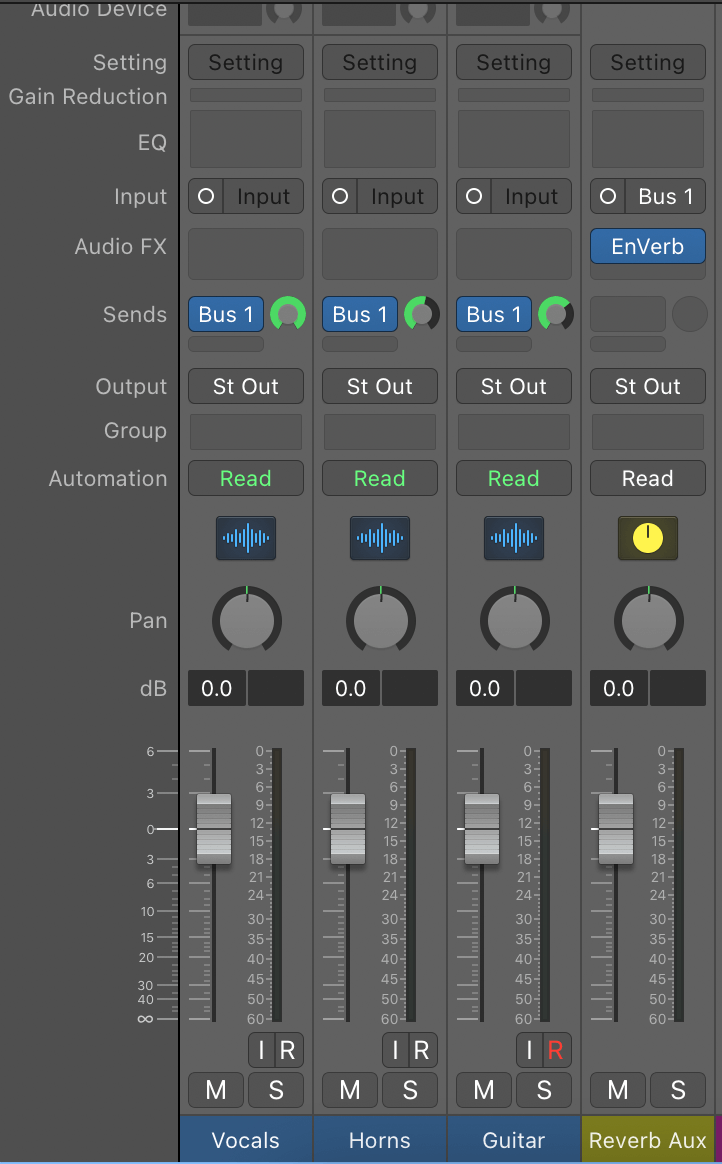
Lastly, one essential thing to bear in mind with send/return effects is that the dry/wet mix parameter on (at least) the first plugin inserted into an auxiliary return channel must be locked at 100% wet, otherwise you’ll be setting the depth of the effect once using the dry/wet mix on the plugin, then again with the send control on the dry channel. This will result in a boosting of the dry signal level, as it outputs through both channels at the same time, upsetting the balance of the mix.

Our Products
-

2in | 2out Audio Interface
-

10in | 6out Audio Interface
-

10in | 14out Audio Interface
-

20in | 24out Audio Interface
-

24in | 32out Audio Interface
-

2in | 2out Audio Interface
-

4in | 4out Audio Interface
-

24in | 24out Audio Interface
-

Everything you need to start recording
-

8 Channel Smart Preamp with AD/DA
-

8 Channel Mic Pre & ADC
-

8 Channel Mic Pre + Tone Control
-

Modular Analogue Recording Console
-

Small Format Analogue Recording Console
-

Small Format Analogue Recording Console
-

Immersive Audio Interface and Monitor Controller
-

Desktop Monitor Controller