


Up there with compression in its essential music production status, EQ (short for ‘equalisation’) is one of the most powerful effects in your mixing toolbox, enabling shaping of the frequency content of instrument and vocal tracks, as well as groups, auxiliaries and even the master output of your mixer. Indeed, although EQ plugins will be categorised as ‘effects’ in your DAW, that term doesn’t really do them justice, implying occasional usage for the purpose of dramatising or glamourising a sound. In actuality, you can expect to deploy EQ plugins on the vast majority of your mixer channels, even if only for basic corrective purposes much of the time.

What is EQ?
You’re probably already familiar with the basic principle of equalisation, as the music playback app on your phone will feature a simple graphic EQ, for tailoring the sound to your liking. EQ in music production serves essentially the same role – sculpting the frequency content to make stuff sound ‘better’ – but rather than the whole track, it’s applied independently to individual elements within it (drums, bass, guitar, keys, etc), so as to bring out the best in each one, cut away unwanted and unnecessary frequencies, and prevent clashes between sounds that occupy similar frequency ranges – the bass and kick drum, for example, or vocals and guitars.
Getting started with EQ
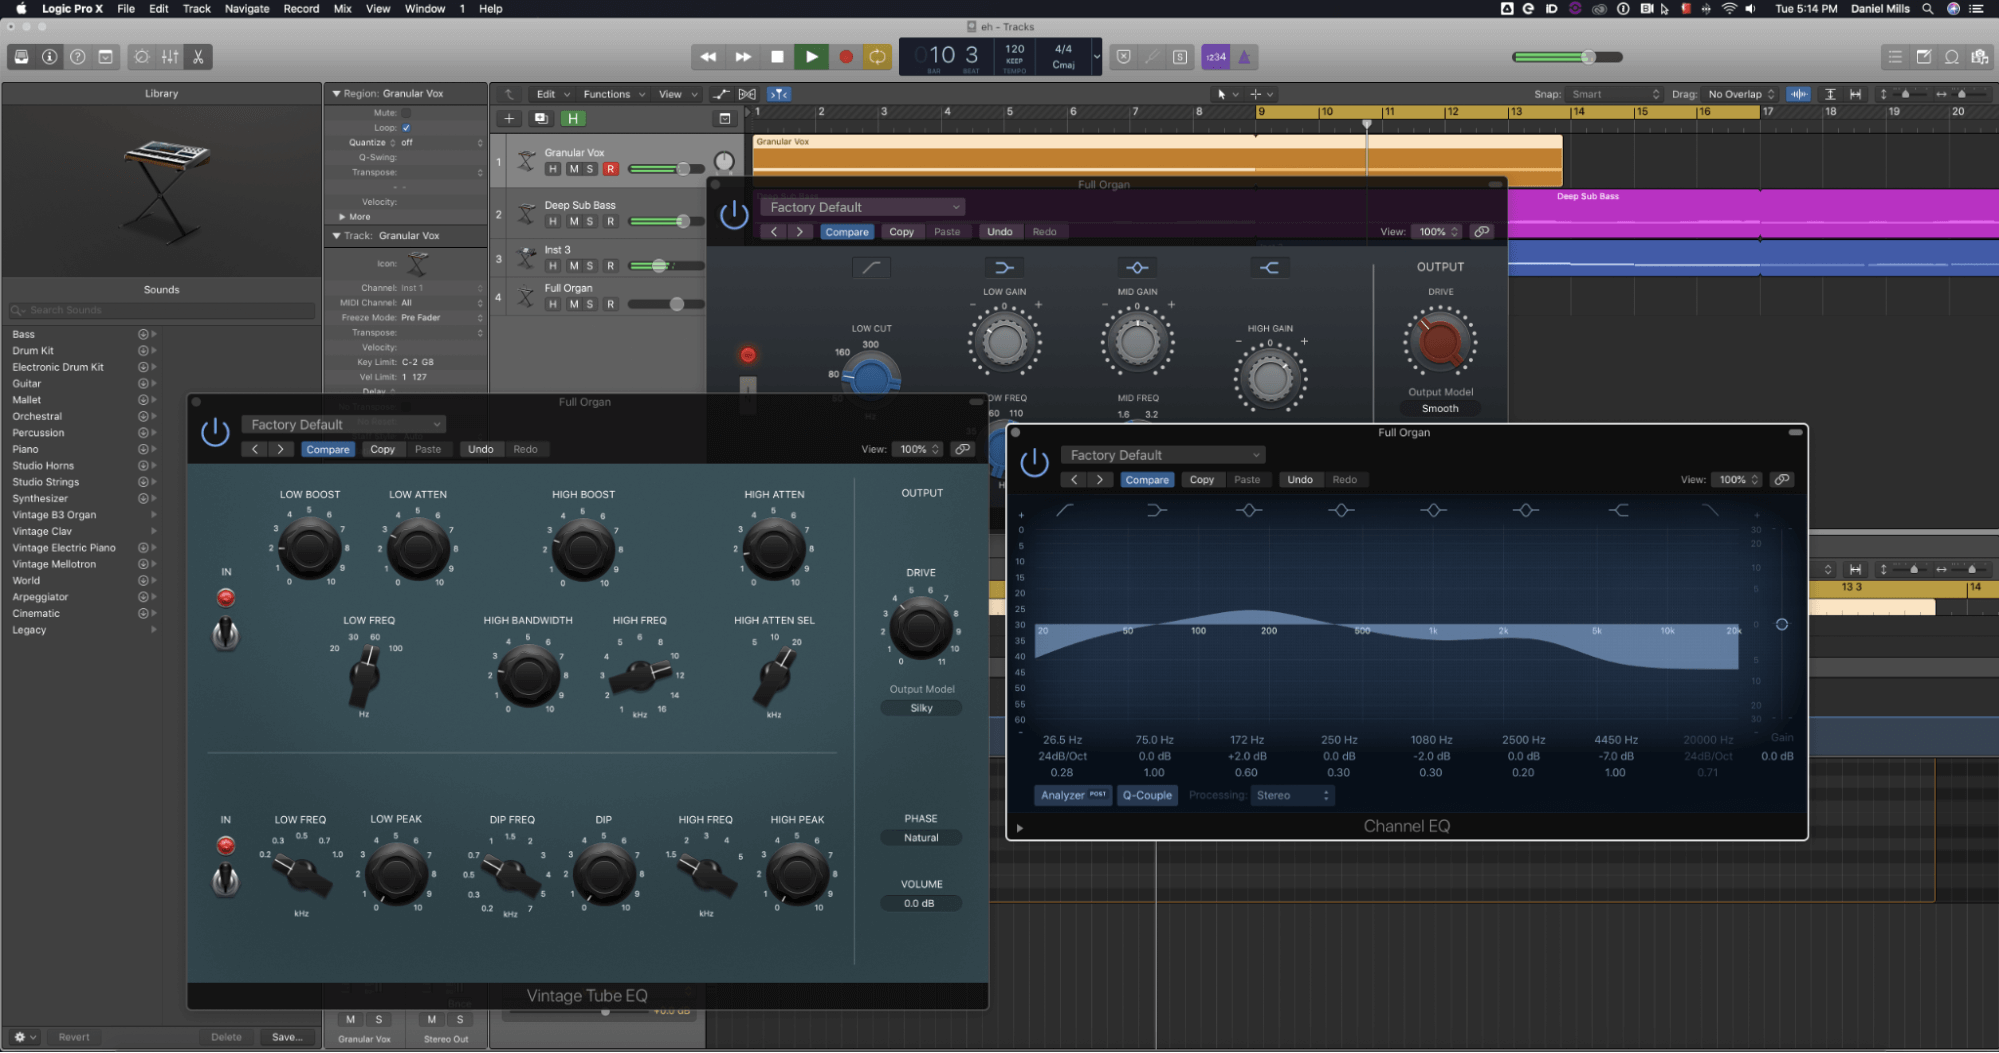
Loosely speaking, an EQ plugin can be thought of as sort of like a collection of volume controls, each one governing the level of a particular fixed or adjustable frequency range. Set the centre, corner or cutoff frequency you want to adjust for a given band, then raise or lower the gain control to cut or boost the volume of that frequency and a range of frequencies adjacent to it, as determined by the bandwidth or ‘Q’ control.
Generally speaking, it’s better to cut than to boost when EQing, especially if the goal is to move one part out of the way of another, as cutting sounds more natural and helps to maintain headroom in the mix. So, rather than boost the volume of a vocal at 2kHz by 3dB to make it heard over an accompanying guitar, for example, cut the guitar by 3dB at the same frequency. Also, most of the time, you’ll want to keep your cuts and boosts quite small – just a few dB either way – as extreme changes can, again, sound unnatural and eat up headroom.
Ultimately, more than any other audio engineering process, the well-judged application of EQ can make the difference between a polished, clear, professional sounding mix and an uneven, amateurish one. Don’t be disheartened if your first attempts at EQing feel awkward and confusing – stick with it, and with practise and experience, you’ll soon be cutting and boosting those frequencies like a pro.
EQ types
There are numerous types of EQ to consider, differing in terms of precision, sound and workflow; and many EQ plugins bring multiple types together, the combination of several parametric bands with high and low shelving bands, and high and low-pass filters being particularly common.
Here’s a run-down of the main types of EQ you can expect to come across:
Parametric EQ
The most ubiquitous and versatile of all EQ types, the parametric is the one to turn to when you need the utmost in control and accuracy. A parametric EQ will house a number of independent frequency bands – typically, three, four or five – each one comprising controls for adjusting its centre frequency, width and gain, and facilitating everything from broad, musical curves to super sharp surgical cuts and boosts.
High/low-pass filters
The high- or low-pass filter simply attenuates everything below (high-pass) or above (low-pass) the set ‘cutoff’ frequency. A resonance parameter might be included, for emphasising the frequencies immediately around the cutoff, and a variety of roll-off slopes will often also be on offer for altering the ‘severity’ of the attenuation.
Many engineers habitually activate high-pass filters on every mixer channel, set to get rid of everything below the lowest audible frequency of each element, in order to keep the easily-overwhelmed low and low-mid frequency ranges of the whole mix free of clutter.
Shelving EQ
When you need to smoothly cut or boost everything above or below a certain ‘corner’ frequency – to add high-end sheen to a vocal, or rein in an overly boomy bass, say – fire up a shelving EQ. A high shelf affects only the signal above the corner frequency, while a low shelf works on everything below it.
Graphic EQ
Something of a rarity these days, the graphic EQ lets you adjust the gains of numerous (anywhere up to 30-odd!) fixed-frequency, fixed-width bands, all carefully selected and calibrated to work together, delivering highly musical (ie, broad and decidedly non-surgical) response curves.
Dynamic EQ
The newest kid on the equalisation block, the dynamic EQ looks like a parametric EQ, but each band has a compressor/expander built in that automatically raises or lowers the gain in response to changes in the level of the input signal or an external sidechain input at that band’s frequency. This is useful for taming frequency issues in dynamically variable signals (harsh hi-hats, sibilant vocals, etc), and automatically EQing one sound based on the volume level of another to prevent ‘masking’ (cutting a particular frequency range in the bass whenever the kick drum hits, for example)
A quick guide to the frequency spectrum
Although any EQ processing will inevitably be highly dependent on the nature of the source material, there are some general rules to follow when it comes to cutting and boosting certain ‘standard’ frequency ranges.
50-75Hz
Boost to beef up kick drums and sub bass lines. Cut to reduce excessive low-end weight.
80-200Hz
Boost to add body to snares and guitars, punch to kick drums, roundness to bass, and general warmth. Cut to reduce low-end mud.
200-500Hz
Boost to ‘warm up’ vocals, guitars and synths, and add presence to basses. Cut to reduce muddiness.
500-800Hz
Boost (with care!) to bring out the tone of almost any instrument. Cut to reduce ‘honk’.
2-5kHz
Boost to give vocals, guitars, synths and strings clarity, definition and impact. Cut to reduce harshness.
5-10kHz
Boost to add presence and sheen to drums, cymbals and guitars. Cut to reduce scratchiness and sibilance.
16kHz+
Boost for brightness and ‘air’. Cut to reduce high-end fizz.


Our Products
-

2in | 2out Audio Interface
-

10in | 6out Audio Interface
-

10in | 14out Audio Interface
-

20in | 24out Audio Interface
-

24in | 32out Audio Interface
-

2in | 2out Audio Interface
-

4in | 4out Audio Interface
-

24in | 24out Audio Interface
-

Everything you need to start recording
-

8 Channel Smart Preamp with AD/DA
-

8 Channel Mic Pre & ADC
-

8 Channel Mic Pre + Tone Control
-

Modular Analogue Recording Console
-

Small Format Analogue Recording Console
-

Small Format Analogue Recording Console
-

Immersive Audio Interface and Monitor Controller
-

Desktop Monitor Controller