


Emmavie Intro – title
Don’t Sleep On The Magic of Vocal Arranging
Emmavie Intro – image

Emmavie Intro – para
You’ve written a beautiful song. You’ve recorded an amazing top line melody and a hook to top the charts but something’s still missing. You could add more guitar layers or maybe it needs some more synth strings but, ultimately, you don’t want to take away from the focus of that great vocal. This is where the magic of vocal arranging comes in.
Good vocal arranging makes a statement with your voice. It adds a new dimension and depth. Use your voice in place of an orchestra of instruments. It can be as subtle as the layered “oohhs and aahhss” in the background of your favourite Ariana Grande song, lifting the verse and gracefully floating you from the pre-chorus into the hook, or you can add a 3-part harmony to your ENTIRE SONG like Beyoncé did on “Party featuring Andre 3000” (those harmonies were so tight, it was almost unnoticeable).
1.How to Harmonise – title
1. How to Harmonise
1.How to Harmonise – 1st para
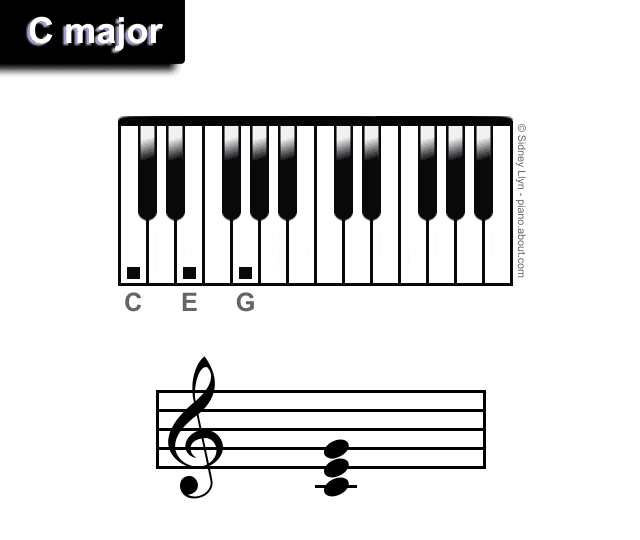
A harmony is series of notes that blends with a song’s melody, often achieved by singing the melody transposed up or down in intervals that correlate to the key and chord structure of the song.
Try this If your song is in a major key, find the first note of your melody and move it up 4 half-steps. For example your first note is a C, you will instead start on an E and sing/play the melody with all of the notes transposed up by 4 half-steps. To add a third part, transpose the harmony by another 3 half-steps (7 half-steps in total).
1.How to Harmonise – 1st image
1.How to Harmonise – 2nd para
With a song in a minor key, you can practice the same technique but by moving your melody first by 3 half-steps up for the first harmony and then by 4 half-steps for the third part. Be mindful of your chord progression and the types of chords it consists of. Adapt the steps you transpose your melody by to suit when the chord is major or minor.
For the most effective result, when recording your vocals, you need to focus on keeping your pitch and timing tight, singing in unison with the main vocal. Singing harmonies even the slightest bit out of tune creates clashing and undesirable harmonics. If you find your harmonies aren’t quite gluing together, I might suggest using Melodyne or Autotune ensure you’re creating a tight harmony but use these effects on a low retune speed setting to retain a natural sound (or not, depending on the effect you’re going for).
1.How to Harmonise – 2nd image

1.How to Harmonise – 3rd para
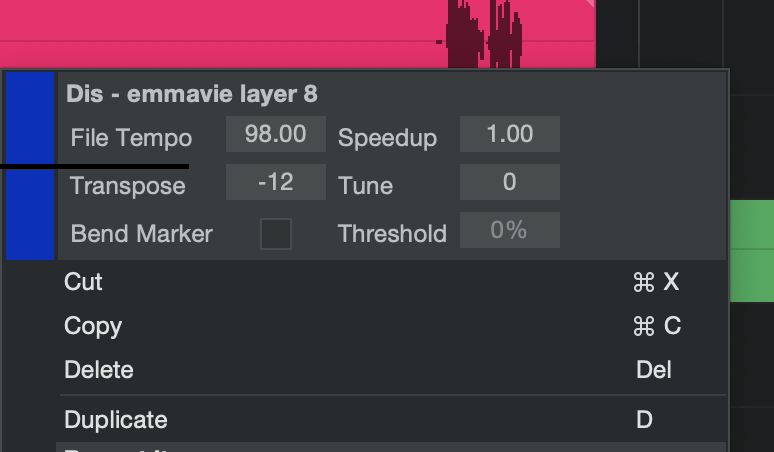
Alternatively, if you don’t have the patience to learn your entire melody pitched up in these intervals, most DAWs will allow you to transpose your recording by any amount without affecting the tempo. This means you can duplicate your recording several times and pitch all of your recordings up and down by as many steps as you like. Even though this will give you very precise harmonies, it may end up sounding quite robotic. This effect can be heard on a lot of Billie Eillish’s music, where her main vocal has been doubled and transposed down by an octave (-12), giving the song an eerie and spooky feeling to suit her style that I’ve aptly nicknamed, Horror Pop.
1.How to Harmonise – 3rd image
2. Study the Greats – title
2. Study the Greats
2. Study the Greats – 1st para
I would recommend listening to great artists who are already nailing this. Some of the most notable vocal arranging techniques have been given to us by artists such as Imogen Heap, who uses live electronics to record, manipulate, effect and layer her voice during live performances. She is one of the pioneers in digitally building a song using solely her voice live on stage. She famously designed a pair of gloves that trigger an array of effects like loop recording and delay through smooth hand movements during her live performances.
2. Study the Greats – image

2. Study the Greats – 2nd para
If you want to hear the true art of vocal arranging, I’d recommend listening to The Singers Unlimited – “Nature Boy” taken from their album The Complete a Capella sessions.
3. Composing – title
3. Composing
3. Composing – 1st para
Be aware of the why. By this I mean, you need to be clear of your intentions when adding in backing vocals and harmony.I’ve always thought of my backing vocals like the string section of an orchestra. When it’s epic and wants to convey a engulfing, consuming feeling, I stack them like a wall of impenetrable sound. As much as they can add emphasis and impact to a particular phrase, they might also take away from the boldness of a main vocal.
Check out my song “Dough” – https://open.spotify.com/track/683WNpHgqToxbMf68lxxdk?si=Vj0-ls1uRbSMx0lhAu4pfg
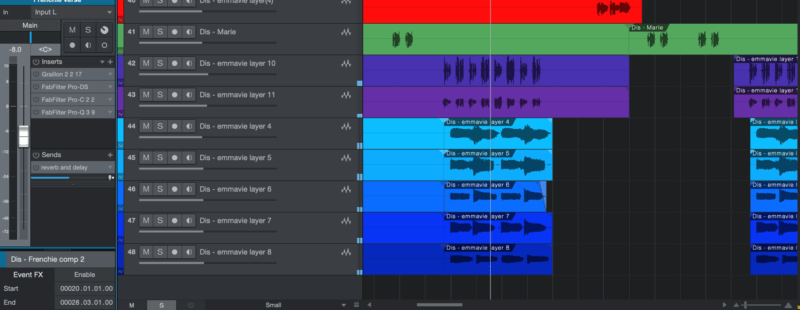
These really close, almost clashing harmonies create so much texture and vibration. I often write a four part harmony as though I was writing for a barbershop quartet. To thicken this wall of sound even more, I record each part again but an octave higher and lower (if these are notes that I can reach) and bring these channels quite low in the mix. I can now use all of these layers to create the feeling of a song growing. As it nears the chorus, I introduce each harmony layer by layer. For example, I might have the first 4 parts come in for the first 4 bars of the prehook and then for the last 4 bars before the chorus, I introduce the upper and lower octaves of all of these.
3. Composing – 1st image
4.Mixing those harmonies – title
4. Mixing those Harmonies
4.Mixing those harmonies – 1st para
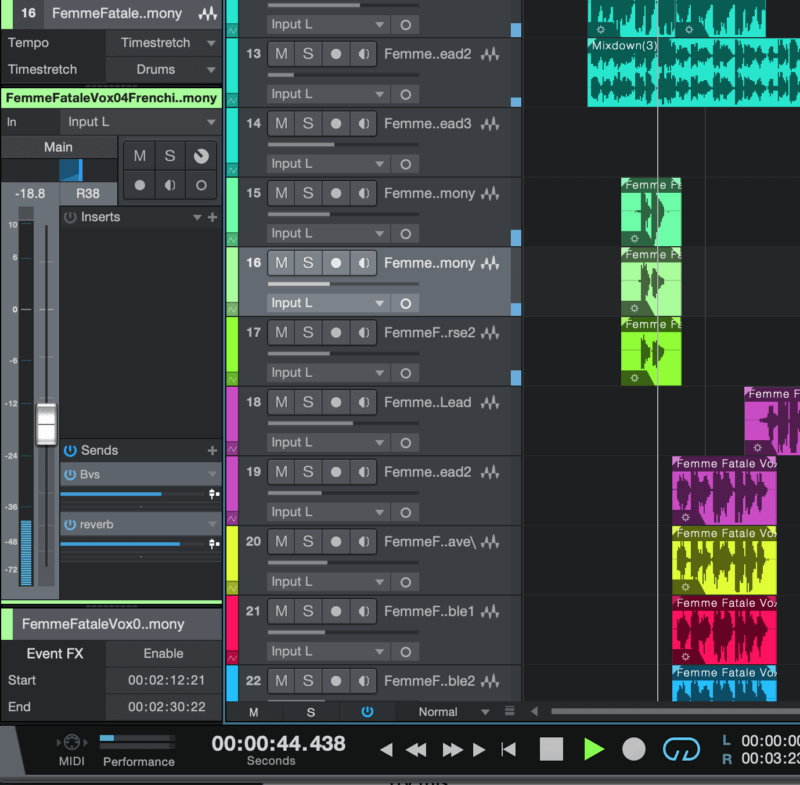
No matter what notes you’re singing, your voice fills a particular space on the frequency spectrum and therefore, adding harmonies often sits in the same space as your main vocal. If you are recording background harmonies that aren’t supposed to sit at the front of the song but instead sit inside the mix, behind the main vocal, my technique is to record doubles of each harmony. This allows me to create spatialisation by panning the recordings away from the centre so that the main vocal isn’t crowded and the song suddenly sounds wider.
4.Mixing those harmonies – 1st image
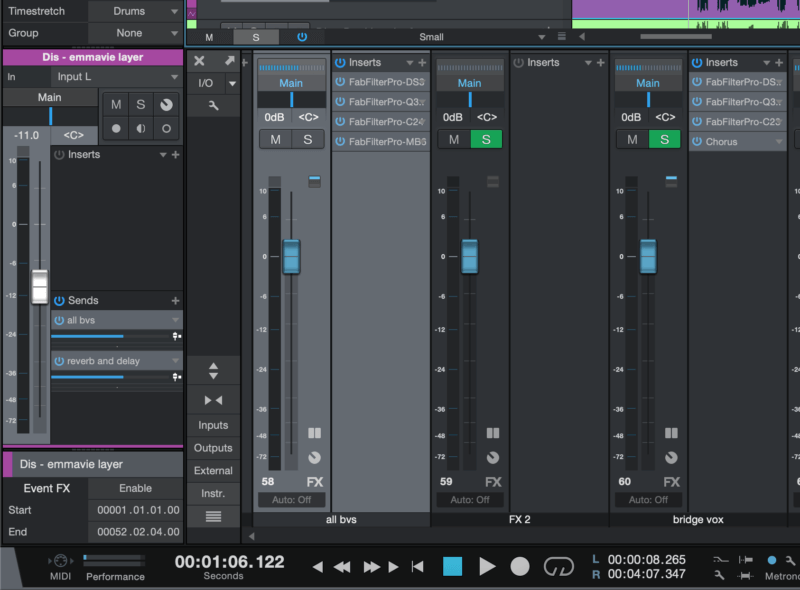
4.Mixing those harmonies – 2nd para
TI often end up with a lot of channels to mix. To manage all of these, I bus all of my background vocals to one FX channel on my mixer so I can apply effects to them all and not put too much strain on my CPU. I can push the gain up and down on all of the vocals and EQ out any frequencies that crowd the main vocal.
4.Mixing those harmonies – 2nd image
4.Mixing those harmonies – 3rd para
Add a good Desser to this FX channel because layering lots of sharp sibilant sounds can be harsh on the ears.
Add a light compression with a slow attack and release, aiming to keep the dynamic dynamic in these layers but adding control and creating a ceiling for all of these many layers. My trick is to use a multi-band compressor on my stacked backing vocals as I might find the middle band of frequencies need a slightly faster compression. Compressing each band allows me to retain dynamic and give the song a natural feeling whilst maintaining control of the volume.
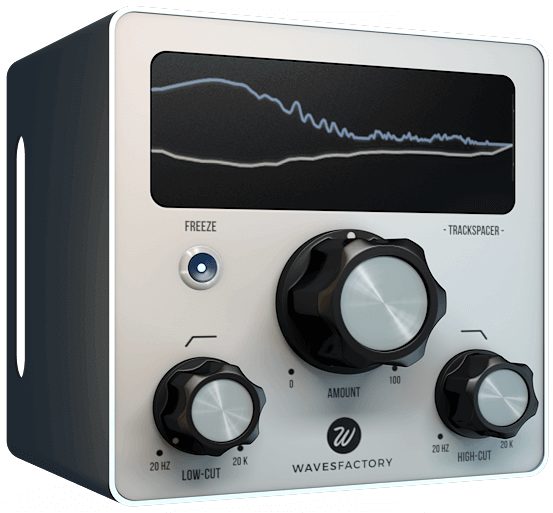
My secret weapon is a plugin called Trackspacer by Wavesfactory. It is a sidechain module and rather than the relationship between two sounds being the volume of the entire sound when they interact, Trackspacer takes the selected frequencies of one sound and sidechains these out of a relative sound, creating an almost unlimited space for layers and preventing overcrowding.
4.Mixing those harmonies – 3rd image
4.Mixing those harmonies – 3rd para
Now that you have all the tools, go forth and harmonise!

About the author
Emmavie is a self taught singer/songwriter, producer and DJ from London. Specialising in what she describes as “limitless, soulful, future RnB”, her music is an amalgamation of 90s RnB influences and her love for digital audio experimentation. Emmavie has credits across a number of artists both UK and international, including collaborations with IAMNOBODI, Budgie, ROMderful, Jarreau Vandal, Dornik, Alfa Mist, Barney Artist and Jay Prince.


Our Products
-

2in | 2out Audio Interface
-

10in | 6out Audio Interface
-

10in | 14out Audio Interface
-

20in | 24out Audio Interface
-

24in | 32out Audio Interface
-

2in | 2out Audio Interface
-

4in | 4out Audio Interface
-

24in | 24out Audio Interface
-

Everything you need to start recording
-

8 Channel Smart Preamp with AD/DA
-

8 Channel Mic Pre & ADC
-

8 Channel Mic Pre + Tone Control
-

Modular Analogue Recording Console
-

Small Format Analogue Recording Console
-

Small Format Analogue Recording Console
-

Immersive Audio Interface and Monitor Controller
-

Desktop Monitor Controller