


We have hands-on examples and jump into my latest client Track from Layla Kay and her Single “Supervillain” with many vocal harmony layers and double tracked lead vocals. Are you Ready? Let’s go!
After reading this blog post you will be able to creatively Record, Edit and Mix your Backing Vocals, double Lead vocals and Ad-Libs.
How to Record Layered Vocals?
Backing Vocals
It all starts in the composing/recording stage and layered vocals can give your songs the extra spice, emphasise the emotion, or help you need to build bigger choruses.
Get creative and try to sing your chorus melody one octave higher, lower, or both and try even a third or fifth above your melody to add density and excitement to your song.
Once you figure out the parts that will assist your composition, it’s time to record.
The following tips will help you to make this process a fun experience and simplify the mixing stage.
Backing Vocals Recording Tips:
Always record the backing vocals over your main Lead Vocals.
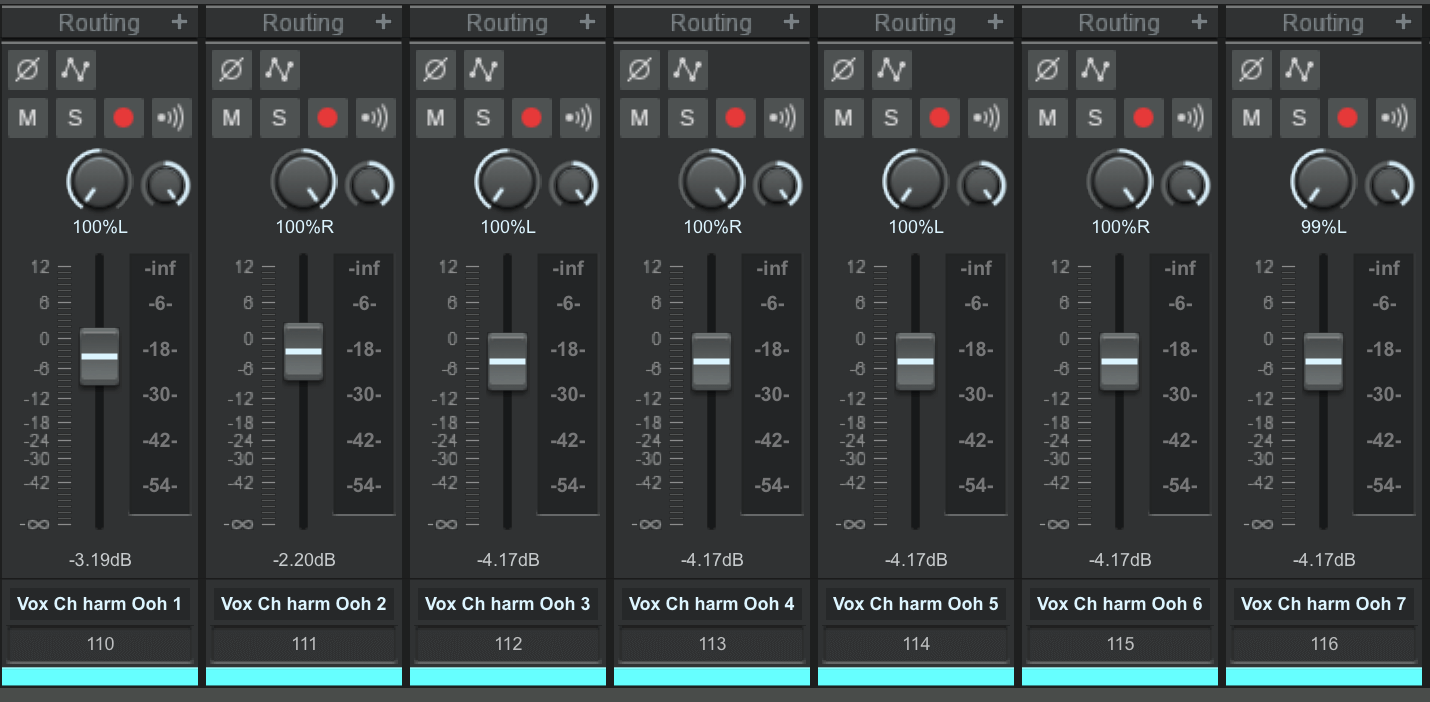
#1 Double each Harmony
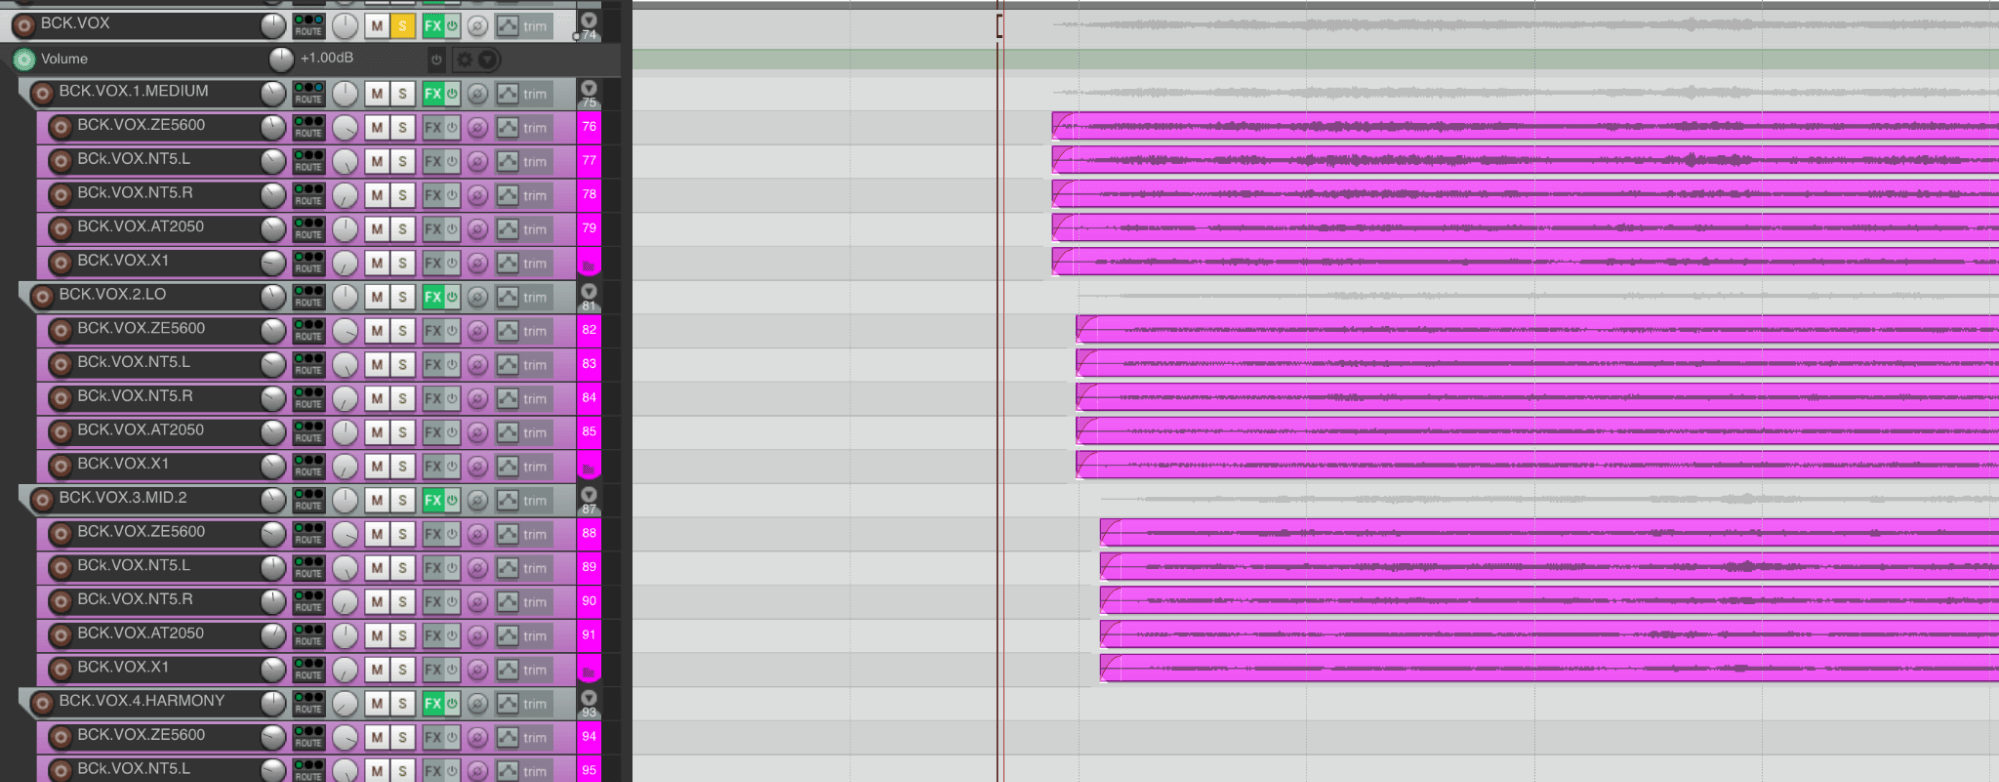
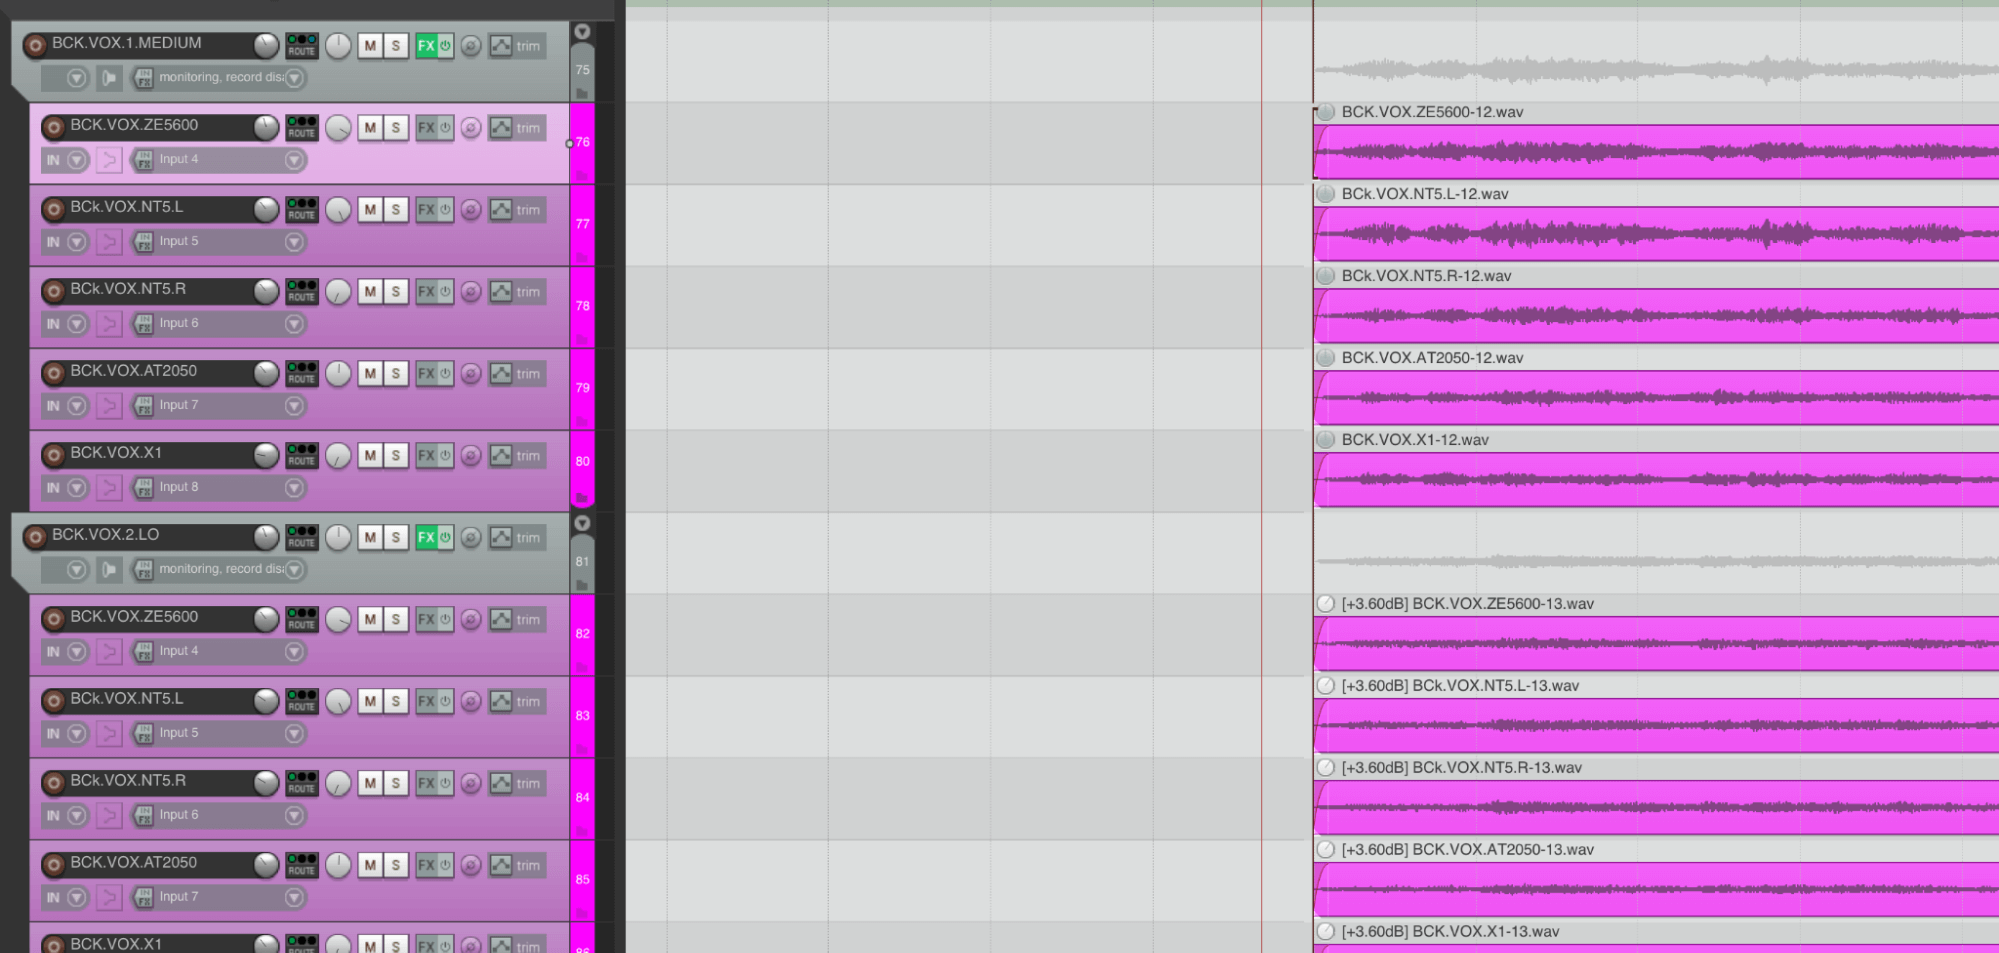
When Recording your Vocal harmonies, consider doubling each of them: 2 Tracks with the higher Harmonies, 2 Tracks with the Lower harmonies and Pan them 100L and 100R in your Mix for now.
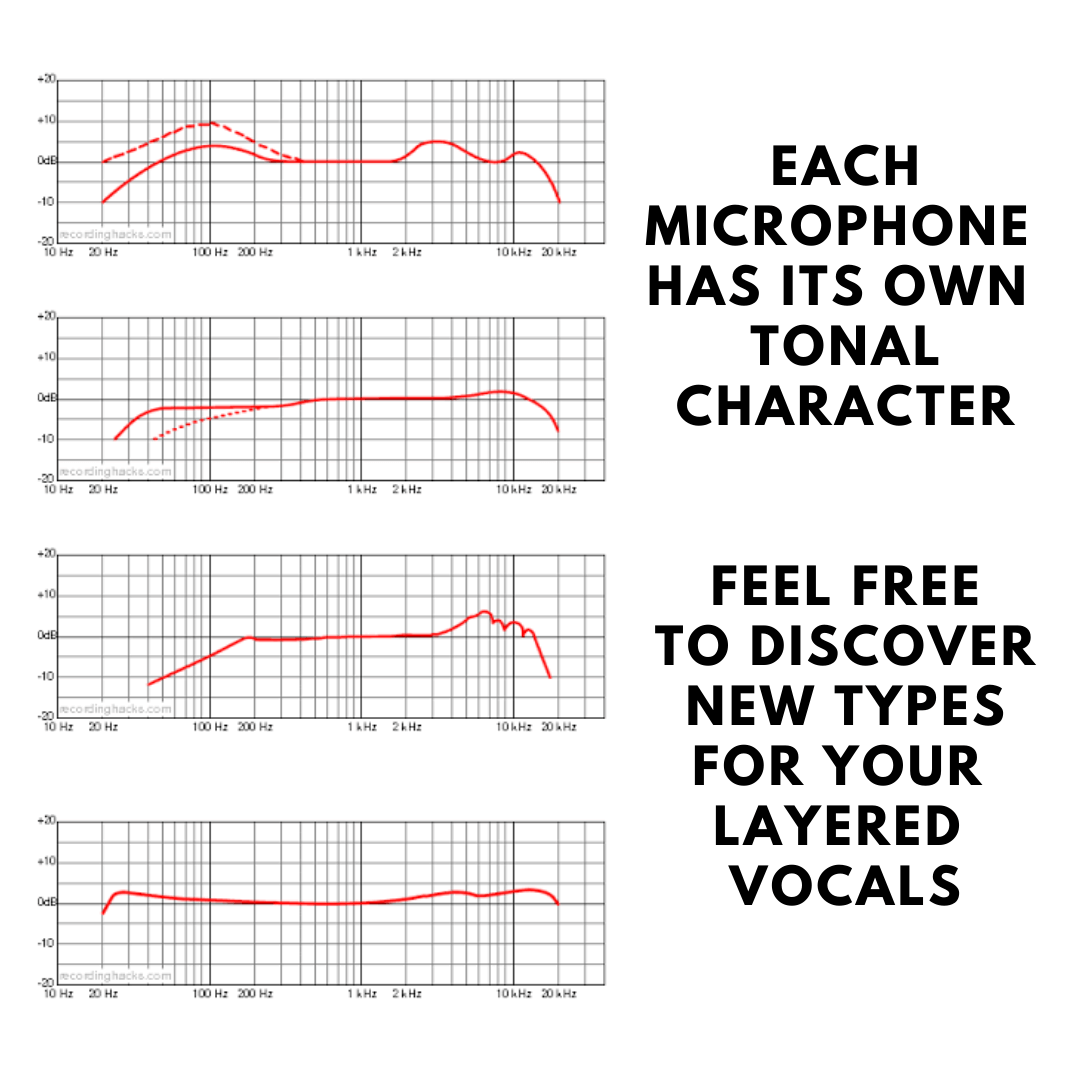
#2 Use different Mics
If you have the possibility, try to use different Microphones for the Lead and Backing Vocals. Every Microphone has its own tonal characteristic, so you can see it as a kind of Equaliser that helps to separate the vocals from each other in the Mixing stage.
When using the same microphone, the same frequencies will be amplified so it can be tricky to achieve separation in the mix.
Tip: You can even try Microphones that are not intended for vocals!
#3 Change the singing position towards the Microphone
So you only have one Mic? No Problem! This is the most common technique to achieve natural depth and thickness in your songs.
Imagine you want to sing the same backing vocal part 4 times in the same range with the same Microphone. To achieve depth, you can simply take one step away from the microphone. Do it twice and take another step away, singing a bit louder.
As an alternative, you can take a step away to the right or left to record the natural space in the room and reflect it in your song.
If you don’t use an omnidirectional Microphone, you can also turn your microphone around and sing into the back of it. It will sound more dull but maybe that’s exactly what the emotion of your song is looking for and it will better blend into the mix with a few EQ moves.

The more the bigger:
You decide what you need in your songs: From simple 2 backing vocals, to a small choir with 4 – 6 layers or a huge choir with 10 to 20 Layers of backing vocals, the decision is up to you.
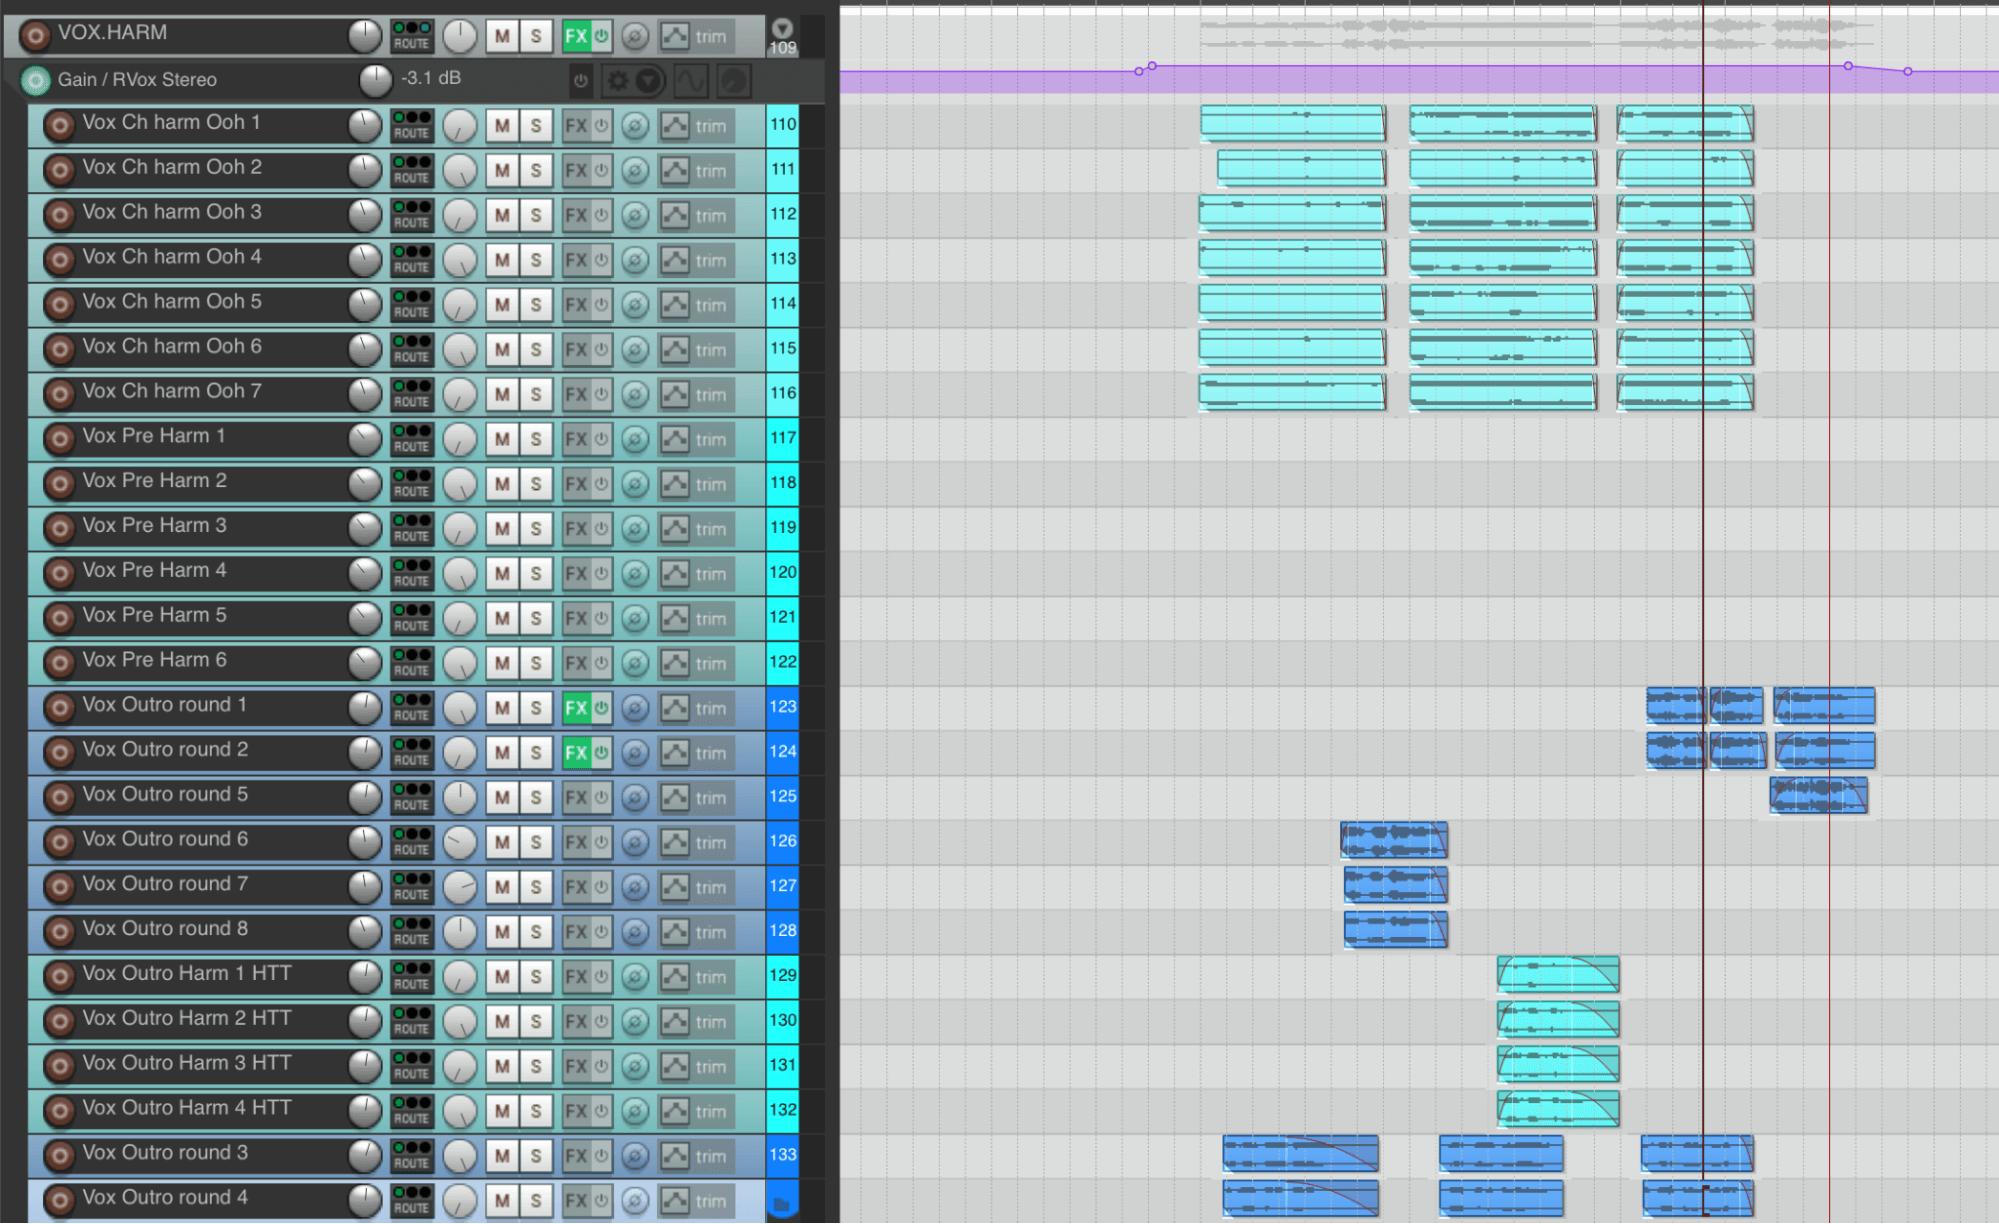
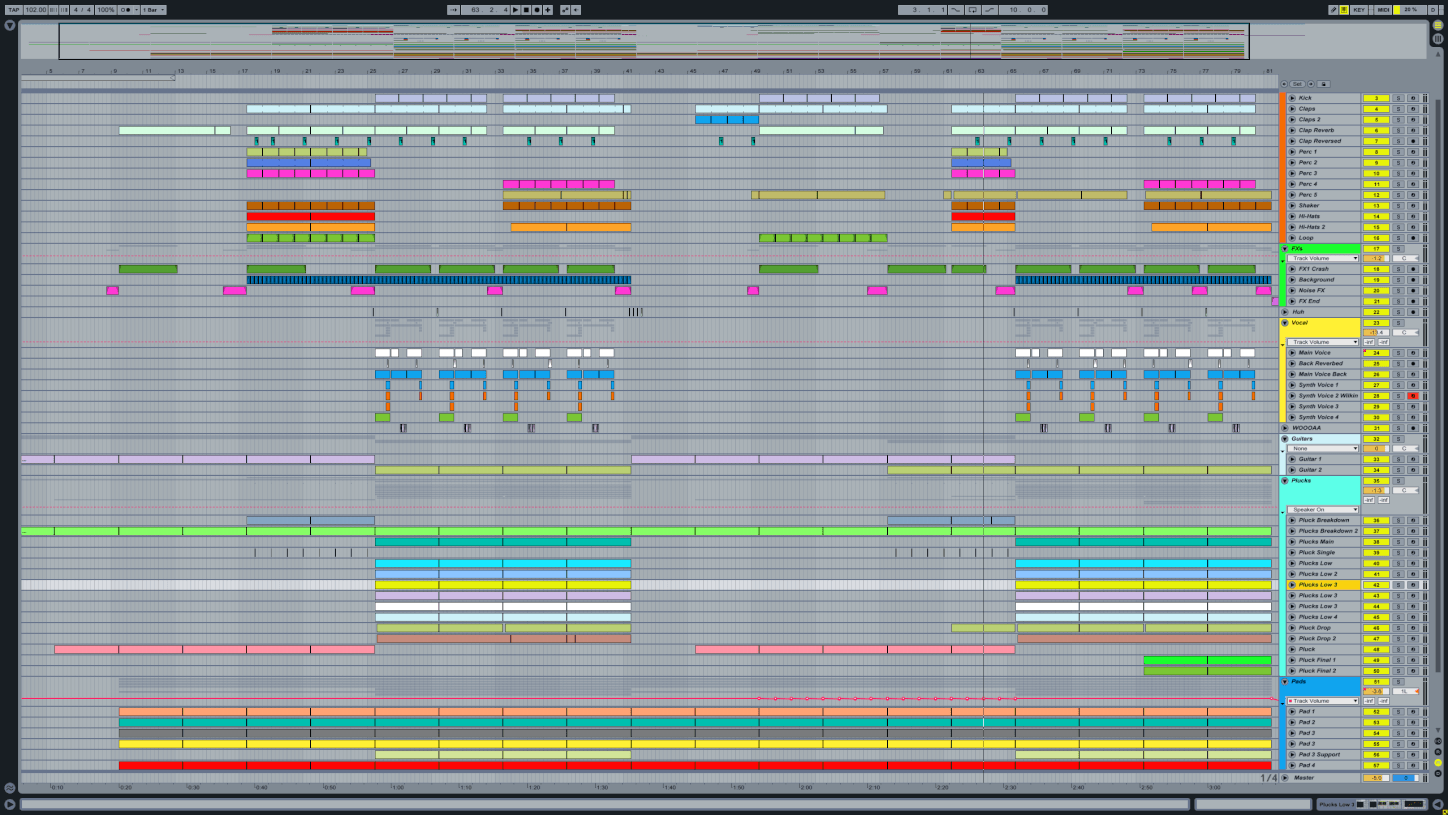
Up to 14 Layers of Backing Vocals for a huge outro
Examples for great backing Vocals:
For Space in the Mix
Aretha Franklin – (You Make Me Feel) Like A Natural Women
I love how you can hear the different spaces of the backing vocals, how they are in the left and right back of the room.
For Big Choruses:
Coldplay – Hymn for the Weekend
Layered Backing Vocals with Delay Effects makes this Chorus truly Big and memorable.
Lead Vocals and Ad Libs
Another common technique used to make the lead vocal more exciting is to double the same part and mixing it underneath the original. Vocal doubling was already used by Bands like “The Beatles”, “Led Zeppelin” and incredible artists like Chris Cornell.
Ad-Libs are the last spice in your vocal arrangement and mostly known from Hip-Hop, Rap, Funk and R&B music. James Brown is known to be one of the first musicians who added shouts, screams and yells to underline his energetic message.
Doubled Vocals Recording Tips:
#1 Prepare and rehearse your Lead vocal lines
This one sounds obvious but is often overlooked:
Be prepared to double the line by knowing the melodic rhythm by heart. In my past experience, vocals get changed and re-written in the studio and it’s often hard for the artist to repeat the same lines in the same way, so keep this in mind to save time.
But don’t panic, if it doesn’t work out 100% we share tips on editing later in this article to fix this.
Recording your vocals in the same range, the same way will make your vocals sound fuller and cutting through the mix.

Lead Vocal Doubled with identical voices
#2 Change Microphones
By changing the main microphone the same principle applies and you will achieve a distinctive separation to layer your main vocals without any issues.
#3 Get creative with Vocal ranges and expressions
Making music is a creative process so feel free to experiment with different ways of singing over your main vocals in different octaves, whispering whole phrases and mixing them underneath or even screaming and distorting them. Creativity has no limits.
Lead Vocal in 2 different octaves
Ad-Libs Recording Tips:
#1 Underline the Song message
One way to use Ad-Libs is to pronounce certain words and make them stick out to underline the core message in your phrase. You can even use 2 layers for the same words and pan them left and right for a balanced effect.
#2 Special Effects
Most of the time certain phrases and words are used with effects like heavy reverb, Delays, pitch shifter, flanger, doubler, phaser, chorus, distortion and many more to make the track more exciting and interesting.
You can hear it mainly in Hop-Hop, Trap, and Rap Songs.

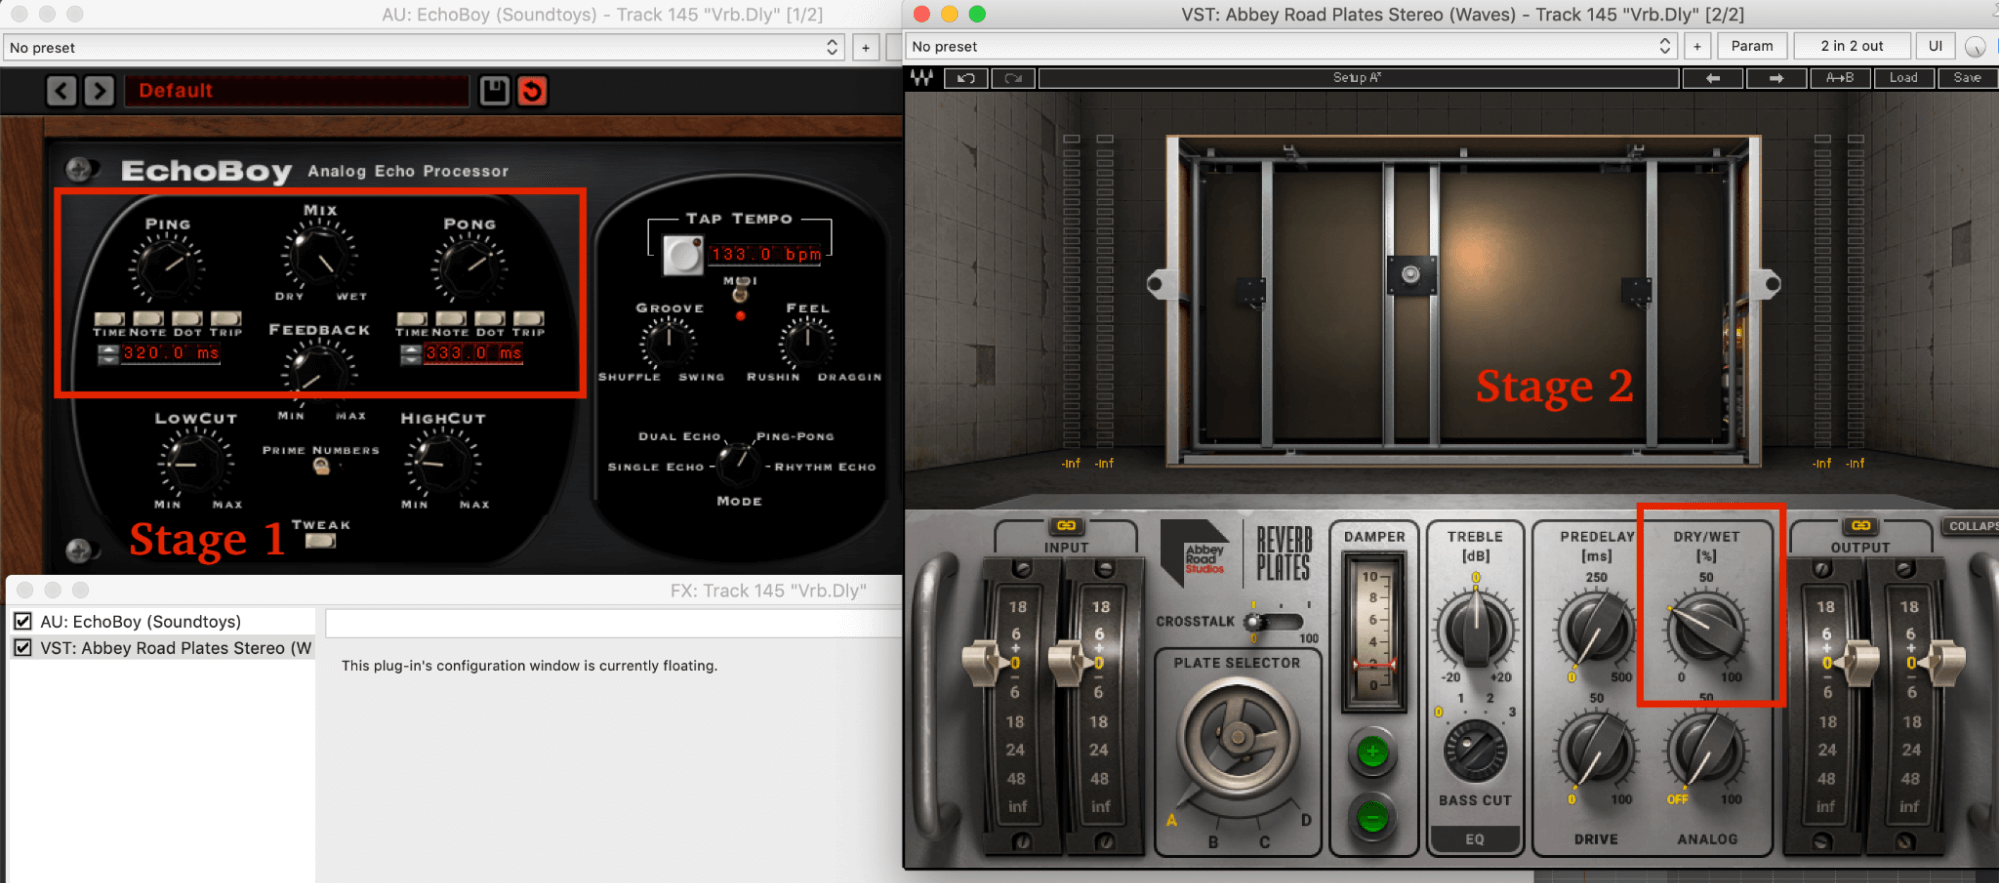
One of my Ad-Lib Vocal Chains: Pitch Shifter, Distortion, Slap-Back Echo, Ping-Pong Delay, Tremolo
Note: You don’t need to buy these plugins, most DAW’s have the same effects as stock plugins.
#3 Get creative and recognizable with your Ad-Libs
I learned this technique from several Rap and Hip Hop artists in the studio which also serves as a great way to loosen the atmosphere and tension.
As an artist you can imagine being in a different scenario like a live performance, in the club with your friends or in the Jungle, yelling phrases like “Uh Uh Uh”, “Yeeeeah” and simply celebrating yourself and the moment of recording.
Keep on recording in a loop and play around with your voice in a playful way, you will see that magic happens, your voice gets warmed up and you might have 2 or 3 takes that can be used in your song.
Many rappers repeat their Ad Libs in their songs and get recognized by their trademark, phrases like “Yawk Yawk Yawk” , “Just Follow The Sun” and more.
Band: Sun Followers – Droga
Examples for great Doubled Vocals and Ad-Libs
Fuller vocals, variation and ad-libs in one song
Soundgarden – Black Hole Sun (Chorus)
Absolutely fantastic how the doubled voice in the Chorus adds to this already tense and spooky feel and makes the vocals feel fuller.
On top of that Chris Cornell is adding small nuances and variations in the second layer, as well as distorted Ad-Libs that switch from left to right in the last chorus, using all techniques that we discovered above.
Creative Ad-Libs and Trademarks
21 Savage – Ball w/o you
This Song is a great example on how Ad-Libs can spice your track. His trademark is the phrase “Oh God!” repeating throughout the song, and from min 1:56 min it’s like an internal dialog where his mind answers to the current situation – brilliant.
How to Edit and Mix Layered Vocals?
Before we jump into mixing I show you simple tricks that will make your layered vocals sounds tight, round and full, let’s go:
Layered Vocals Editing Tips
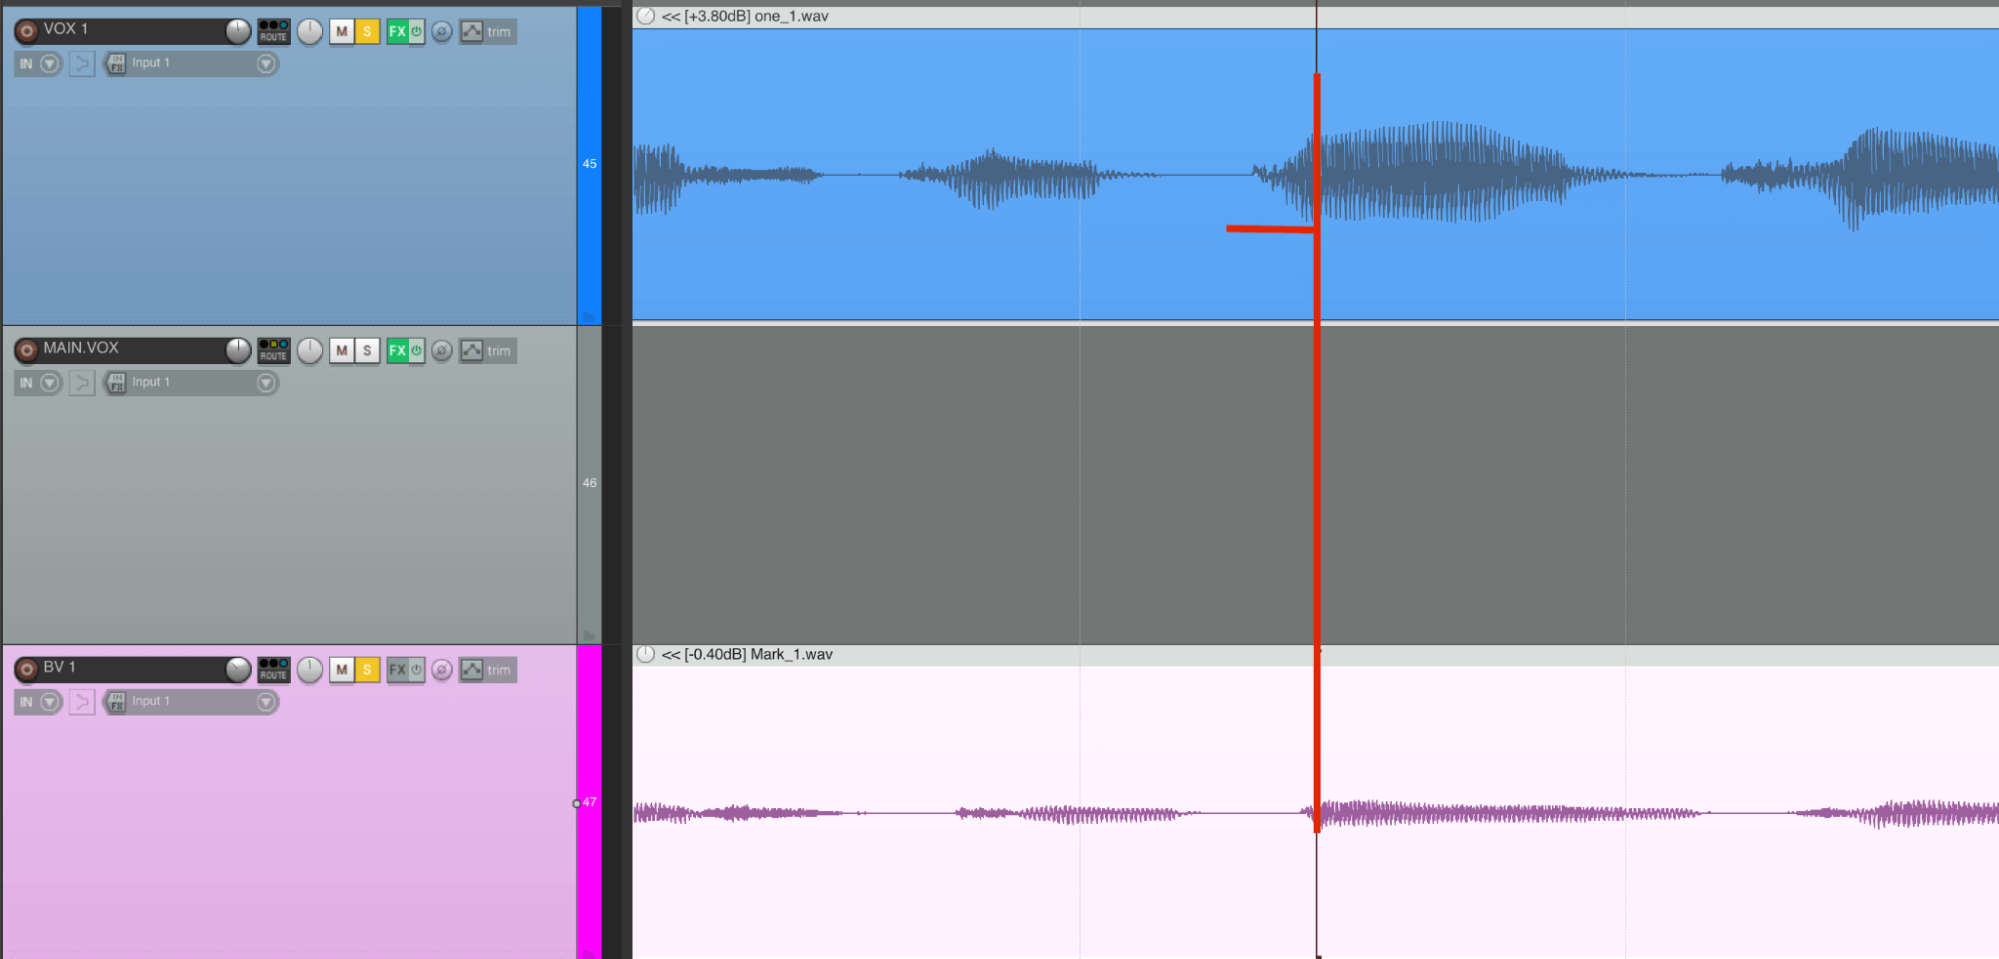
#1 Starting at the same time
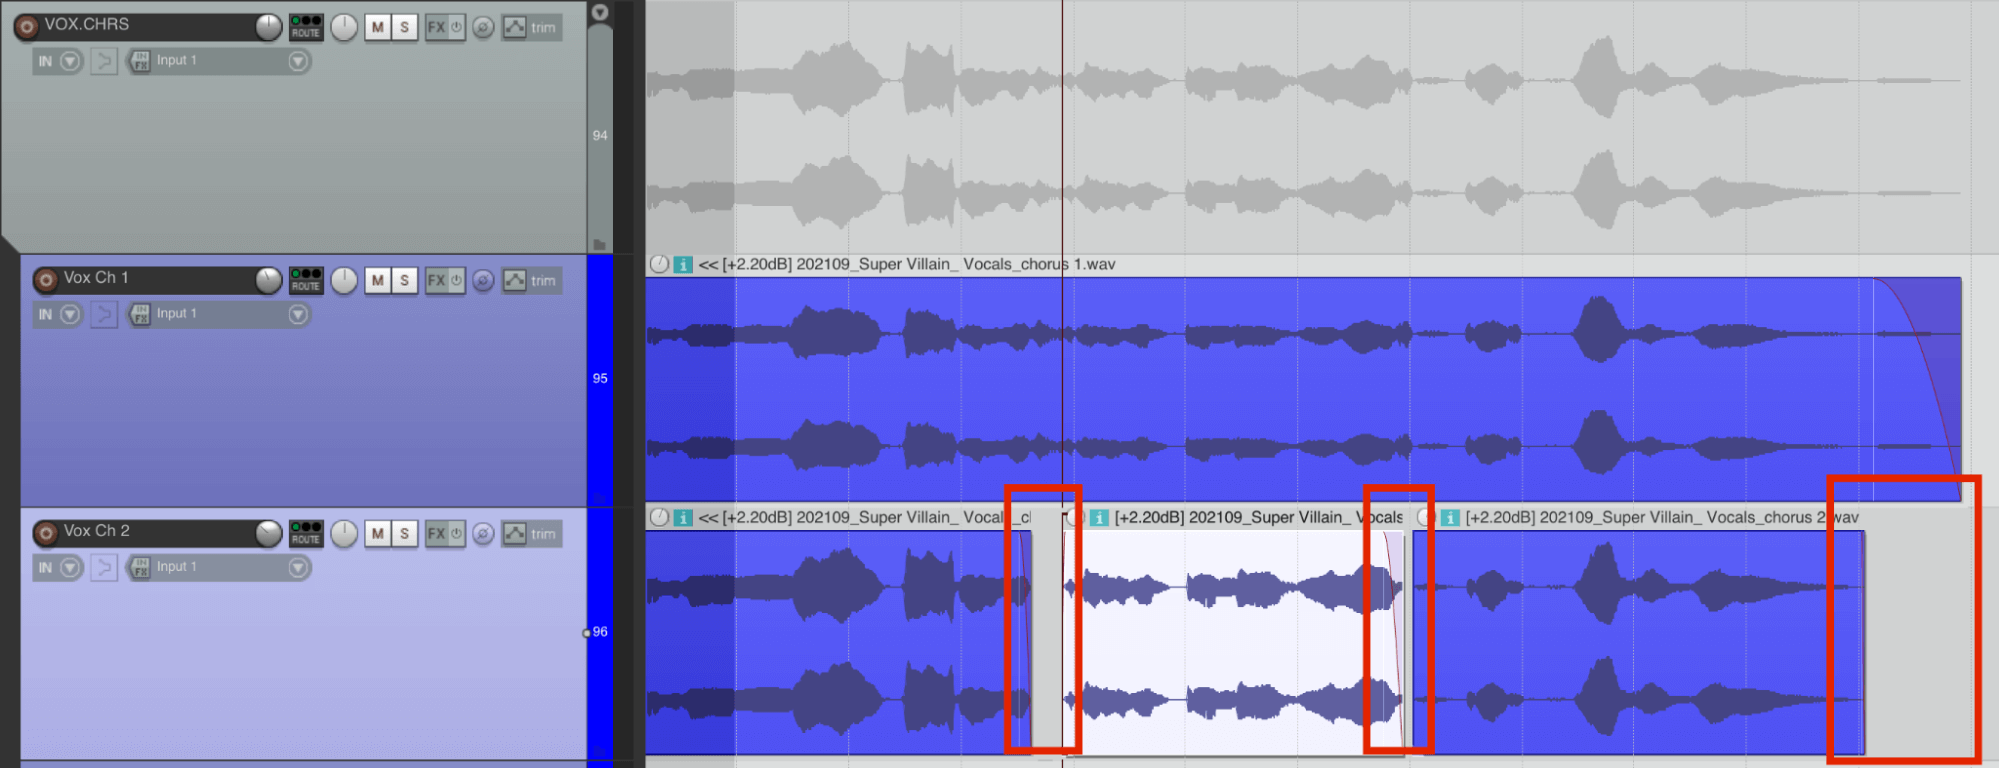
It’s important that the layered vocals start and end at the same time for a good listener experience, let’s compare example 1 and 2:
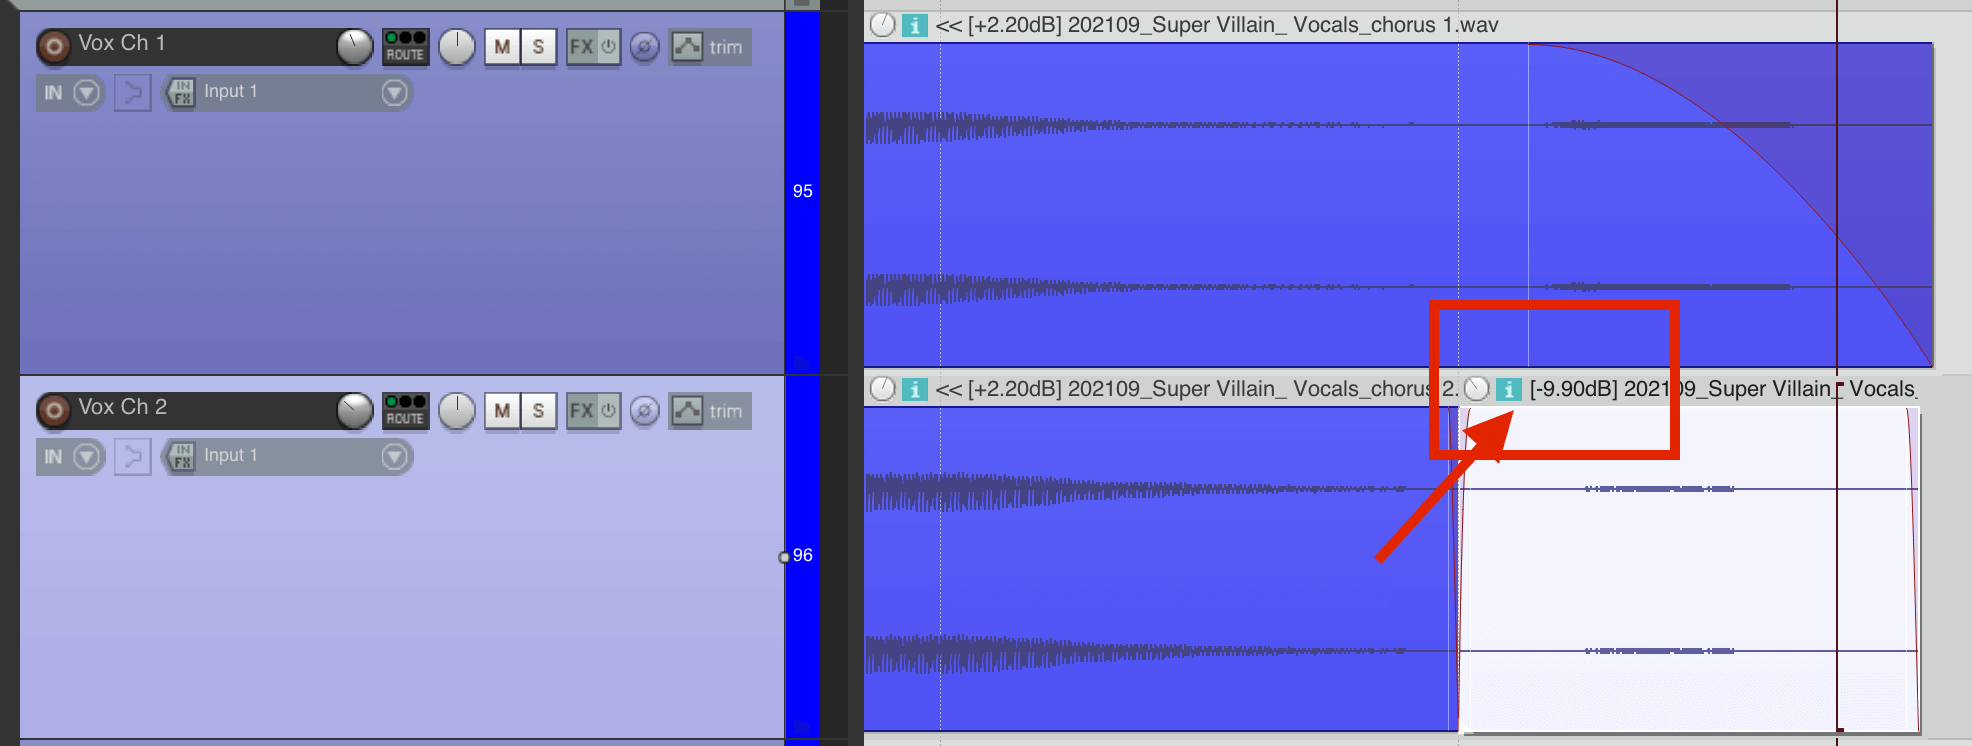
Here they start tight at the same time!
Here’s what to do – cut the first full word in every layer and drag the beginning of the word to the starting point when the main vocals start. Then move on to the next step.
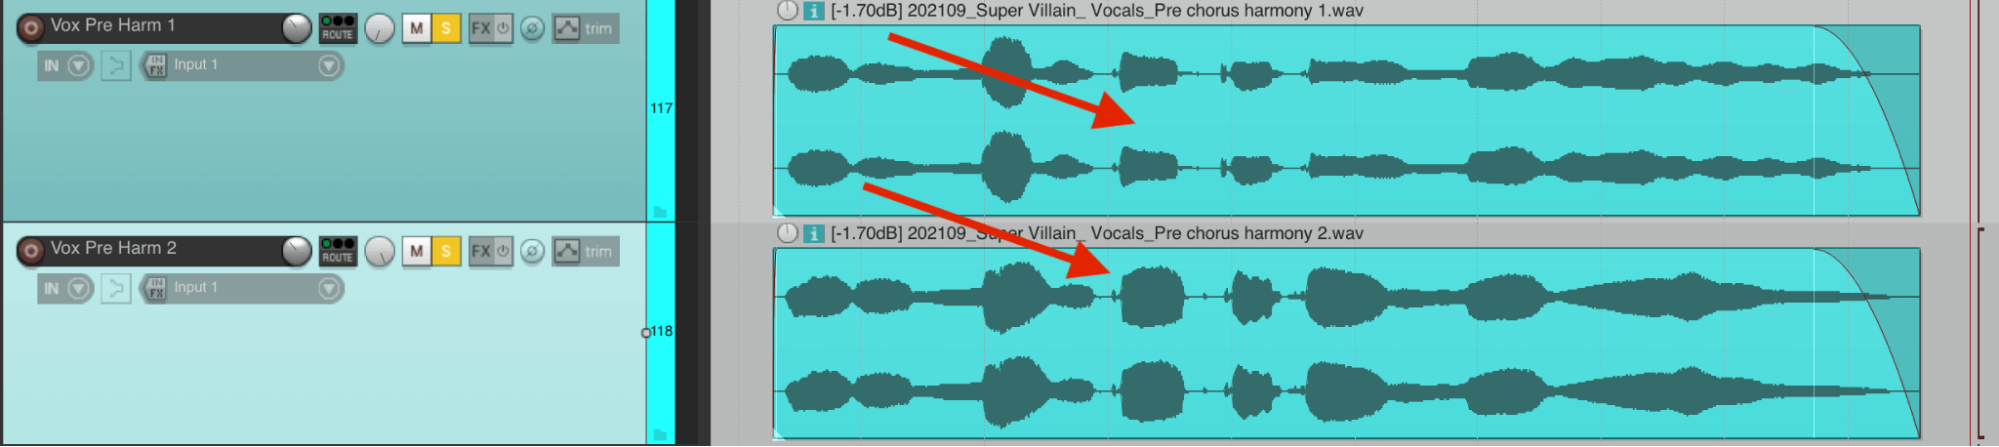
#2 Phrases and words are not in time
This is a common problem when getting client mixes that can be fixed easily manually, here are again 2 examples:
Band: Sydney – Bygone
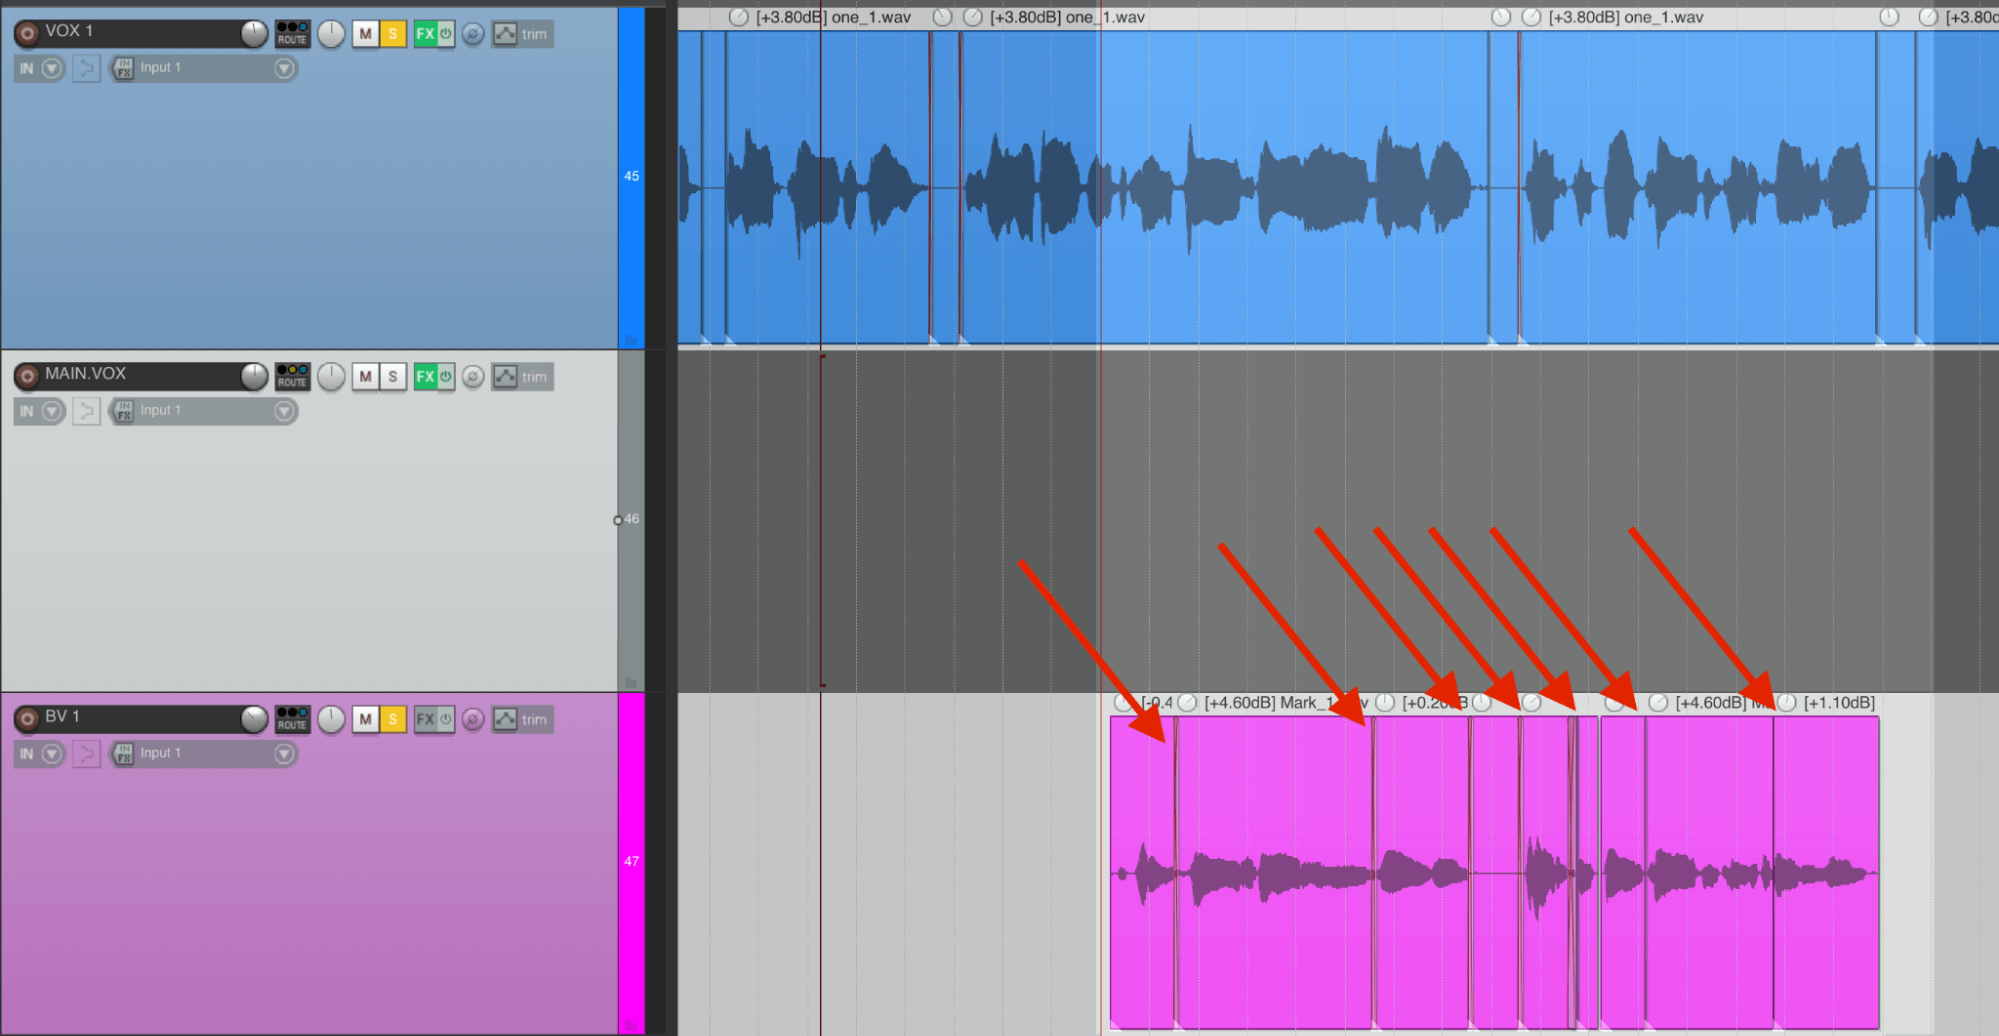
Clean Edits, adjusting “Word Blocks” step-by-step to fit to the Lead Vocal
My recommendation is to work in “Word Blocks” and adjust them step by step if it’s the desired effect to have a clean voice that fits together.
Orientate on the main vocal line and simply cut and align the doubled vocal track to the main vocal track. To avoid pops and clicks when exporting the track use crossfades to make clean edits.
#3 Long notes don’t match
This happens often when the backing vocals are improvised, so they will vary in length and it might sound odd when 4 voices end on time while others are still on.
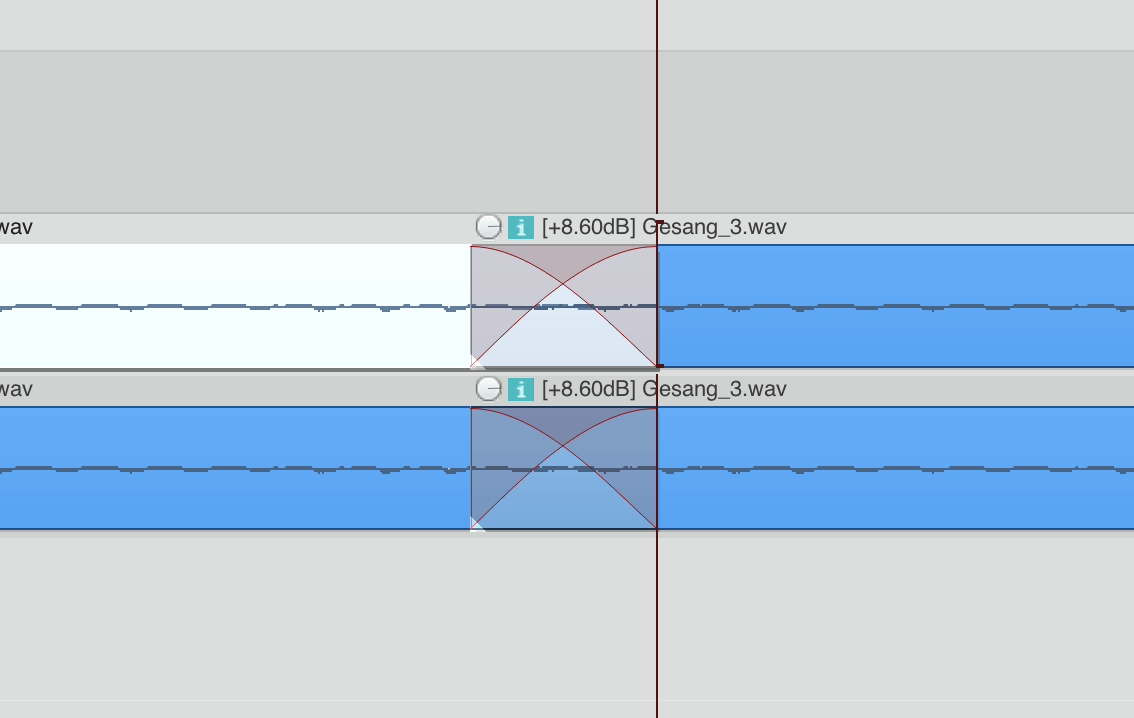
The trick is to cut the long notes in the middle and shorten them with a clean crossfade so that the endings match up again.
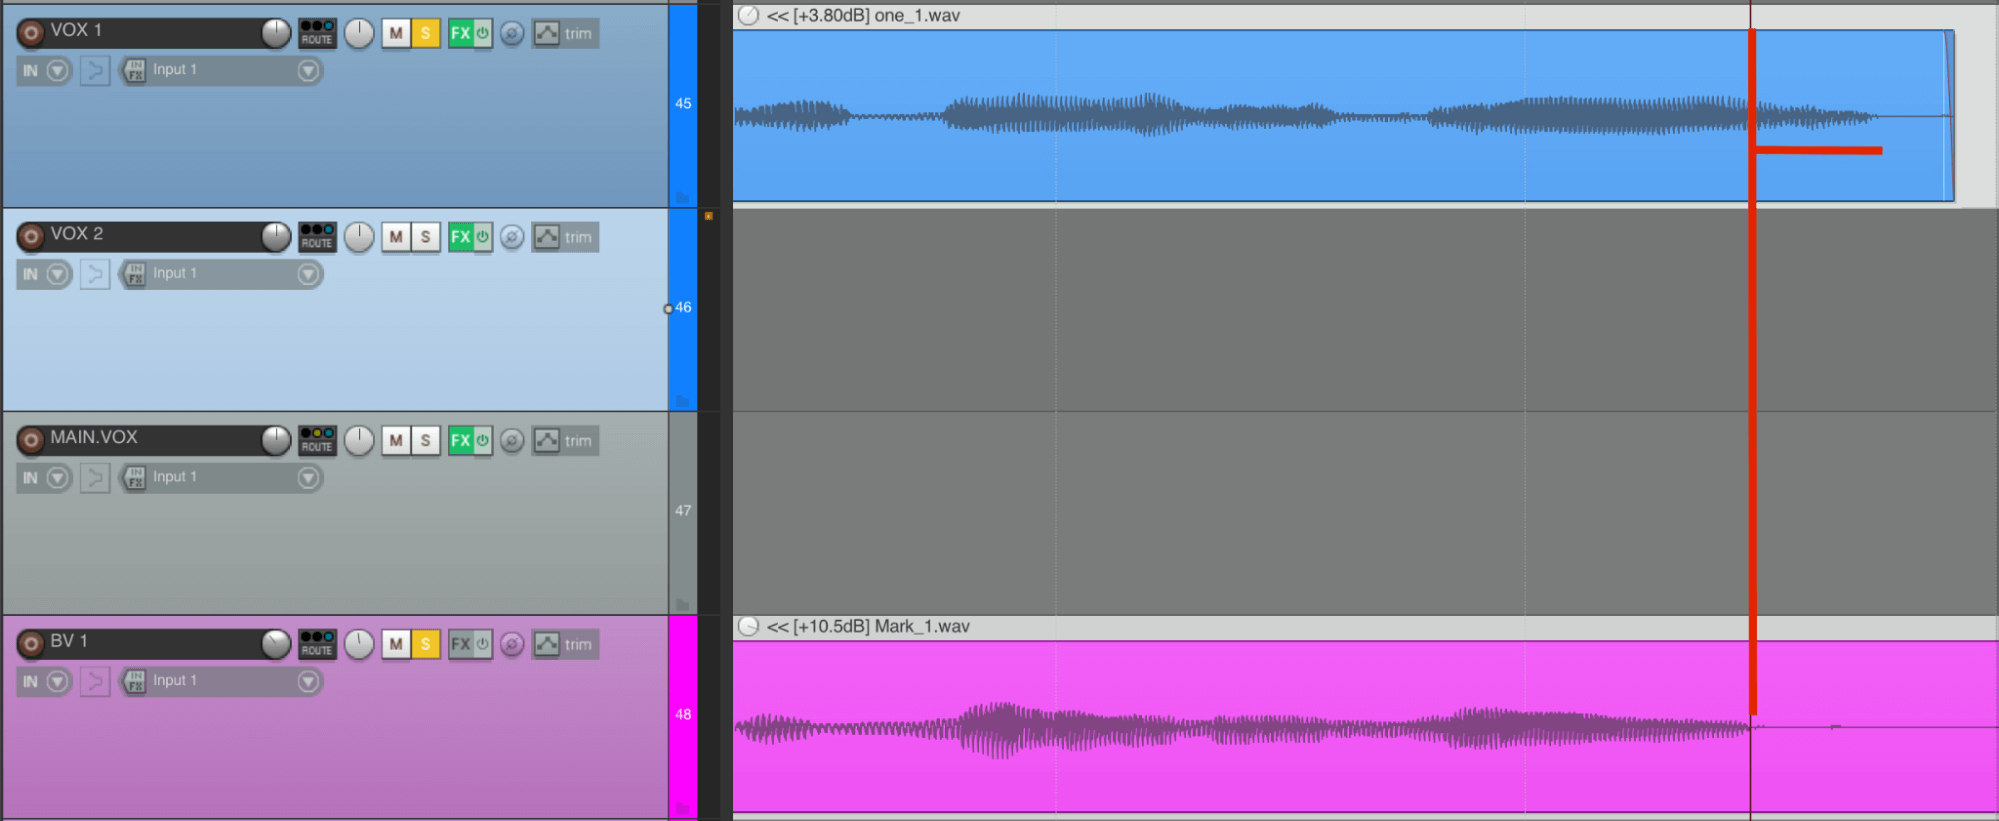
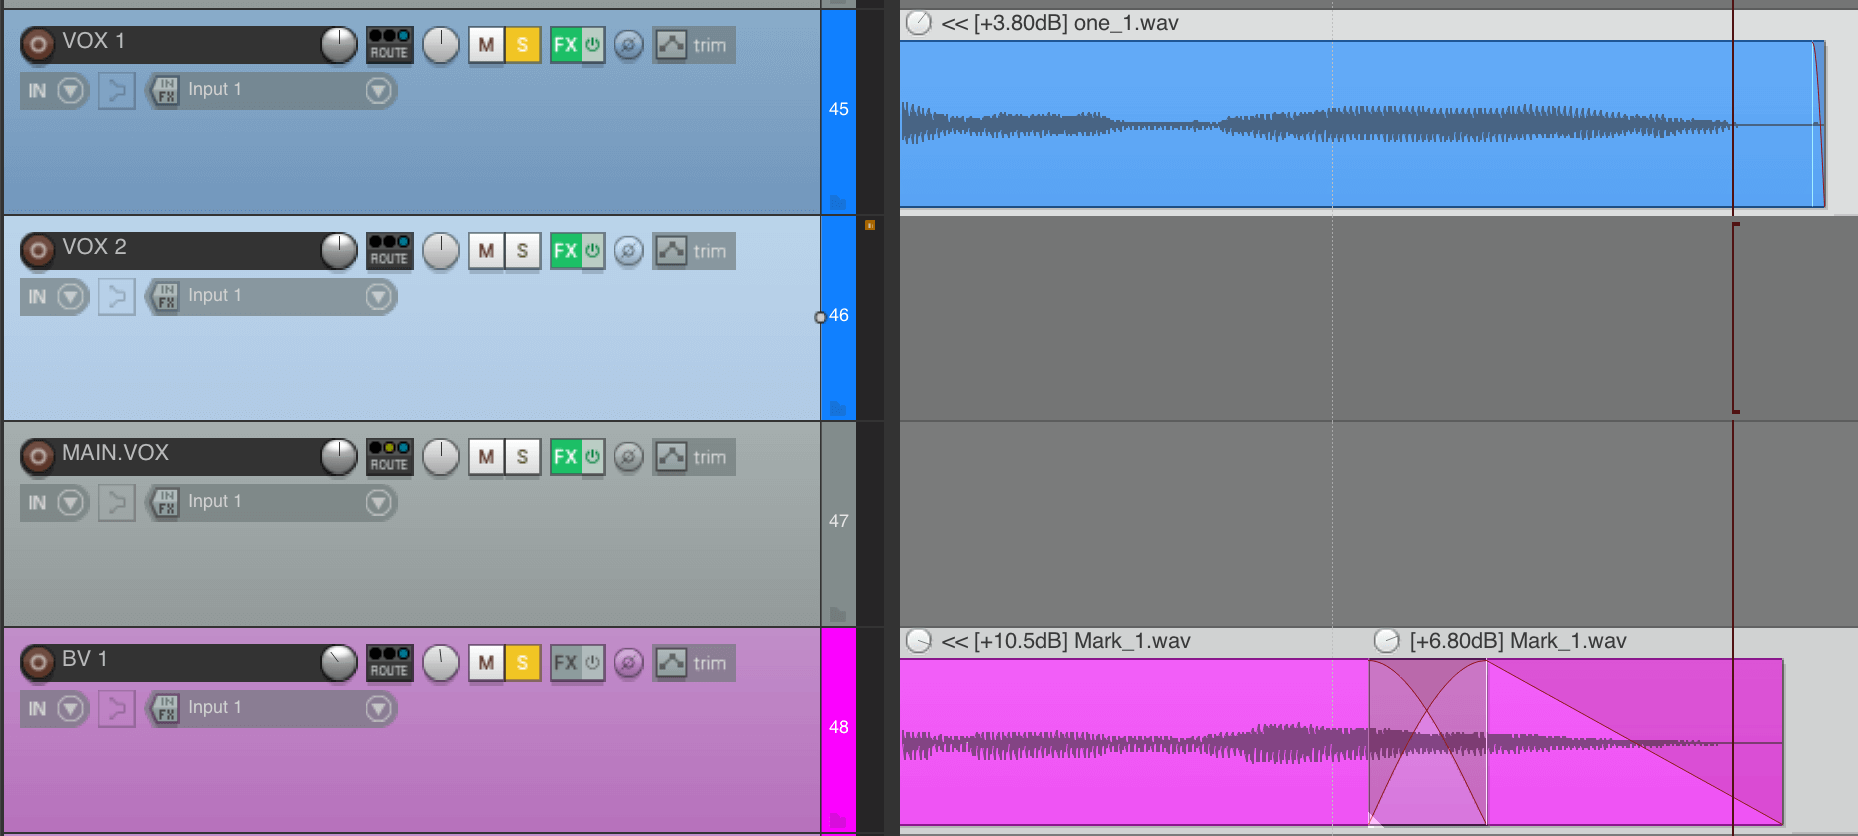
If they are too short, you can extend them like in the example below.
#4 Harsh sibilance and loud breaths
A De-Esser is not always enough to tame harsh “s”, especially when layered, these sharp notes can really stick out.
There are two ways to work on that:
First, you can manually cut the “s” in your tracks and bring it significantly down in volume with your volume function directly on your track.
The second tip is to cut the “s” in your layered vocals, so only the main vocals pronounce them.
On top of that, depending on the compression you are using, harsh breaths can be exaggerated so I recommend to either cut them out or bring them manually down in volume.
Layered Vocals Mixing Tips
Now we are ready to go to the mixing stage and give our songs the final, creative touch. There are so many different ways to Mix layered vocals and I’m happy to share my way with you. Nevertheless, feel free to take these tips as an inspiration and discover your own unique way of Mixing.
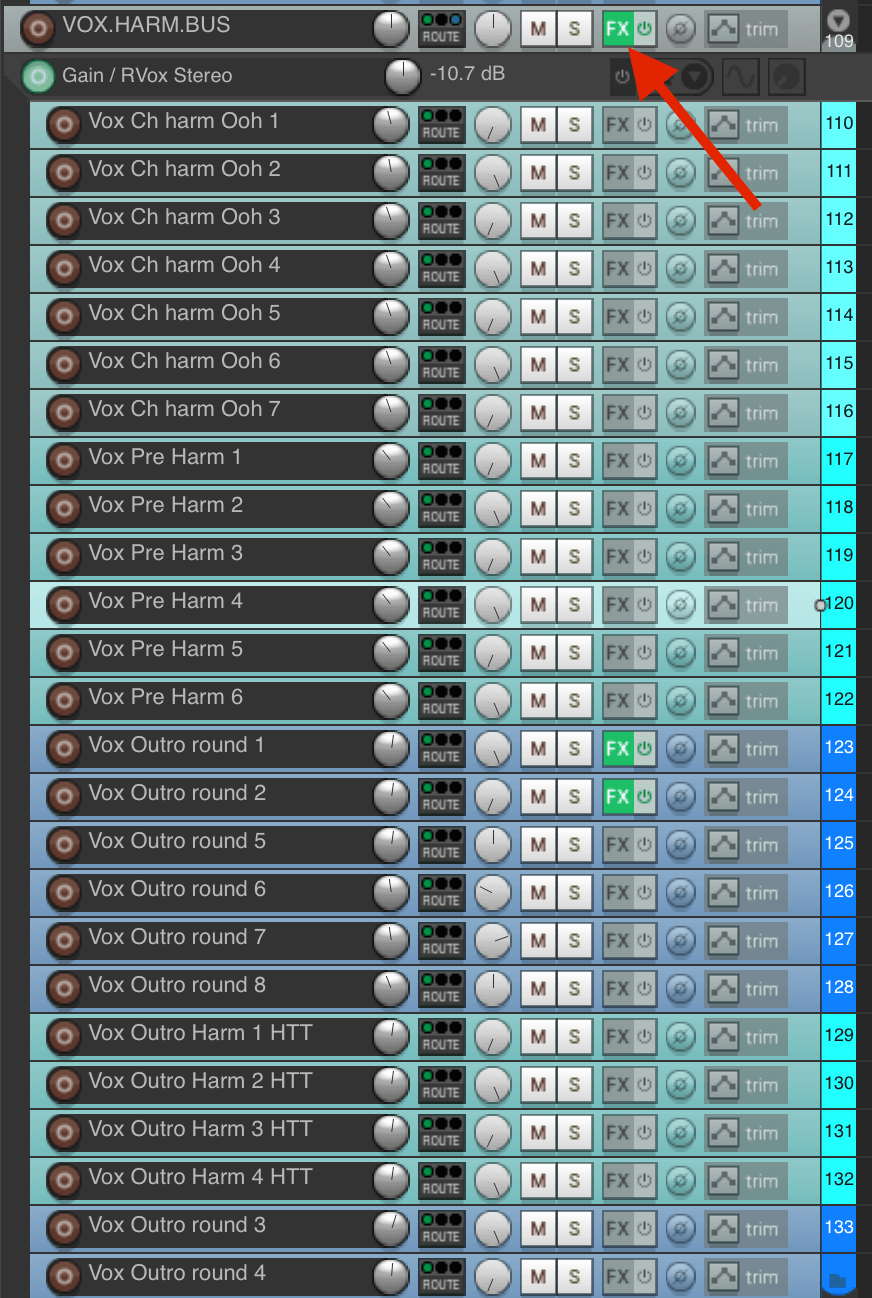
#1 Bus Processing
First of all I send all Layered vocals to one Bus and do all my processing on the Bus itself as it saves a lot of time and CPU. Instead of inserting the same plugin on each track, I insert one Stereo Plugin in the bus and process all tracks together.
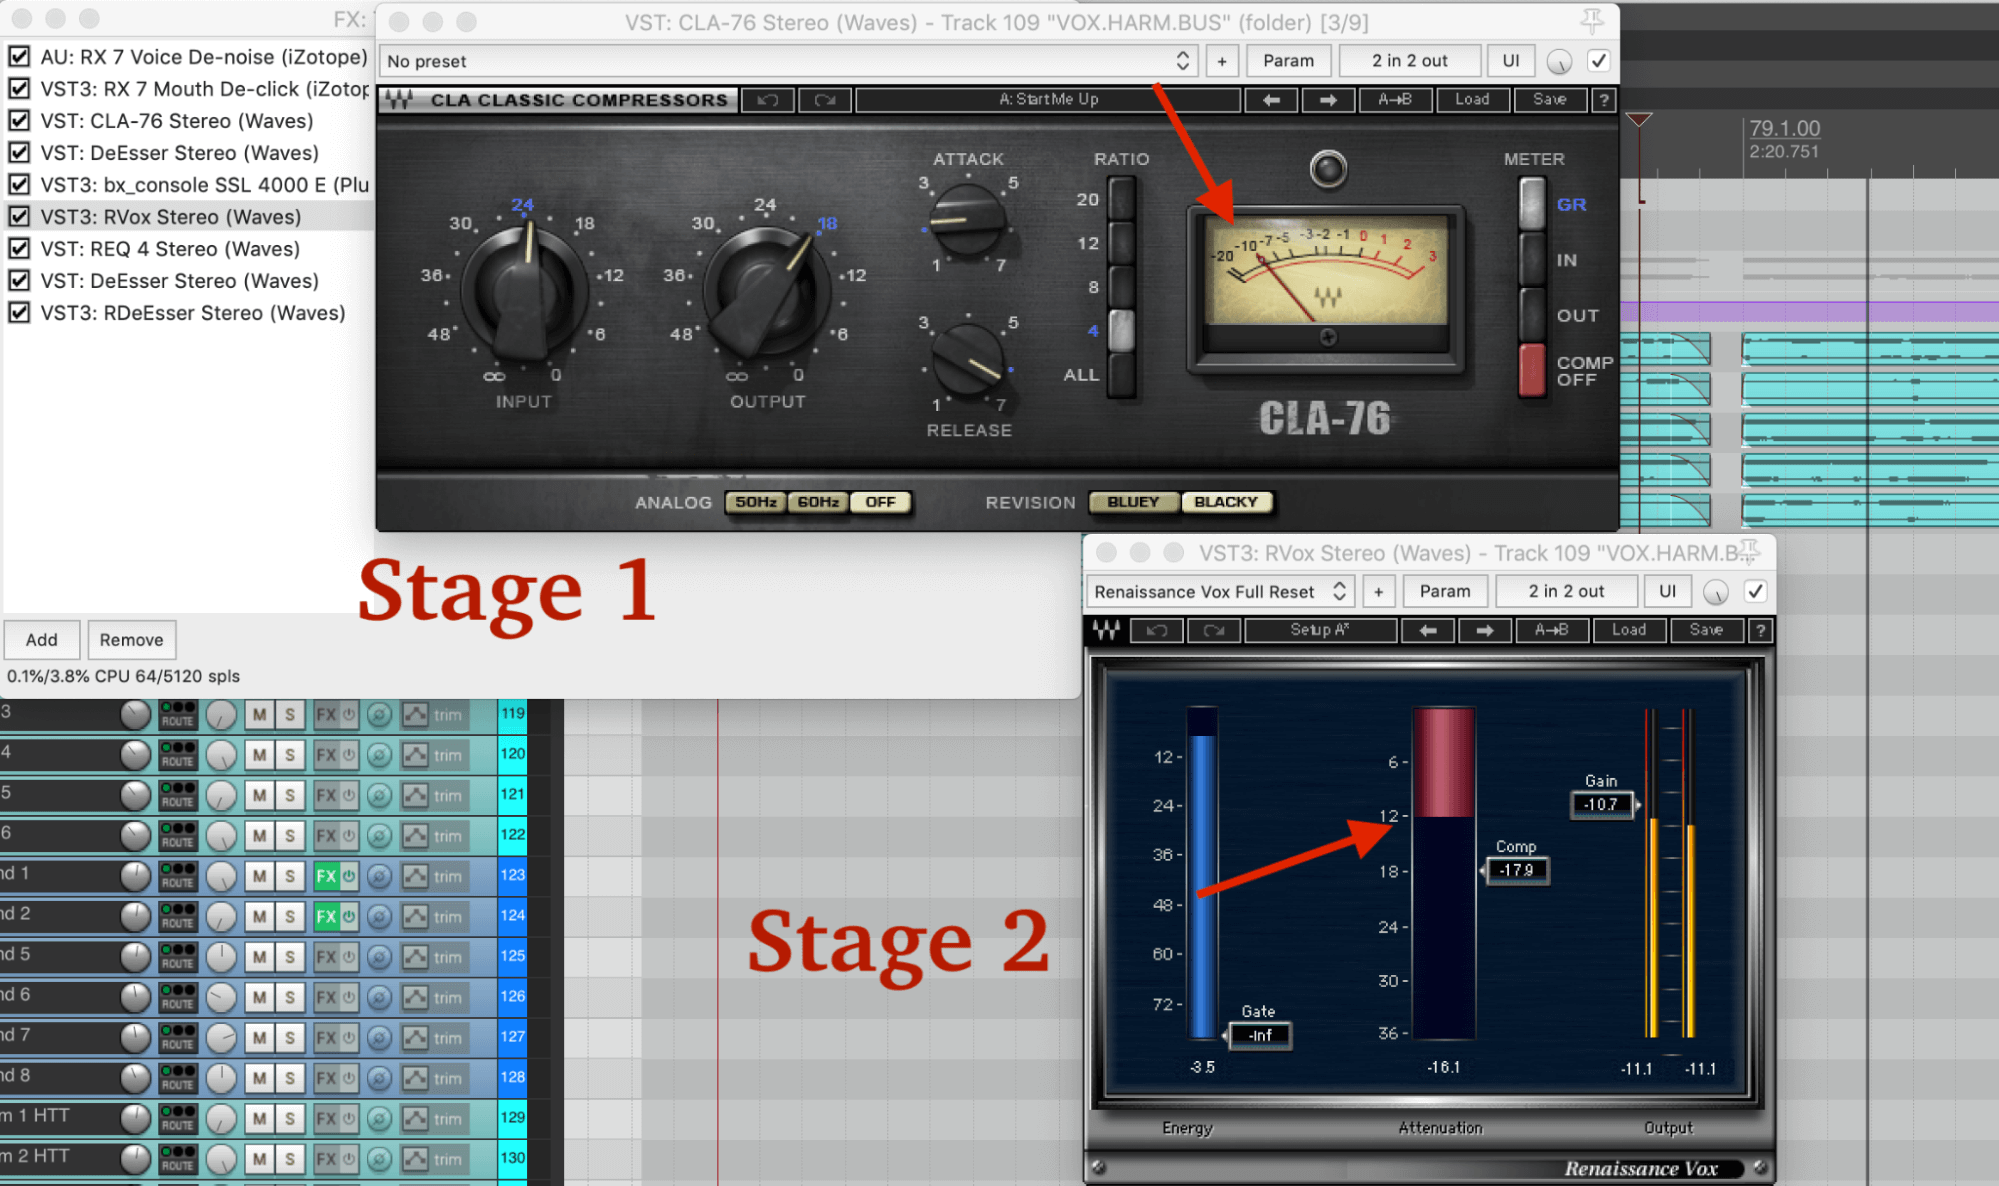
#2 Compression stages
Now it’s time for compression to glue the layered vocals together, which means to bring them to the same space. I’m using heavy compression, up to -10dB in 2 stages and make the decision only by listening to it until it feels right and sounds like one unit.
Stage 1 is maybe not the most elegant but fast way to even out the backing vocals volume wise. The second stage, after adding EQ and De-Essing, later helps me to thicken up the vocals and make them louder in the mix.
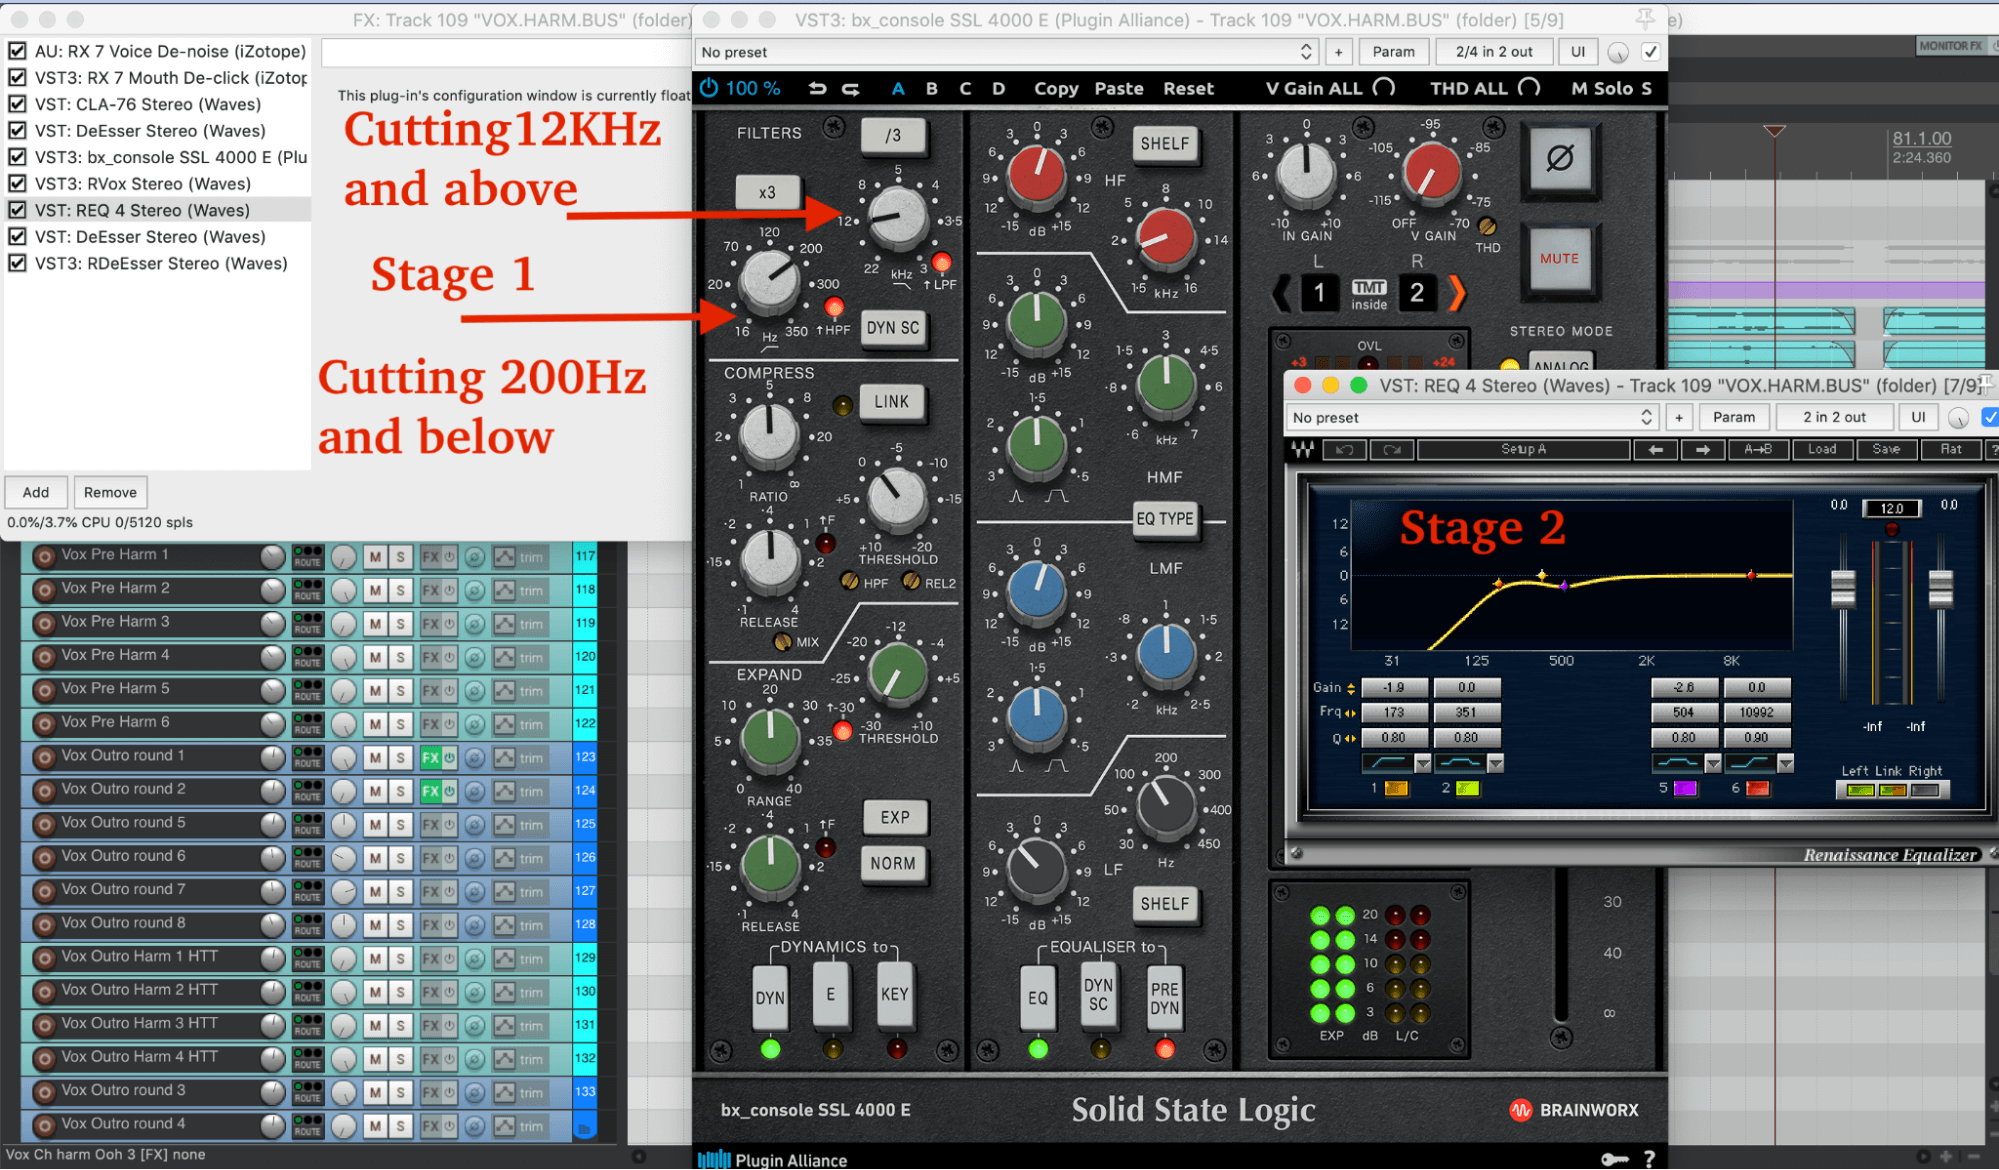
#3 Common Equalisation points
If you used the same microphone for your layered vocals, it might be that a few frequencies got especially emphasised and will be more present than others.
As a rule of thumb I’m looking for a Low End cut up to 120Hz, so I won’t cover any other instruments or the Main Vocals. Imagine wrapping the layered vocals around your Lead. Make a small cut for the backing vocals, depending on the most present point for your natural lead voice that is mostly between 700 – 1400Hz.
Additionally I’m taking care of the top end and usually make a High Cut up to 14 Khz to take the presence out and bring them more to the back.
Tip: In general it’s helpful to make priorities in your Mix to think which Elements should be more present and upfront (Usually Lead Vocals) and which ones are rather in the back. By simply cutting the top end of your elements you’ll place them more into the background of your mix – try it out!
#4 Multi-Band Compression
To have more control about the specific frequencies, the Multi Band compressor is a helpful tool. When I need more “body” (means you can hear more of the chest voice), I compress more of the Low Mid frequencies and make only this part louder.
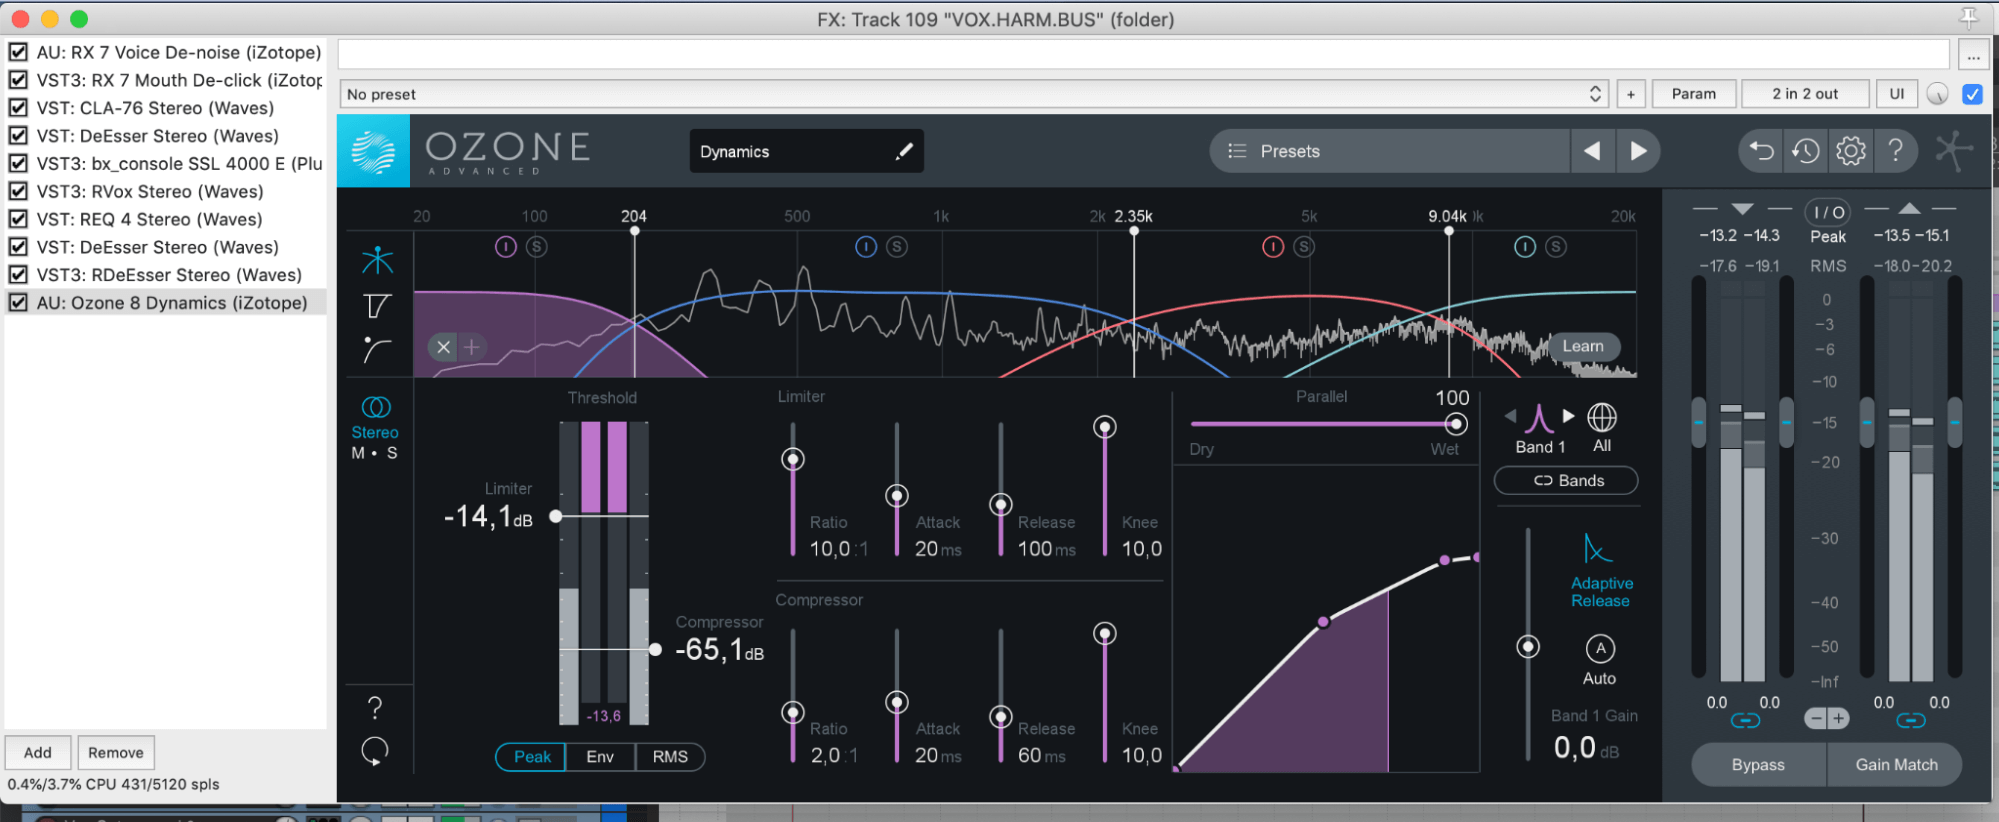
Compressing specific areas to make these spots “tighter” and coherent
For the final touches I’m adding another simple Equaliser, usually when the Mix develops further, to make final adjustments: From additional low cuts to fine tuning and cutting last disturbing frequencies with small Q factors and carefully with -2 dB cuts.
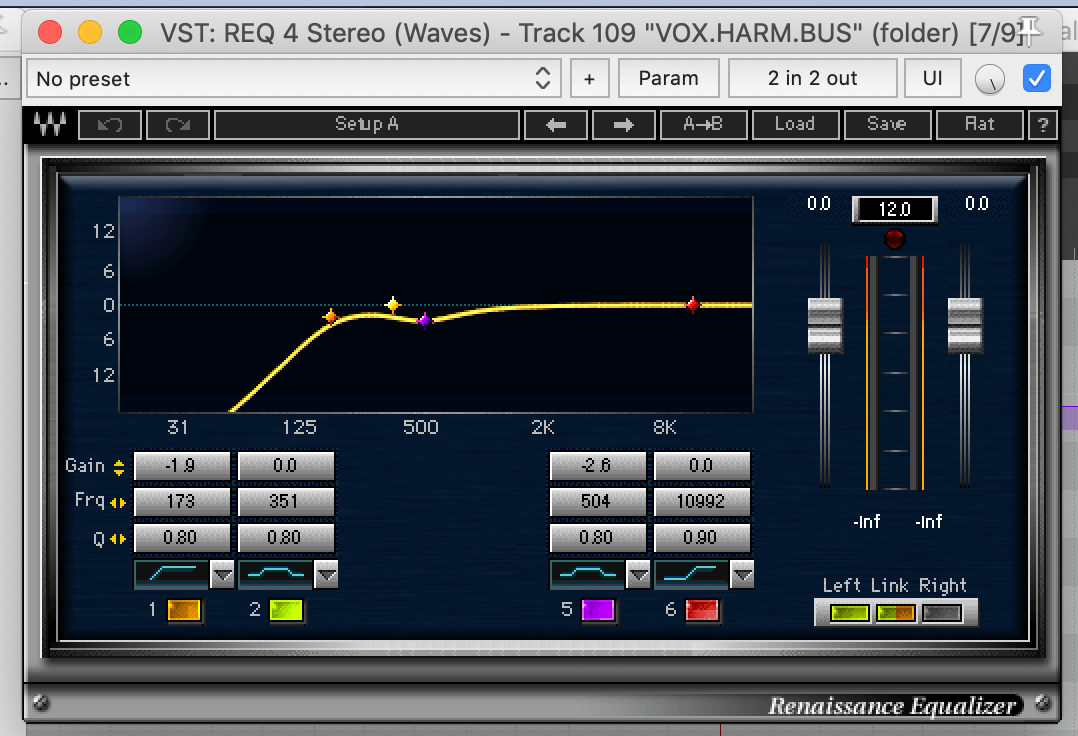
Cutting more Low that got louder through the compression stages and cleaning the 350 Hz area
#6 Effects: Reverb, Pitch Correction, Delays, Doubler and more
After we have the sound we had in our mind it’s time to get creative one more time.
Reverbs and Delays will help you to build a 3D space around your vocals and make them sound fuller.
For big choruses that remind us of choirs or stadiums, you can use big reverbs with a long reflection time. Think about bands like “Imagine Dragons” who achieve these powerful stadium hymns with huge reverbs and vocal layers.
If you want more presence but still different spacing, try out a plate reverb with a shorter reverb time.
Delay units will help you to achieve more depth and movement, for example Stereo delays that have slightly different times left and right, Ping-Pong delays that alternate from left to right.
Another common technique is to route your delays into a reverb with a Mix balance between 20 – 30% to achieve movement and bigger spaces at the same time.
What I tried recently was to pitch the backing vocals one octave up, one octave down and blend it back into the mix.
Routing the Backing Vocal Bus to a Parallel Compression Bus is very helpful to achieve more thickness. I use a compressor with slow release and slow attack times and compress up to -20dB, blending it slightly back into the mix.
The last tip is to route your Backing Vocals into a Vocal Doubler effect, which will detune your vocals ever so slightly and build an illusion of a second vocal layer.
I recommend bringing this effect a little bit back into the mix but inaudible to avoid phasing issues.
You can use this effect also on your Lead Vocals, if you didn’t record a second vocal layer.
Detuning both channels by a few cents will help to build thicker vocal tracks
Thank you for reading and have a wonderful time creating new music, we hope this tips gave you clarity, helpful techniques and creative ways on how to work with layered vocals.

About the author
Adrian “Ady” Parzentny is a travelling Music Producer, Mixing Engineer and Coach, operating “Hit The Road Music Studio”. Love to music drives him everyday and you can find his mixing tutorials on channels Like Produce Like A Pro, Promix Academy and Mix Innovator. Sharing is caring and audio production is an adventurous, never ending learning process.
Our Products
-

2in | 2out Audio Interface
-

10in | 6out Audio Interface
-

10in | 14out Audio Interface
-

20in | 24out Audio Interface
-

24in | 32out Audio Interface
-

2in | 2out Audio Interface
-

4in | 4out Audio Interface
-

24in | 24out Audio Interface
-

Everything you need to start recording
-

8 Channel Smart Preamp with AD/DA
-

8 Channel Mic Pre & ADC
-

8 Channel Mic Pre + Tone Control
-

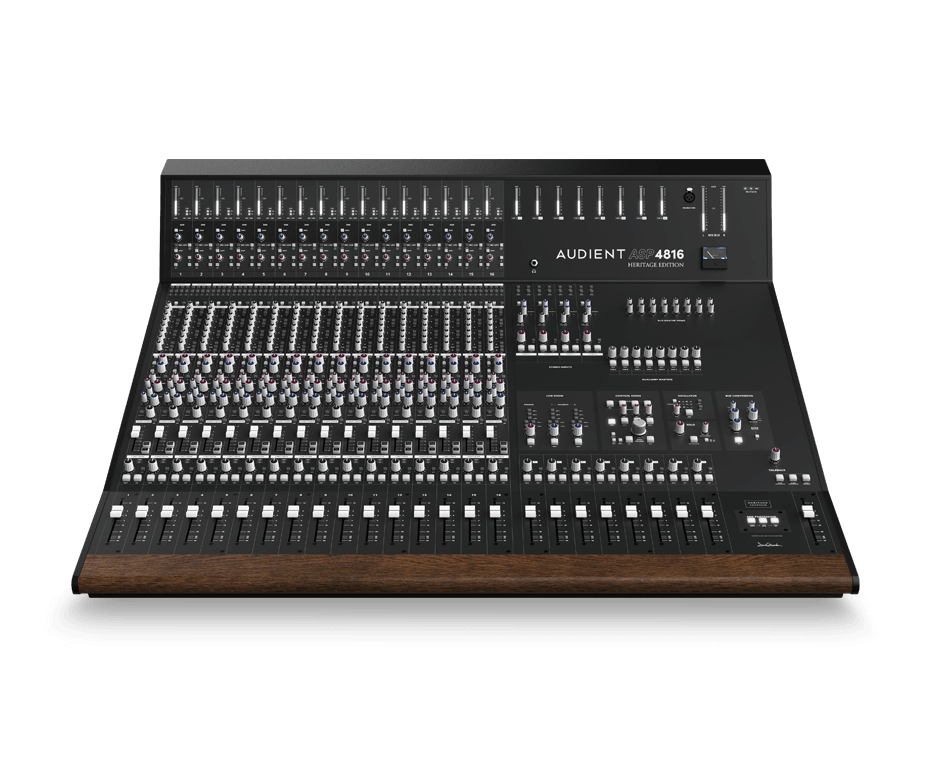
Modular Analogue Recording Console
-

Small Format Analogue Recording Console
-
Small Format Analogue Recording Console
-

Immersive Audio Interface and Monitor Controller
-

Desktop Monitor Controller