


How to get a killer slap tone on your bass?
“How Do I Get A Killer Slap Tone On Bass?”
Often I get questions about having a great slap bass tone, what kind of amp or what kind of equalisation to use. I would say that those elements are definitely important but also secondary to others – more basic elements – that should be taken into consideration.
The Type Of Bass
The Type Of Bass
Some basses are not really appropriate for a bass slap tone (for example any semi acoustic basses) while others excel in reaching that type of sound in an easier way. The jazz bass, as used by Marcus Miller, the stingray bass often used by Flea or Louis Johnson and many others can be an excellent choice. An easy way to compare different types and sounds of bass guitars is checking some of the numerous videos that are available on Youtube showing several slap techniques and different sounds.
The bass should also fit to your hand size. Furthermore it is very important to consider the distance between the end of the neck and the pickups, there should be enough space for slapping and pulling comfortably. Also the spacing between the strings is another important factor you have to take into consideration.
The strings
The Strings
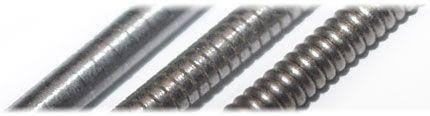
The strings must be fresh and round wound (flat wound strings are more suitable for a vintage finger style). Personally I prefer the nickel type more than the steel strings but this is quite individual. The gauge is suggested to be light, for example 95 or 100. It creates a brighter sound that will allow you to play faster and to make your fingers less tired.
Experiment with different string brands and find out what is the one that sounds better and also feel better under your fingers. The tactile experience is very important, too. (In the photo from left to right: Flatwound Strings, Semi Flat, Roundwound strings)
The strings IMAGE
The Bass Setup
The Bass Setup
The bass setup is fundamental for any style of music you want to play and especially if you want to create a nice slap tone.
The bass should have a quite low action allowing the strings to vibrate in the right way.
If you are not familiar with making a complete setup of a bass, I would suggest to bring it to a luthier and ask for a medium low action. There are also many tutorials on how to make a setup on the bass by yourself. Be careful with your Truss rod and if you do not feel confident in doing that, it would be better to contact a professional to not risk ruining your instrument.
First sound check
First Sound Check
As a preliminary check before plugin your bass into any device, the slap tone should be already nice without any amplification. Just wood and strings. If the tone satisfies you and if you feel the brightness in the sound – that “zing” that you were expecting – it is very likely that you will reach the sound you have in your mind.
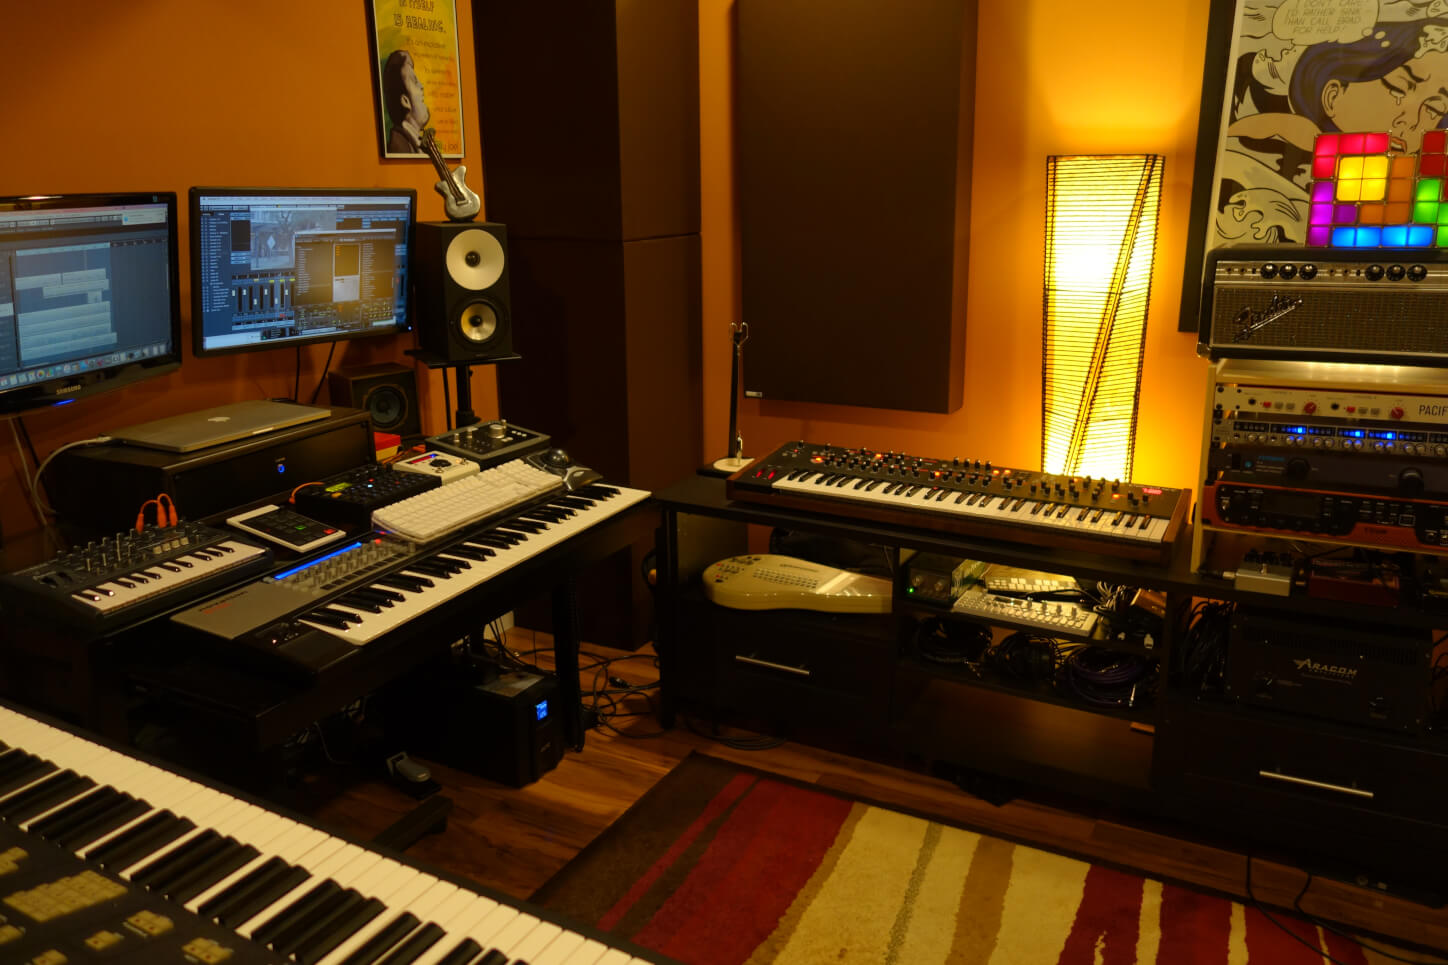
Home Recording
Home Recording
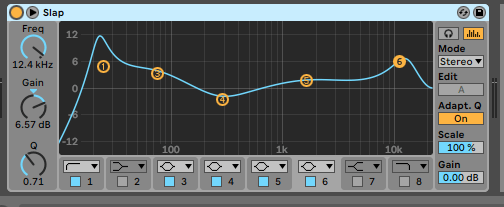
In this article we focus on creating a great sound for a home recording session. Lately I’ve been plugging my bass directly into my Audient ID44 for home recording, so I don’t need any additional amp or device to get the sound I want.
The pre-amps in the Audient are pretty neutral, so they allow me to reach the sound I chose without colouring it. Once the bass is plugged in I start to check different configurations of the pickups. This choice is very individual. I usually love to use stingray style basses with one Humbucker pickup.
The next step is to equalise the input sound. Most of the bass players boost the high and bass frequencies for having the classic slap tone. In my opinion this equalisation is very useful, especially in a first recording phase. Be aware that mid frequencies are the ones that tend to make your bass more present in a song mix. So if you feel that your bass recording sounds nice in solo but gets lost in the mix when all instruments come together, consider to reduce your boost in high and lows or increase the mids and see the difference of perception of your bass.
Home Recording IMAGE
Compression
Compression
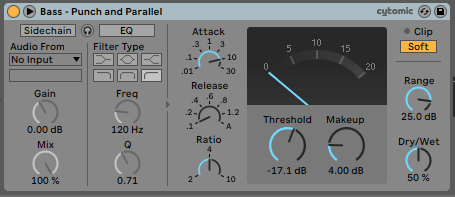
Compression in bass is important in many situations but for recording slap bass parts it becomes fundamental. Even when you are a great player and you can keep the notes at the same level there will be some differences between slapped and pulled notes anyway. The risk of not using a good compression is that some notes will be too present and others totally unheard.
The level of compression must be given in the right amount. Using too much compression would flatten the sound and not give any motion to it. Play a little around with compression plugins if you do not have a compression external pedal and find a good balance.
Compression IMAGE
Other Effects
Other Effects
To get a very funkadelic sound many bass players use envelope filters.
An additional EQ pedal could be beneficial but more in a live setup to compensate missing frequencies than in a studio environment.
Some musicians suggest using a touch of Chorus in a slap sound. Try and experiment with different plugins and pedals to find the right effect for yourself.
Final Consideration
Final Consideration
A good slap technique is a lot about having a clean technique and using rhythmical nuances. It is really important to practice as much as possible and necessary to feel confident using this technique. No recording tricks or devices can cover this.
Be rhythmically creative and try to learn a different vocabulary on the bass.
I leave you some suggestions for bass books about how to slap:
“Slap It!” Tony Oppenheim
“Bass Master Class” Louis Johnson

About the author
Marco De Ritis is an Italian bass player and music producer. Played in several Italian acts of different musical styles from Death Metal to Blues with international touring experience (Dog Byron, CorpseF. Art) He is currently based in Berlin where he is focusing on electronic production and continuing his activity as session musician.

Our Products
-

2in | 2out Audio Interface
-

10in | 6out Audio Interface
-

10in | 14out Audio Interface
-

20in | 24out Audio Interface
-

24in | 32out Audio Interface
-

2in | 2out Audio Interface
-

4in | 4out Audio Interface
-

24in | 24out Audio Interface
-

Everything you need to start recording
-

8 Channel Smart Preamp with AD/DA
-

8 Channel Mic Pre & ADC
-

8 Channel Mic Pre + Tone Control
-

Modular Analogue Recording Console
-

Small Format Analogue Recording Console
-

Small Format Analogue Recording Console
-

Immersive Audio Interface and Monitor Controller
-

Desktop Monitor Controller