


Intro
Making my own virtual piano instruments is an important part of my artistic output. I collect recordings of pianos in amazing spaces so that I can use them in my personal studio at home.
It’s easier to do than you might imagine and it’s definitely easier than writing a how-to guide, but I’ve given it a go and encourage you to try and find out for yourself.
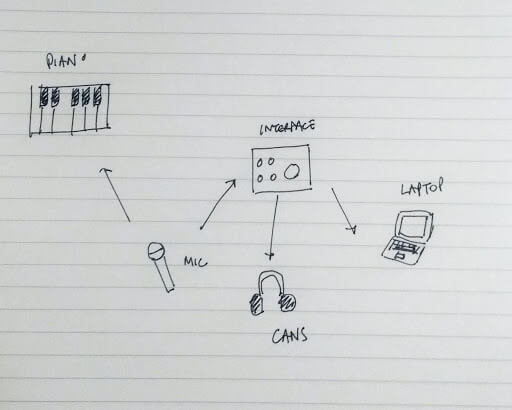
1. What you need
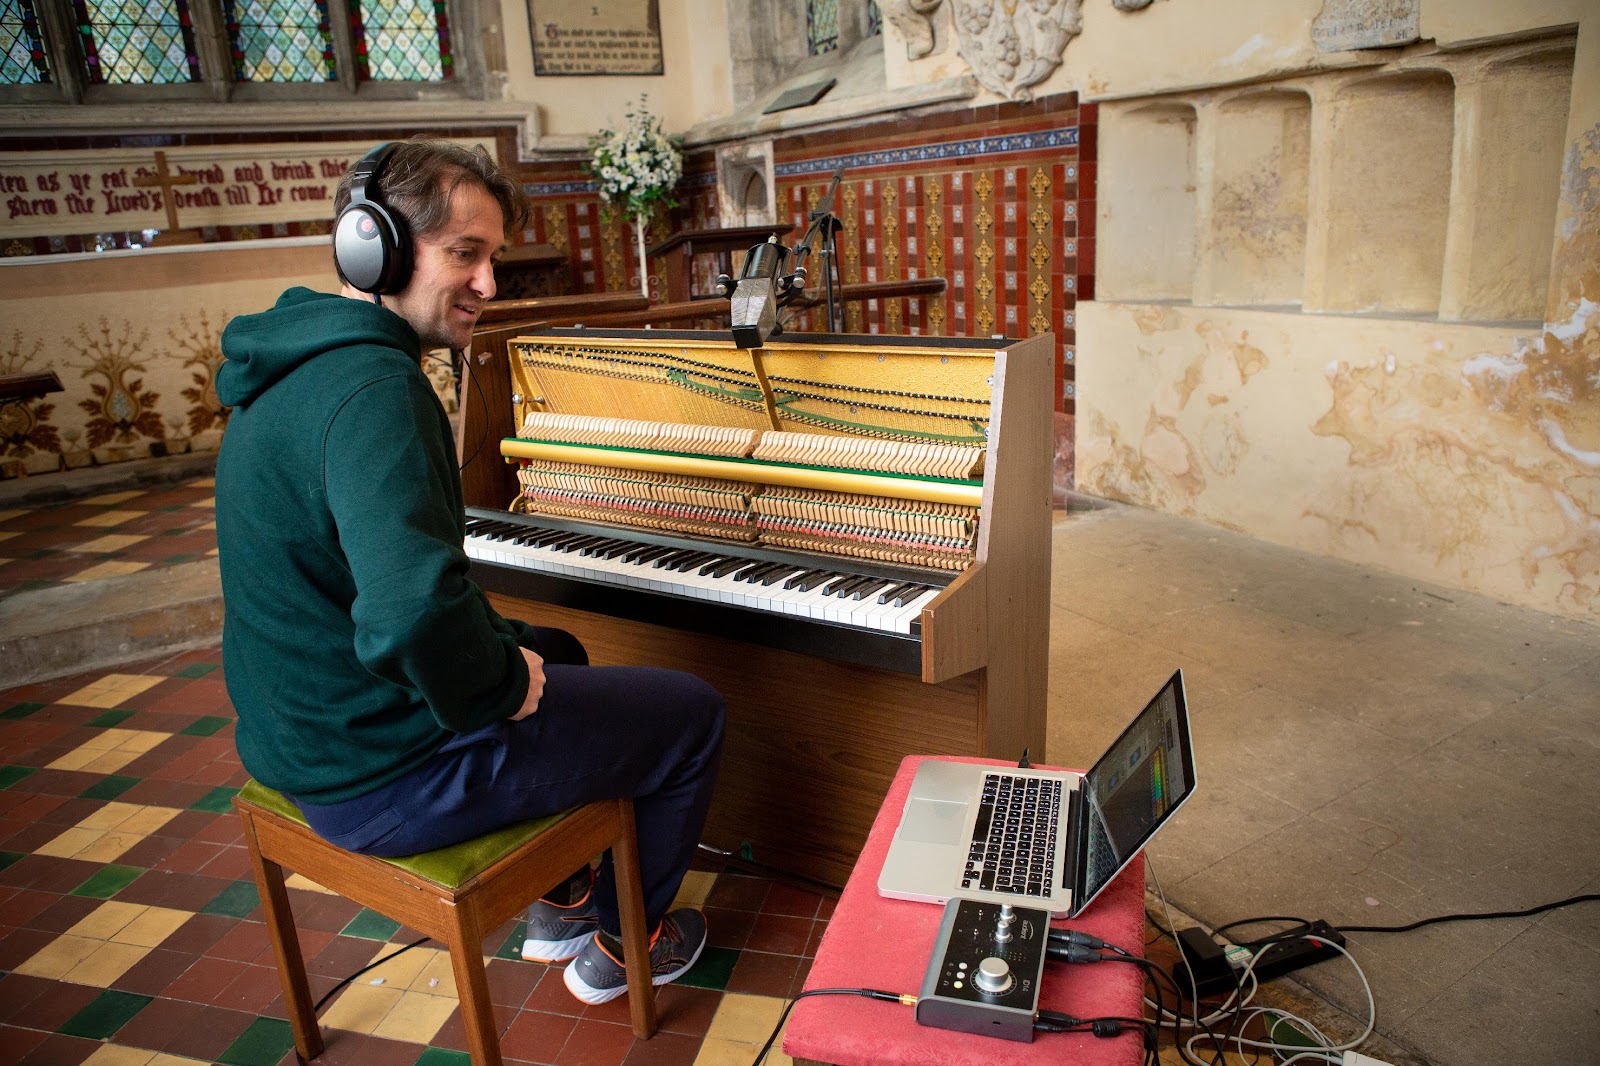
What you need:
• access to a real piano in an interesting space
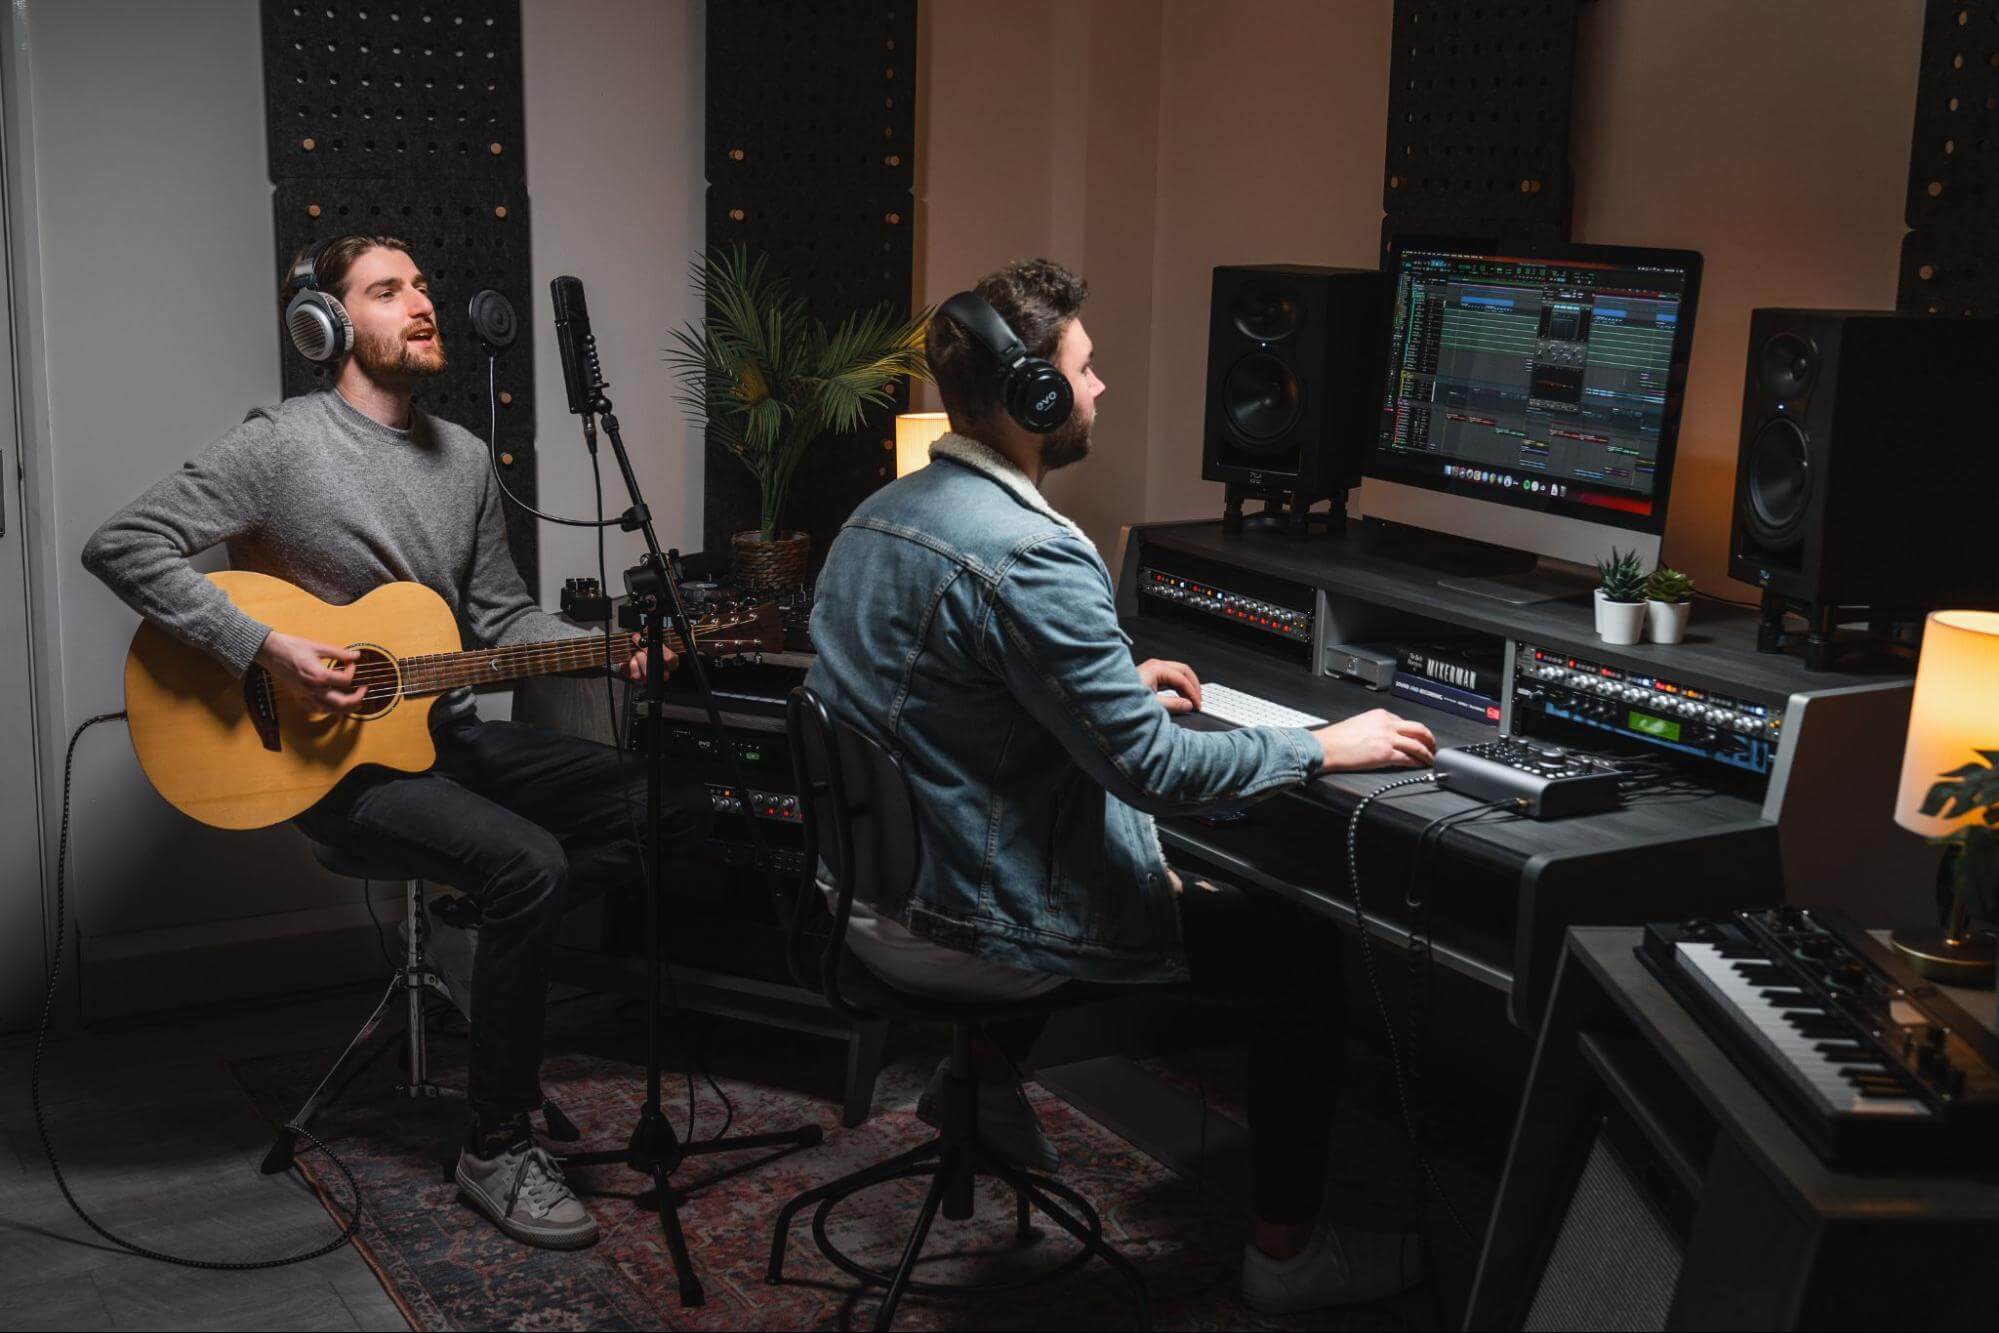
• a microphone (or a pair of microphones for a stereo image)
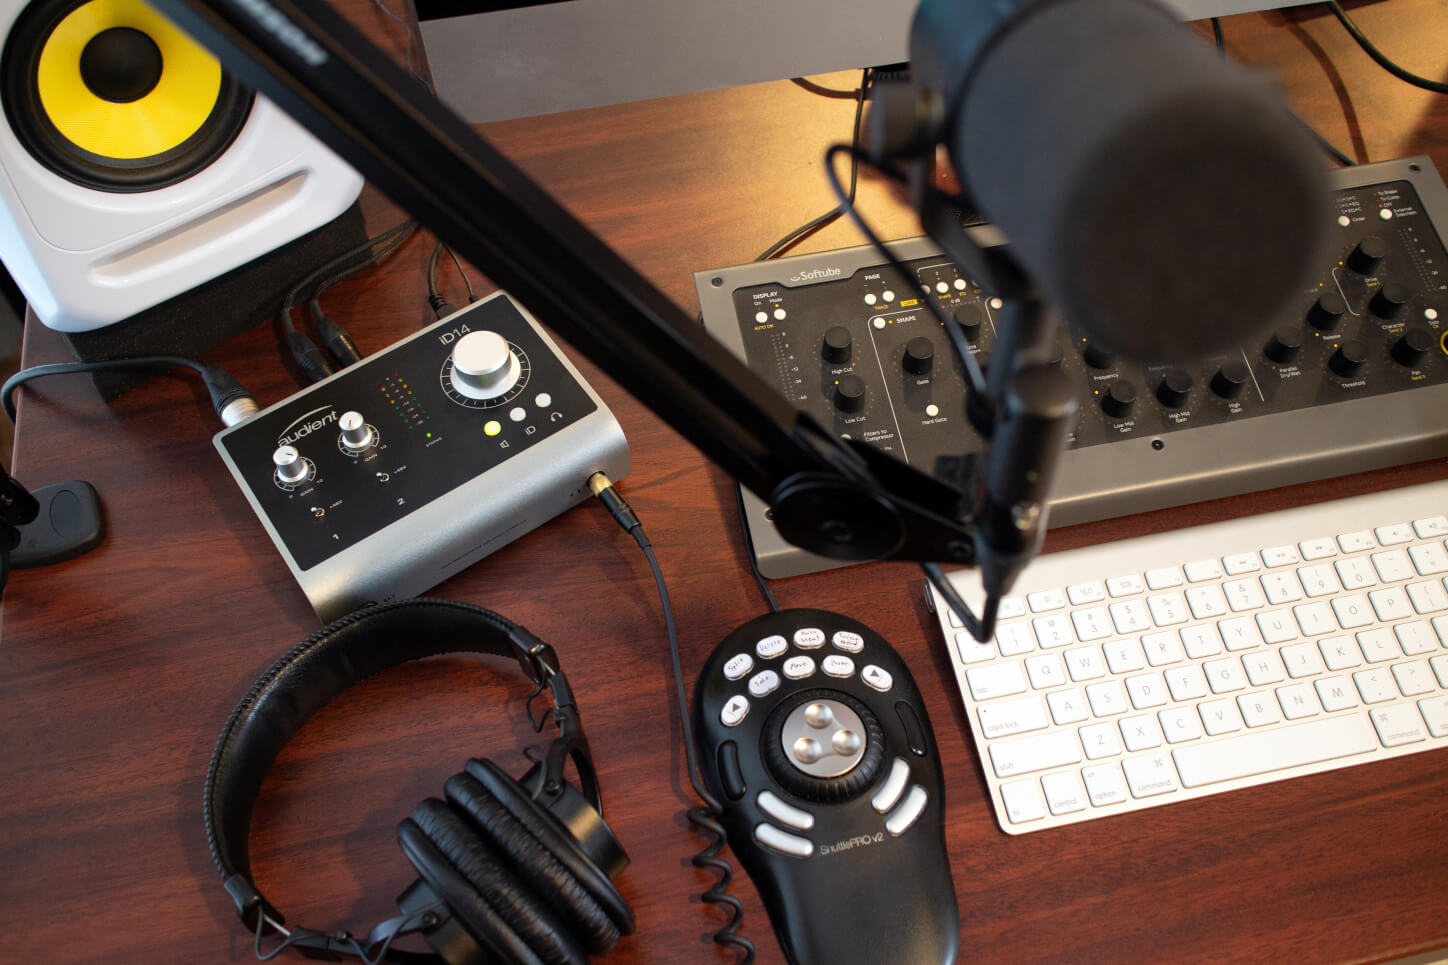
• an audio interface
• a computer
• a set of headphones

It’s not essential to have an expensive pair of classic microphones recording a world-class musician playing a Steinway grand piano in a concert hall to create a good quality sample. In theory, you might obtain a very usable sample with its own unique character using an affordable handheld dynamic microphone in a good recording position on a beat-up upright piano in an old pub.
The touch of the pianist, the quality of the actual piano (and whether it is in tune or not), the space it is being recorded in, the microphones used, and where they are positioned are all determining factors in what your sample sounds like.
You can do things in a simple, very quick, and efficient manner to begin with. For example, you might set up the microphone pointing at the piano, adjust the gain level on the audio interface so you have a decent signal, hit record, and start the session. However, it’s well worth spending some time considering how you can improve the playability (and vary the sound) of the sample by putting a bit more effort into the process.
2. Experimenting With Sound
Experimenting With Sound
On an upright piano, you can remove the front panel to expose the strings and hammers enabling you to position the microphone(s) as close as possible to the piano’s insides.
The microphone(s) will capture all of the mechanical sounds from the fingers hitting the keys and creaking pedals, through the movement of the hammers, the attack of the transient as the hammer strikes the strings and finally the release of the individual dampers as well as the player’s fingers hitting and lifting off the keys.
In comparison, the further away you move the microphone(s) from the piano the more acoustic reverberations in the space you will hear, just as you might increase or decrease reverb on a channel in a mix.

Different parts of an upright piano project the sound differently and there will be optimum positions around a piano where you can position the microphone(s). Typically, these tend to be:
• above the top lid of the piano
• the space between the floor and the bottom of the piano keyboard
• the front of the piano that the pianist faces
• the rear of the piano (which is the soundboard of an upright)
It’s slightly different for a grand piano for a number of reasons including their size, the lid is a reflective surface and there is easier access to the inside of the piano.

Whether or not a piano is up against a wall, in the middle of the room, has the lid open or not, and if the front is removed (on an upright) – all introduce variation into the recorded sound.
The venue might also be subject to other environmental noise over which we have no control. One of my pianos is in a 15th-century church, next to an inner-city road, next to a pub and across the road from busy shops, in the vicinity of a large cathedral in a city that has a very large seagull population.
I have a wide range of different ambiance to choose from to blend with the amazing reverb in the space depending on what time of day I record there. On some recordings, I have cathedral bells, bird calls, cars, and pedestrians talking. It’s all to be embraced – if I want a clinically quiet recording, I’ll go to a recording studio with a piano or use a stock sample.
It’s worth mentioning that individual notes tend to sound richer with the sustain pedal held down. You might also try using the celeste (middle pedal) or place the material in between the hammers and the strings.
The German composer and recording artist Nils Frahm is an effective exponent of treating the strings and hammers, placing a cloth, paper, and items like bunches of keys or paper clips that vibrate on or in between the strings to create unique piano sounds. He is relatively well known for his piece “Toilet Brushes” in which he plays the strings of a grand piano with said items with impressive musicality.
Experimentation and research is key – being aware of good starting positions and exploring what the microphone is capturing as you move around is time and effort well spent – as well as occasionally doing the unexpected just like Nils. The whole process can be educational, very gratifying and as well as a lot of fun.
3. Recording
Recording
Once you are happy with how you have set up the piano and microphones and have the right amount of gain coming through your audio interface to the laptop and a comfortable monitoring level in your headphones start a new project in your DAW.
Set the recording resolution and frequency to 48Khz and 24bit.
You will be playing 12 notes starting with the lowest C through to the highest F in a cycle of
fifths.

The complete cycle is C0, G0, D1, A1, E2, B2, F#3, C#4, G#4, D#5, A#5 and F6.
When you record you capture each note long enough to capture a decent amount of its tail. The lower notes have longer tails and the higher notes have shorter tails. C0 is around 18 seconds give or take a couple of seconds and F6 is likely to be around 6 seconds give or take half a second.
We can use the estimated time of the note tails beginning with 18 seconds and reducing the time for each key but the important thing is to use your ears as well to end the note at the right time.
Record each note with the sustain pedal held down before striking the key then lift it carefully after you’ve released the note at the end of the tail.
The best commercial piano samples capture recordings with a professional pianist playing several sets of notes at different volumes.
In my own projects, I prefer the sound of a quietly played piano so now I tend to only capture a few takes played with the same gentle sensitivity then choose the best notes as opposed to my very first attempt when I captured many takes of hard, medium and soft versions. It can take some time to listen to all the takes and carry out the necessary editing and can get a little more complex later on in the sampler if you have several different velocities too.
A good compromise might be to combine a soft take and a loud take to avoid getting bogged down in listening, selecting, and editing that goes with many different takes.
To make your sample more realistic you also need to make a recording of release triggers for all of the notes in the cycle of 5ths. Gently press down the key without the hammer sounding the string then release the key aggressively so that the noise of the release trigger and the key moving back into its starting position is emphasised.
The last thing you need to record is some room noise so that you have the option of using a noise reduction utility if required when you are processing your takes.
At the end of the recording session you should have captured:
1. a softer take of each note in the cycle of fifths taking care to include a generous portion of the tail
(you might want to do a few takes so you have lots to choose from when compiling your edits)
2. a louder take of each note (with tails and a few takes as per the softer take above)
3. a take of release triggers for each note
4. 30 seconds of room noise
4. Editing your takes
Editing your takes
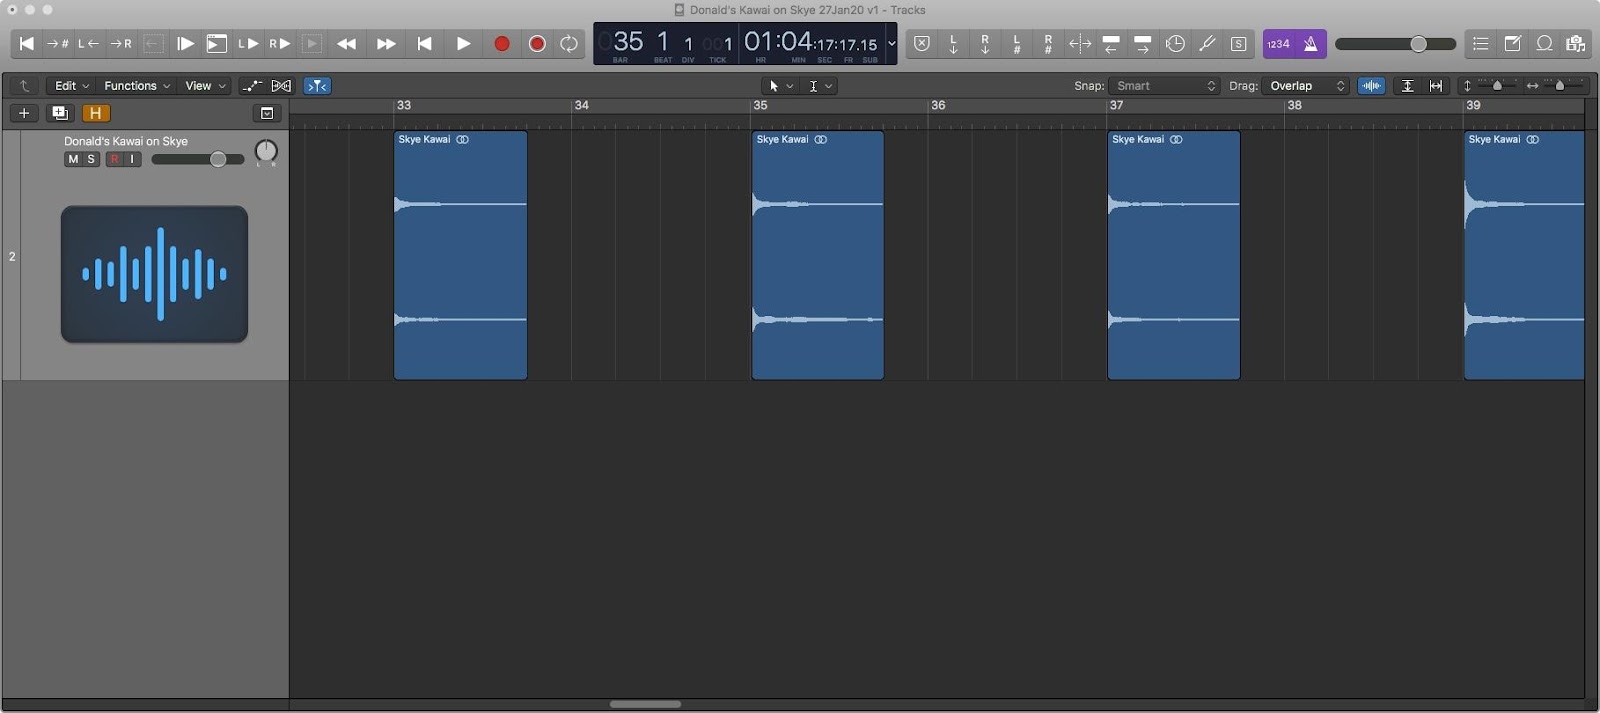
In your DAW you will need to edit your takes by splitting them where transients start and the reverb tail finishes for each note, export each into a wav file and label them so they are identified in such a way that you and/or the sampler can organise the file names (in Logic Pro X it’s possible to do it automatically, but it’s easy enough to do it manually too).
Zoom in horizontally and vertically to the timeline on your DAW, select the scissor tool, and make the splits as close to where the transient begins and the tail ends of each note in each take. Monitor the wave form with your ears too. Sometimes I find myself using the fade tool in Logic Pro X to tidy up the beginning and ends, but it’s not strictly necessary if you deliberately leave a small space at the start because you can change the start position in the sampler. Some DAWs have the facility to detect the start points of transients and make automatic splits – this saves time, but sometimes you might have to zoom in and make manual adjustments.
5. How to name your files
How to name your files
Create a full set of individual files for each note saving them as 48khz, 24-bit wavs and naming them so you end up with a full set of individual notes for each of the takes (choosing the best note from multiple takes if appropriate):
eg. “Piano soft C0.wav”
12 files of Piano soft C0 through to Piano soft F6
12 files of Piano loud C0 through to Piano loud F6
12 files of Piano release C0 through to Piano release F6
Also slice the 30 seconds of room noise and save that to an individual file.
6. Creating your virtual instrument
Creating your virtual instrument

I use Logic Pro X so my instructions here are specifically for the ESX24 sampler that comes with Logic. Armed with the instruction manual to your DAW’s sampler and an internet full of relevant user forums you should be able to adapt the general points here to your particular DAW of choice.
1. In a blank EXS24 instrument click the “Edit” button and the sample editor will appear.
2. Select Zone>Load Multiple Samples then select your set of piano note files you prepared earlier.
You can also drag and drop files into the sampler edit window.
3. In the prompt select the “auto-map” option to assign the sample note from the file name.
4. Create three groups by selecting all the files in each take of “soft”, “loud” and “release” and drag them
into the Zones sidebar to create three new groups. Name the groups soft, loud, and release.
5. Click on the Key column header to organise the files into keys.
6. Select all the F6 files. Adjust the Key Range so that the hi-key range value for F6 files is F6 and the lo-key
range value is B5, which is one semitone above A#5, the previous key in the cycle of fifths.
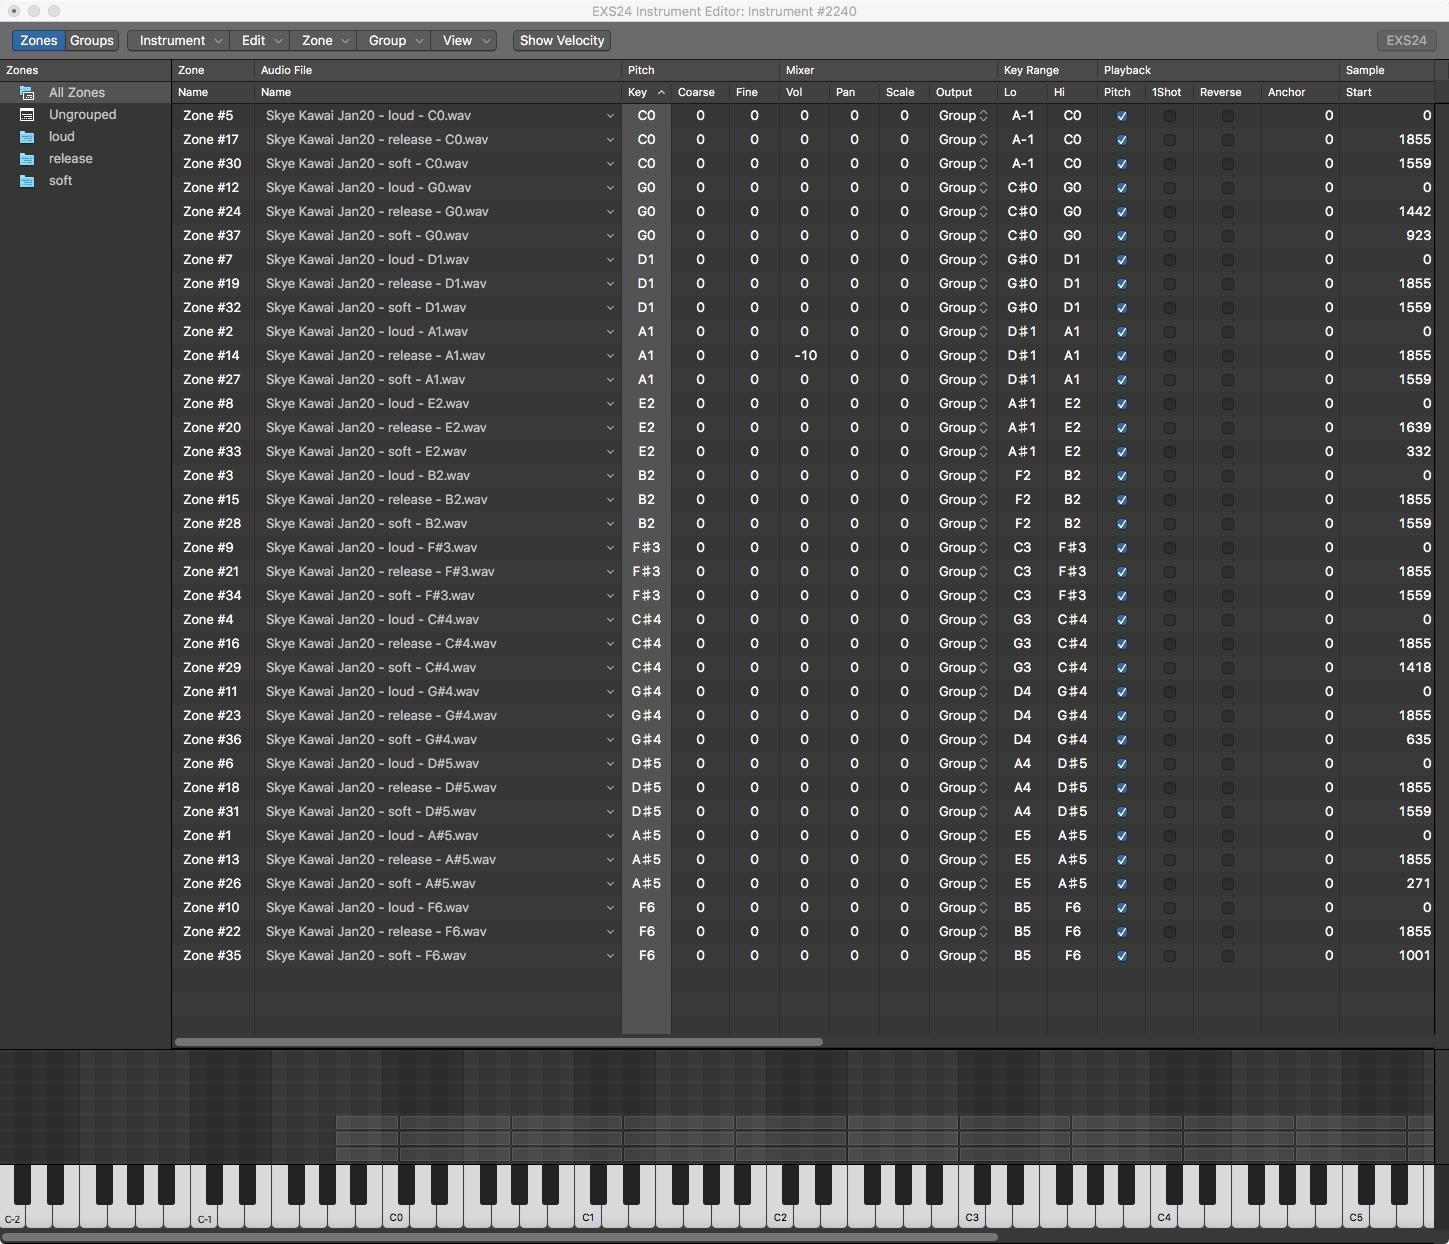
Repeat for each key so that the hi-key range value is the same as the key value and the lo-key value is one semitone above the previous key in the cycle of fifths. For the lowest sample, the lo-key range value is A-1. If you want all 88 keys then you could sample C7, but I very rarely play the high so don’t tend to bother. The reason for pitching the audio down is that it sounds more natural than pitching up.
You will see that the keyboard diagram at the bottom of the edit window also shows how the key ranges are grouped and they are hi-lighted as you hit a note on your controller keyboard. You can also edit the key ranges by adjusting the parameters directly by clicking on the corresponding graphics in the diagram.
Click on “Groups”, click on the View drop-down, select “view all” then set up each of the three versions “soft”, “loud” and “release” so that “soft” and “loud” have the “Key Down” Trigger and “release” has the “Key Release” Trigger, with the following Velocity Ranges for “soft” of 0 to 110, “loud” of 111 to 127 and “release” 0 to 127. Make sure the “Dcy” tick box is ticked and enter a value of 1500 in the Time field for “release”.
The velocity ranges for “soft” and “loud” may need some adjustment to suit your samples.
You may also find that the start value for the soft and loud samples need adjustment depending on how accurate you were when you were editing your recording and preparing the sample files.
7. Fine-tuning
Fine-tuning
You can do many other in-depth adjustments to tweak your instrument such as fine-tuning of pitch and changing start points. It is also possible to tune the pitch of the samples if the piano you recorded was out of tune.
I’ve also found it useful to adjust the Envelope parameters too if the samples aren’t triggering or are cutting off unnaturally when playing and depressing the keys of my controller keyboard.
You may find that there is a build-up of room noise when you play many notes on top of each other eg. a series of chords with the sustain pedal held down on your controller keyboard. The solution to this is to run all of your samples through a noise reduction plug-in to create a noise reduced set of sample files before you import them into your sampler. This is when you might need your 30 seconds of room noise audio file that you recorded. Noise reduction processor will require you to playback the noise so that it can analyse the room noise in order to set the correct amount of reduction.
At this point, it’s probably best to encourage you to experiment with the available parameters in the EXS24 edit window and try things in order to begin to understand exactly what is possible.
8. Summary
Summary
It’s a lot to take in so here is a concise breakdown of the stages:
• Record 2 sets of the cycle of fifths, one soft and one loud
• Record a set of release triggers
• Record 30 seconds of room noise
• Edit the recording in your DAW and save 3 sets of 12 sample files for each note of the cycle of fifths
• If necessary, process the same files with a noise reduction tool which will analyse the 30-second room
noise file to accurately reduce noise on the sample files
• Import the complete set of soft, loud, and release trigger audio files into the sampler.
• Adjust the parameters in the sampler so that the correct keys trigger the samples – pitch down not
up so that the samples sound natural
• Fine-tune
• Save your virtual piano in the sampler
The character of the piano in a particular space, the positioning of the microphone, accuracy of the pre-amp gain levels, and the ability of the pianist to play notes at consistent velocities will determine the quality of your recording and the quality of your recording will determine the quality of your samples.
It takes a few runs to get the hang of everything, but it’s well worth it if you want your own one of a kind characterful virtual piano. Have fun experimenting, there are so many variables that every time is unique.
About the author
Gloucester-based music producer, George Moorey likes to weave a little historical magic into his recordings, by taking his mobile setup – which now includes an Audient iD14 audio interface – into some of the ancient buildings of his adopted home. Capturing the spirit of the city in the form of samples, he showcases them in a surprising variety of genres including choral, classical, folk, hip-hop, electronica, grime and rock.
Our Products
-

2in | 2out Audio Interface
-

10in | 6out Audio Interface
-

10in | 14out Audio Interface
-

20in | 24out Audio Interface
-

24in | 32out Audio Interface
-

2in | 2out Audio Interface
-

4in | 4out Audio Interface
-

24in | 24out Audio Interface
-

Everything you need to start recording
-

8 Channel Smart Preamp with AD/DA
-

8 Channel Mic Pre & ADC
-

8 Channel Mic Pre + Tone Control
-

Modular Analogue Recording Console
-

Small Format Analogue Recording Console
-

Small Format Analogue Recording Console
-

Immersive Audio Interface and Monitor Controller
-

Desktop Monitor Controller