


Get your DI right first!
As with recording any of your instruments, the source itself is the most fundamental component to get right. A DI, or direct injection, is a way of connecting a low impedance unbalanced signal, to a high impedance balanced input. In the case of using amp sims, it is a way of taking the signal directly from your guitar into a microphone preamp. As this is the signal that will be feeding the amp sim, it’s important to record this in the best quality possible.
Ensure your strings are fresh (absolutely brand new strings won’t be ideal, so give them a little time to “play in” and lose the harsh top end.

Ensure that the guitar is properly muted, for example, Les Paul Style guitars will have extra resonances from the string above the nut, and below the bridge. You can use a piece of foam to mute these if needed.
Change the guitar pick – if you are finding your guitar parts are very spiky and transient, going to a softer guitar pick can help even out the notes you are picking. Conversely, switching to a harder pick can help get a more percussive tone.
Change the impulse response (IR)
When playing through a real guitar amp, one of the most important factors in the sound is the speaker used. This acts like an EQ across the guitar amp signal and is heavily subtractive, meaning that the speaker itself is removing some of the frequencies. An impulse response is a way of capturing this EQ response as well as the microphone used, and allowing you to use it later on.
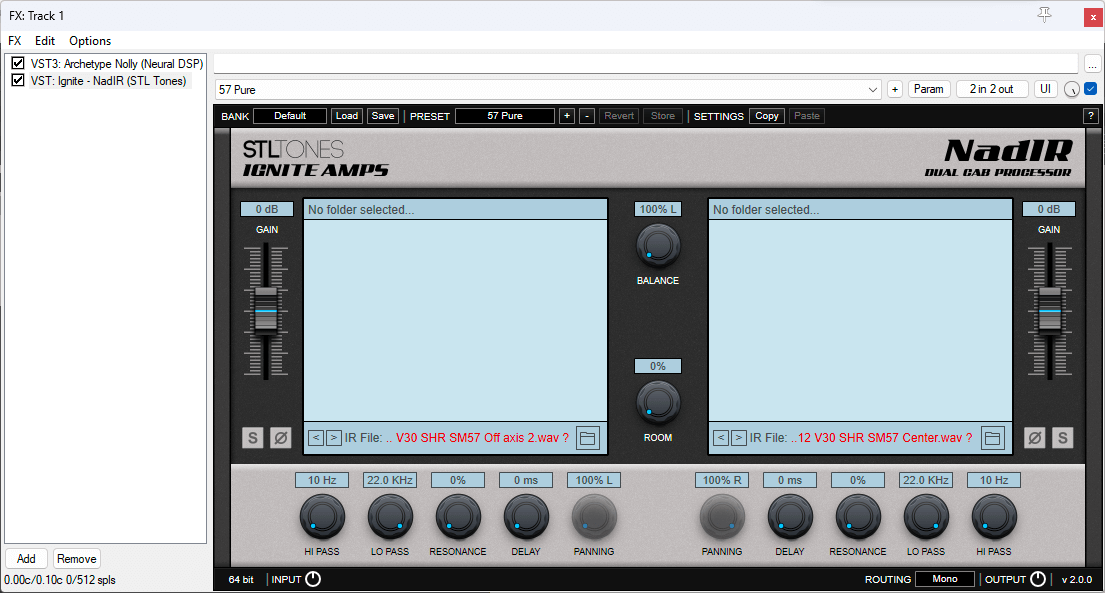
Cabinets themselves are categorised by the speaker size and number of speakers. A 1×12 cabinet refers to a single 12 inch speaker. A 4×12 cabinet is 4, 12 inch speakers in the cabinet.
An impulse response itself is usually a WAV file that is opened inside an impulse loader. However these can also be featured in your amp sims as a graphical interface.
The three main things you want to look out for is the speaker type, microphone and mic orientation (on or off axis).
In the following audio clips you can hear the drastic effect of changing the impulse response.
The clip features the same guitar playing the same take, into a marshall style amp, and then 3 different cabinet impulse responses.
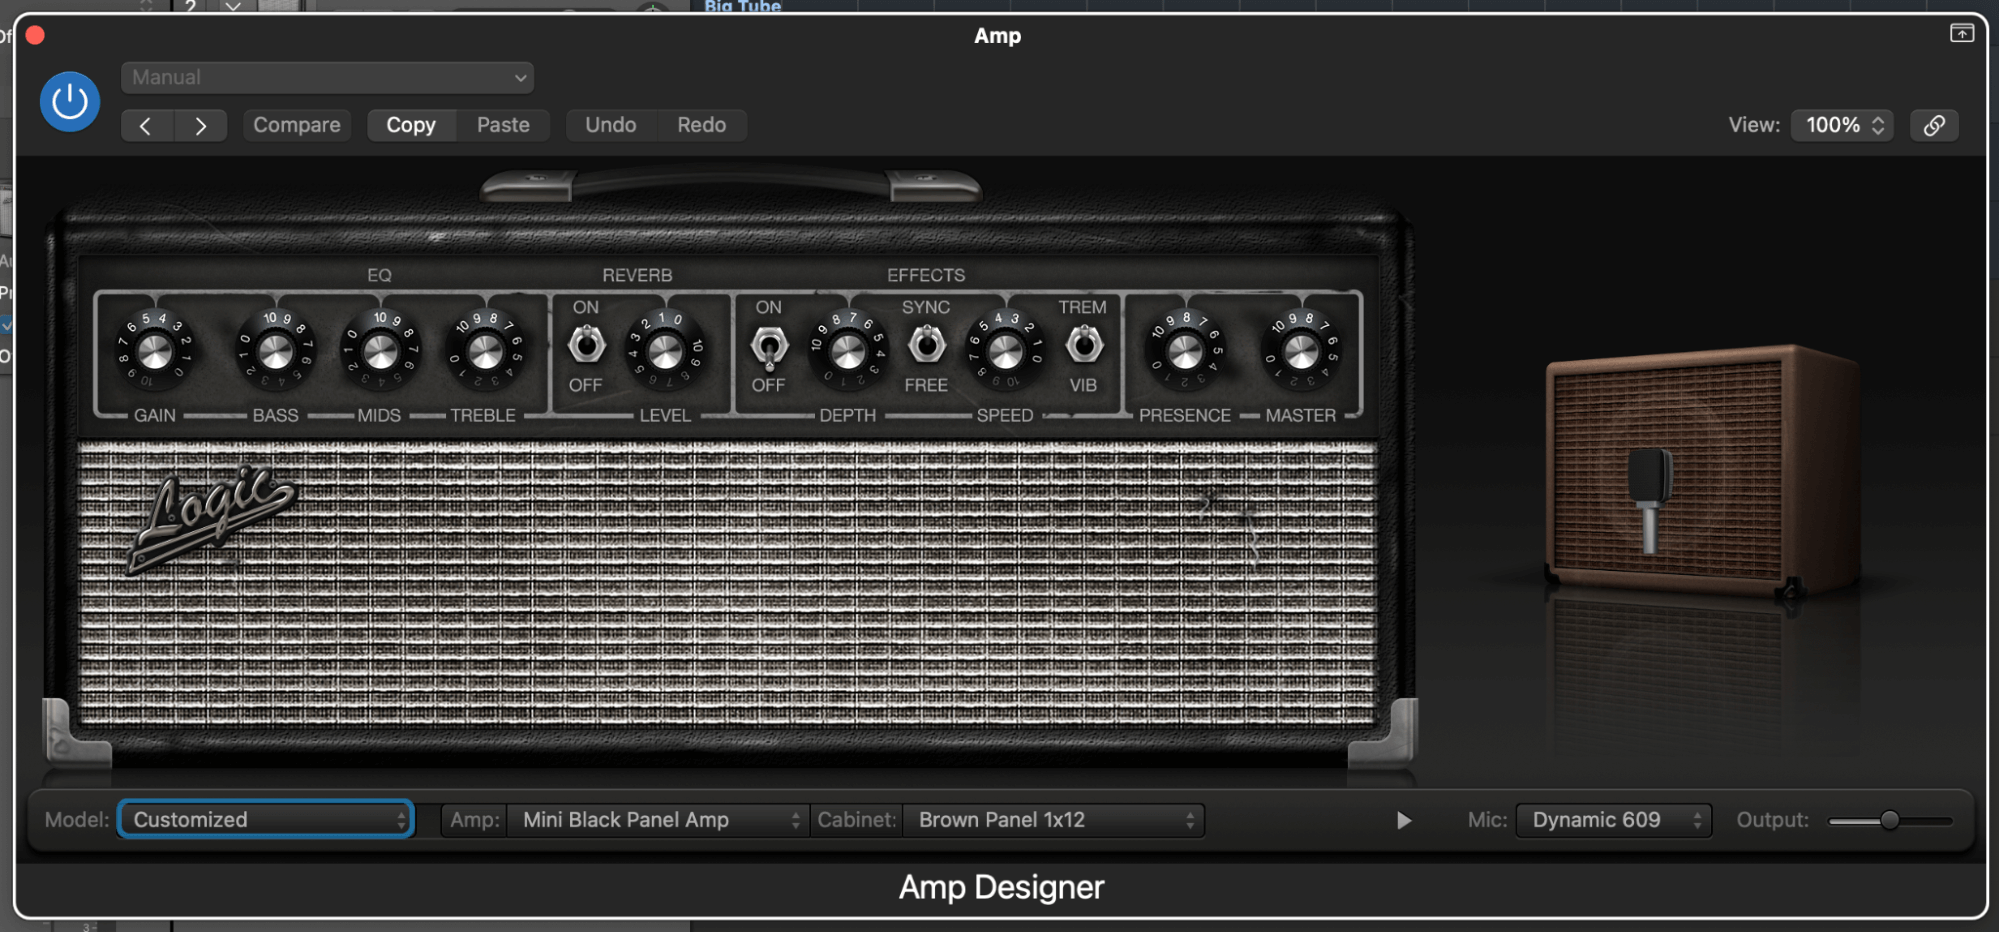
Understand your amp model
Due to the way amp simulators are created, they are nearly always based upon a real life amplifier circuit. It’s helpful to understand what these amp models are based upon, so you can choose the amplifier that suits you the best. Different amps offer different characters and “flavours”.
Some classic flavours that you are likely to find and what they may be used for can be found below.
Tweed – Refers to very early Fender tube amplifiers due to them being covered in a tweed style tolex. While there is no one specific “tweed” amp, these generally have a more gentle distortion character and a loose bass response.
AC Top boost – Refers to the VOX AC30 series of amps, known for their sparkly top end and transition to distortion character.
British Rock – Refers to the classic Marshall rock amps. Heard on countless records, they have a thick distortion character and plenty of gain on tap. You may also see these referred to as a vintage UK stack, where the cabinet will be a large 4×12 cabinet.
High gain – Refers to more contemporary tube amplifiers with huge amounts of gain. The 5150 and 6505 circuits are two highly revered options due to the huge amounts of gain on offer, as well as still retaining clarity. These also have a very thick low end and push the midrange aggressively.
Boogie – Refers to the brand Mesa Boogie, also famous for creating high gain amps such as the Dual and Triple Rectifier. While offering a different type of high gain character to the 5150/6505 circuit.
Jazz Chorus – Based on the Roland amp of the same name, the Jazz Chorus is a solid state amp, it has a chorus circuit built in, hence the name.
These are very clean amplifiers so while far from ideal for gain tones, they are perfect for jazzy clean tones.
While this by no means exhausts all the different amplifiers and options out there, it does give you a good idea of what each circuit is generally designed to achieve.
The clip below uses the same DI and cabinet impulse, the only difference is the amp model itself. The first amp is based on a hot rodded higher gain amp While the second is a classic British rock amplifier.
Use EQ
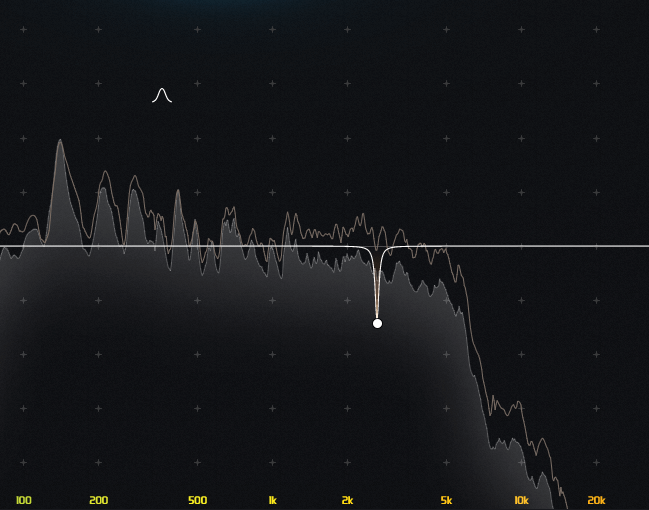
While guitar amps are very broad in their range of frequencies, not everything is required. Generally the extreme top and bottom end is not adding anything useful; the screenshot below shows a high gain guitar signal, which has the largest amount of harmonic distortion.
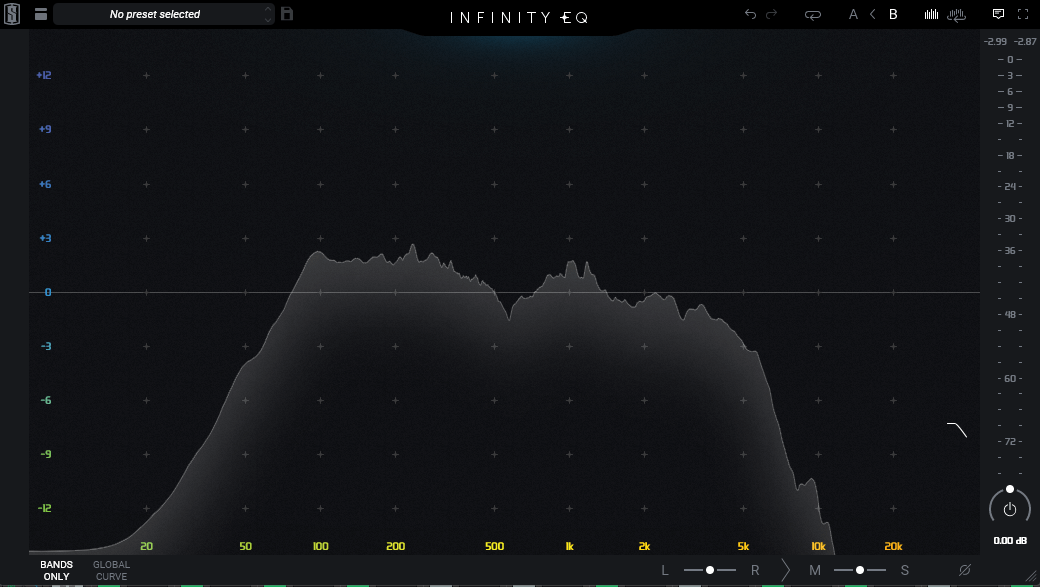
While the majority of the energy is focused in the 100hz, to 6Khz region, there is still audio information above and below that. When it comes to fitting your guitar amp sim into the mix, high and low cutting can focus the guitar tone, and give more headroom for your other instruments.
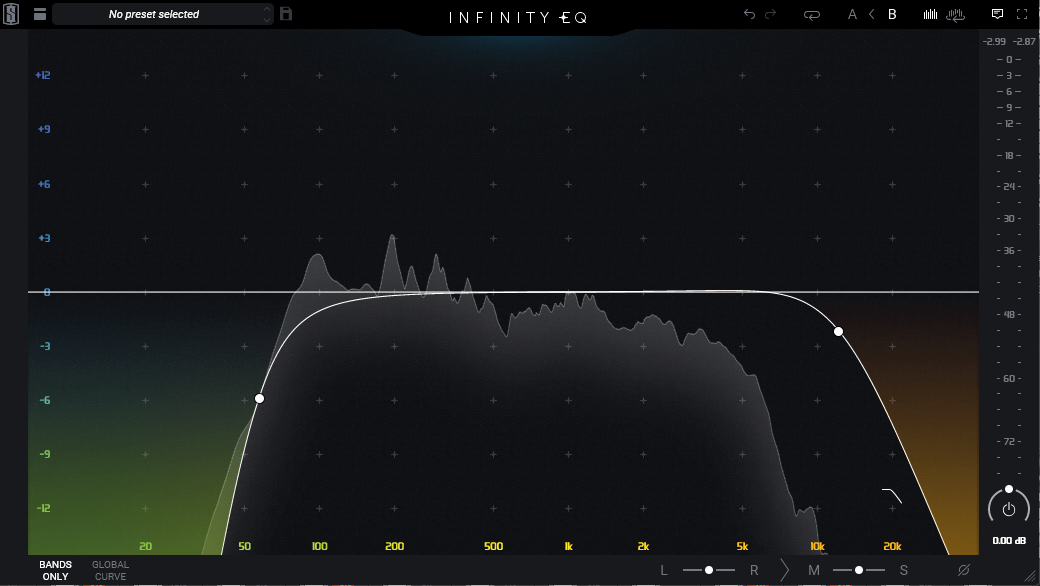
Much as working with a real guitar cabinet, you will also get resonances in the IR. So check for whistling frequencies that don’t change with the note being played, and remove where needed with notch EQ. In isolation these moves may make your guitar sound less full, however in the context of a full mix, this will allow you to push the parts of the guitar signal that you want even further without destroying the other elements you’re trying to balance it with.
Gain Staging
Just like any other analogue or digital signal processor, amp sims will have an operating window for input gain. Too little and you won’t be using the amp sim most effectively, you will get less saturation and may struggle to get the amp to fully break into distortion. Too much level and you will find you’re clipping the input and getting unwanted digital distortion that doesn’t sound pleasing. Use the input gain control of the amp sim to control your input level and check for clip meters lighting up, you always want to avoid clipping at this stage.
Use FX
Very few guitarists just plug a guitar directly into an amplifier, but rather use some pedals for processing the signal. Pretty much any effect you can imagine, exists in pedal form, and this is also the same for plugins!
While there are no rules, there are some conventions to experiment with.
Distortion, overdrive and dynamic effects generally work best in front of the amplifier, changing the way the preamp stage reacts to your guitar signal, while often this is to add gain – it can also be used to shape the tone on the way into the amp.
Much the same as the effects above, chorus, phase and flange also generally work best into the amplifier.
Spatial effects, like delay, reverb and echo generally work best after the amp and before the cabinet. This would be where an effects loop is placed in a analogue amplifier;
Input > Preamp Stage > FX loop out > FX loop Return > Power Amp > Output (to speaker)

Our Products
-

2in | 2out Audio Interface
-

10in | 6out Audio Interface
-

10in | 14out Audio Interface
-

20in | 24out Audio Interface
-

24in | 32out Audio Interface
-

2in | 2out Audio Interface
-

4in | 4out Audio Interface
-

24in | 24out Audio Interface
-

Everything you need to start recording
-

8 Channel Smart Preamp with AD/DA
-

8 Channel Mic Pre & ADC
-

8 Channel Mic Pre + Tone Control
-

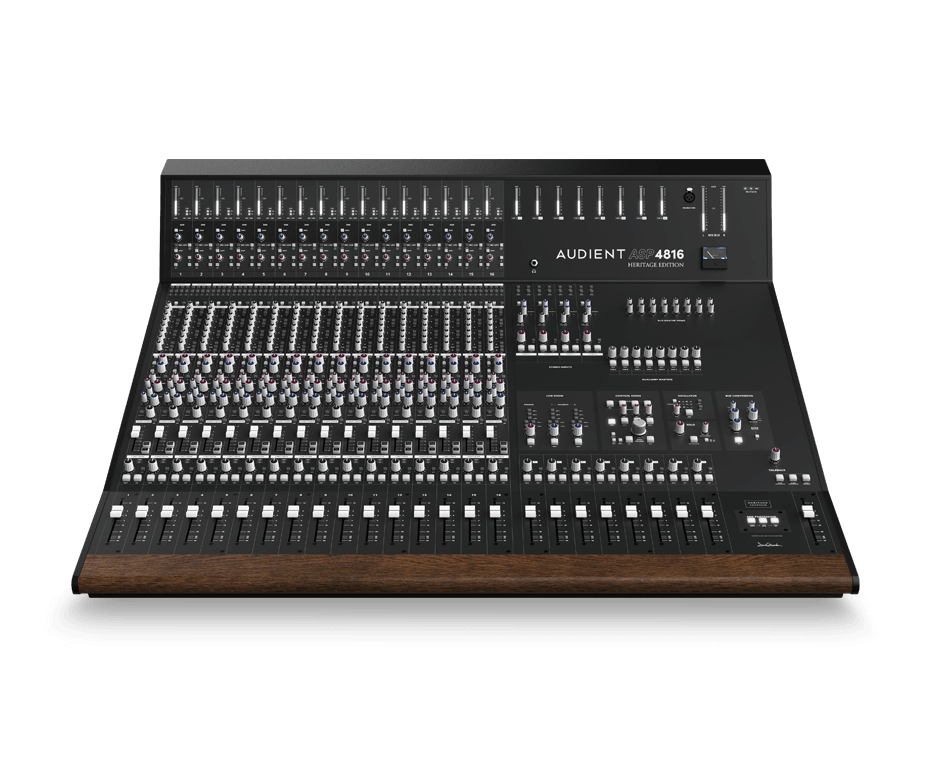
Modular Analogue Recording Console
-

Small Format Analogue Recording Console
-
Small Format Analogue Recording Console
-

Immersive Audio Interface and Monitor Controller
-

Desktop Monitor Controller