


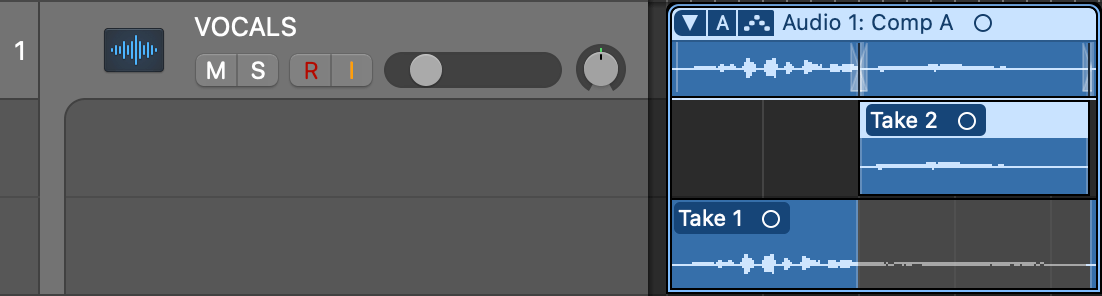
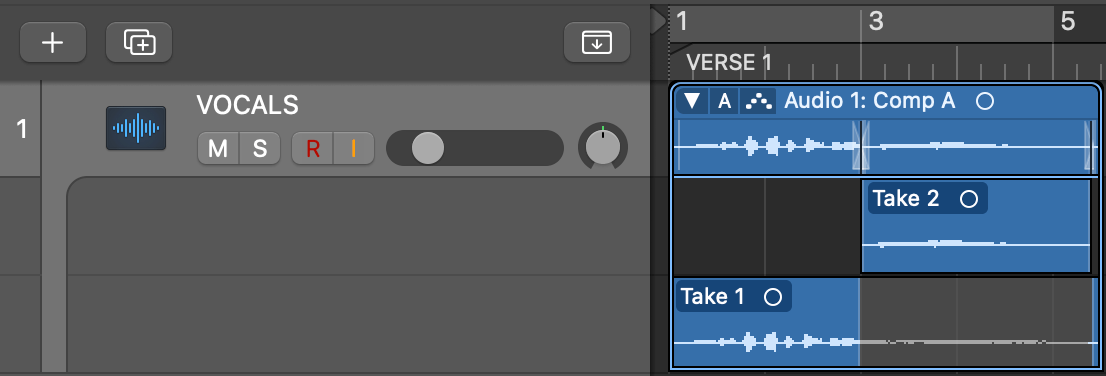
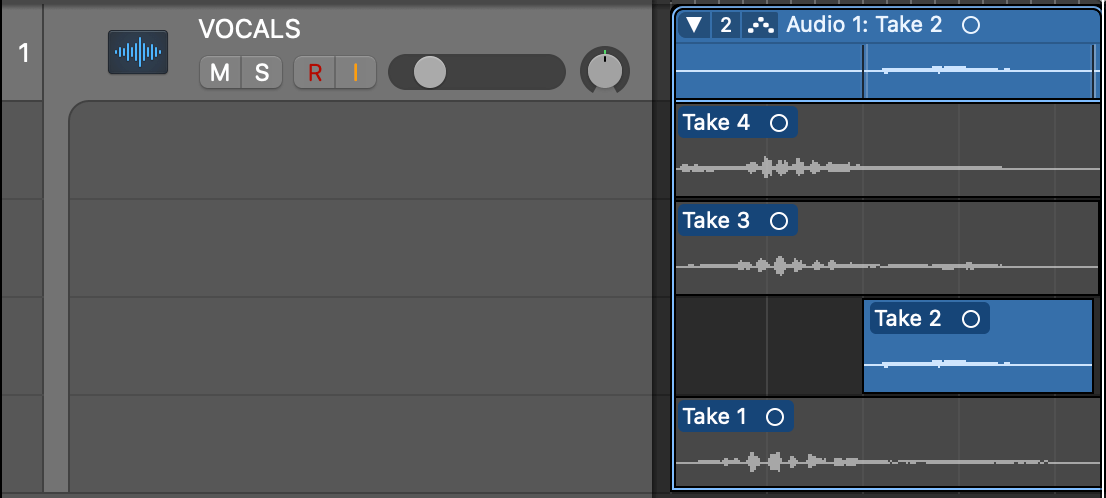
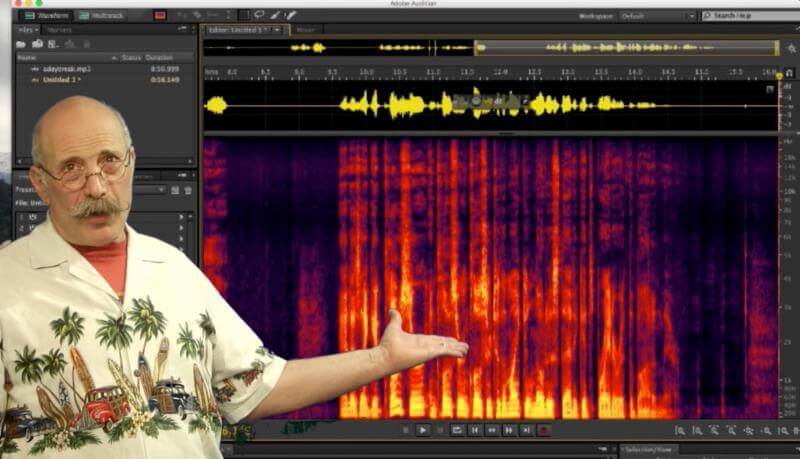
Use your DAW’s built-in comping system
If you’re still comping your vocals by recording to multiple discreet tracks, then cutting and pasting between them to build the comp on a dedicated master track, you’re missing a trick, as all major DAWs feature onboard comping systems that make the whole process far slicker and quicker. This will take the form of a single track onto which you can record as many takes of a vocal in a looping session as you like, each one added to a stack of nested sub-tracks. By dragging contiguous regions across the sub-tracks to select the best bits of each take, the final comp is created without actually cutting or moving anything – playback simply passes through all the sub-tracks together, effectively ‘soloing’ the selected take at any given point.
If you’ve so far resisted using your DAW’s comping system because of reluctance to mess with your established workflow – or, indeed, you’ve never even tried comping before – this could be nothing short of a gamechanger.
Comp in sections
While there’s nothing wrong with having your singer run through as many takes of the full song in one go as needed to build the final comp, generally speaking – and depending on the abilities of said artiste – it’s more productive to track one section at a time: the first verse, then the chorus, then the second verse, etc. The reasons for this are simply that some sections will require more attempts than others, due to their technicality or particular feel; and that singing the whole song several times in a row is going to exhaust your singer, resulting in the last take sounding noticeably different to the first as the energy drops. Approaching each section individually, with short breaks in between if needed, should prevent this sort of qualitative deterioration.
Don’t record too many takes
For the same energy-related reasons as described above, no matter how small the sections you’re recording, don’t flog your vocalist to the point at which they not only can’t sing as well as they did at the start of session, but possibly don’t even want to try. We’d suggest a maximum of four or five takes for any given comp, although this might depend on its length and technical difficulty.
Make notes as you record
At the end of a vocal recording session, you’ll be faced with stacks of separate takes for each section of your song – a lot of material to listen to and comp. If you’re using your DAWs built-in comping system, keeping on top of it all will be much easier than managing a ton of discrete files on separate tracks; but even so, it’s a good idea to make notes as the singer performs each take, highlighting the best and worst of them, so you can efficiently narrow down your selection process right at the start of the comping stage. How you do this is entirely up to you: you could simply list all the takes as they happen and give them a score on the fly, or pre-prepare some form of chart.

Don’t only comp with the vocals soloed
When comping, it’s understandable that you might want to spend most of the time with the vocal soloed, thereby making it easier to pick out those flawless takes and ensure that there are no problems with the edits you’re making to them. Although that level of forensic insight is definitely necessary to an extent, you should really be spending most of the time listening to the vocal in the context of the full track, since this is ultimately where it needs to work. A take that sounds on the money in isolation won’t necessarily fit with the vibe of the rest of the track at that point as tightly as another take that doesn’t stand out quite as well when auditioned on its own. So, solo when you need to fix something or zoom in on a particular edit, and stay in the full mix the rest of the time.

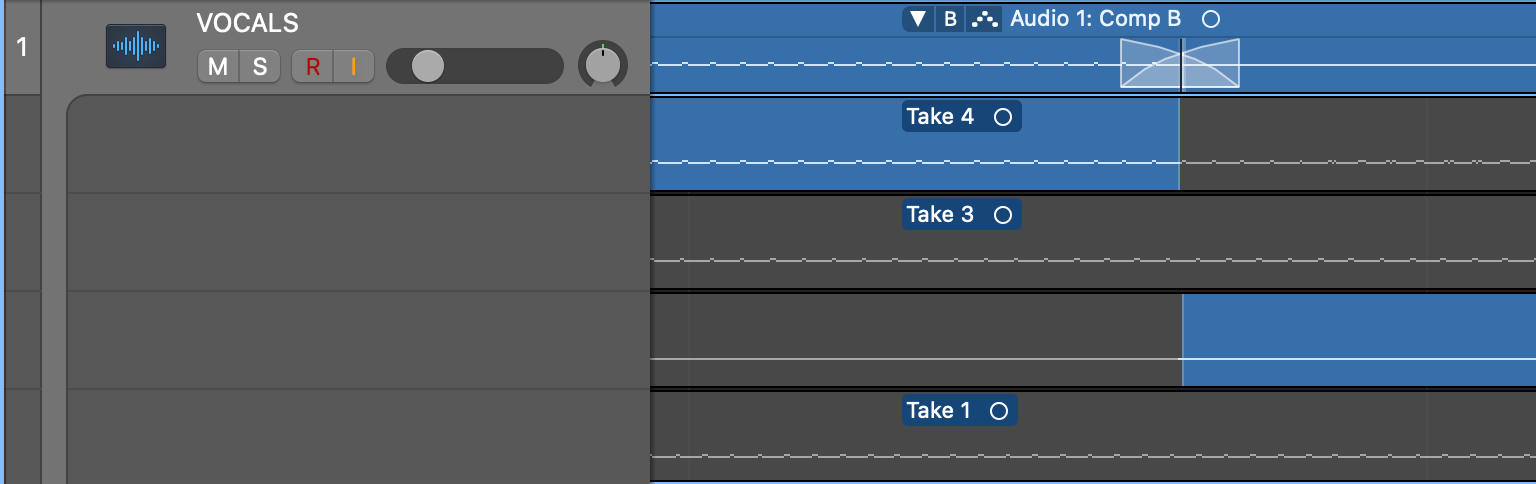
Do whatever it takes to hide cuts
Clearly, one of the keys to a great comp is ensuring that every transition between takes – whether it’s at the start of a word or phrase, or dividing a word into its component syllables – is totally clean and seamless, so it stands to reason that making a cut in a silent section of the recording, or at an atonal consonant sound, is going to result in less potential issues than cutting within the ‘body’ of a word. If you do need to conceal a dodgy edit, though (a slight pop or click, perhaps), you might be able to use other elements within the mix to do it – coinciding a rough edit with a snare drum hit or other transient-heavy sound, for example, could be all it takes. However, if you do need to get corrective on an edit that just can’t be hidden, a short crossfade often works – if you’re using your DAW’s built-in comping system, these may well be applied automatically anyway.
Watch out for breath sounds
In the previous tip, we suggested making comping cuts in silent passages of your vocal whenever possible. However, do be sure that those passages are actually silent, and not occupied by breath sounds that don’t join up cleanly between takes. Be very careful when cutting into the middle of a breath, as you don’t want that audible inhalation to stop dead and sound unnatural, or suddenly jump to a deeper, different sounding intake of breath from another take. Much of the time, cuts between two takes of the same breath will work fine, but when they don’t, the solution is to simply to make your cuts before or after the breath sound.


Our Products
-

2in | 2out Audio Interface
-

10in | 6out Audio Interface
-

10in | 14out Audio Interface
-

20in | 24out Audio Interface
-

24in | 32out Audio Interface
-

2in | 2out Audio Interface
-

4in | 4out Audio Interface
-

24in | 24out Audio Interface
-

Everything you need to start recording
-

8 Channel Smart Preamp with AD/DA
-

8 Channel Mic Pre & ADC
-

8 Channel Mic Pre + Tone Control
-

Modular Analogue Recording Console
-

Small Format Analogue Recording Console
-
Small Format Analogue Recording Console
-

Immersive Audio Interface and Monitor Controller
-

Desktop Monitor Controller