


As a staple effect in the vast majority of mixes, reverb is a part of the production process that’s all too easy to take for granted. Get it wrong in any of a number of ways, though, and your tracks will suffer for it. Here are five pitfalls to look out for…
Setting the wet mix too high
Perhaps the easiest mistake to make with reverb is setting the dry/wet mix control too far round in favour of the latter. Running your reverbs overly wet is a surefire way to swamp the soundstage with overblown tails, but there are a few ways in which such issues can be alleviated.
The most straightforward solution is to simply dial the effect back towards the dry side of the range; or, if your reverb is on an auxiliary channel (and thus set 100% wet), lower the send controls on each incoming channel as appropriate. A helpful technique for finding an effective wet/send level is to dial back the reverb until it’s on the verge of being under-present in the mix, then raise it a touch. This should make for a good starting point from which to tweak the balance as befits the direction of the track.
Another consideration here is sidechain ducking – ie, the automatic reduction of the reverb level whenever a signal is present at the input. Although this isn’t really a viable alternative to turning down a reverb that’s too wet, it is a great solution when you need your tail to be prominent but also want the source material to be clearly heard. A few reverbs, including LiquidSonics Reverberate 3 and Seventh Heaven Pro, and Waves H-Reverb, feature onboard ducking controls, but you can get the same effect by placing a compressor after your reverb plugin and keying its sidechain off the input signal, then setting the threshold, ratio and attack/release times to taste.
Using too many reverbs
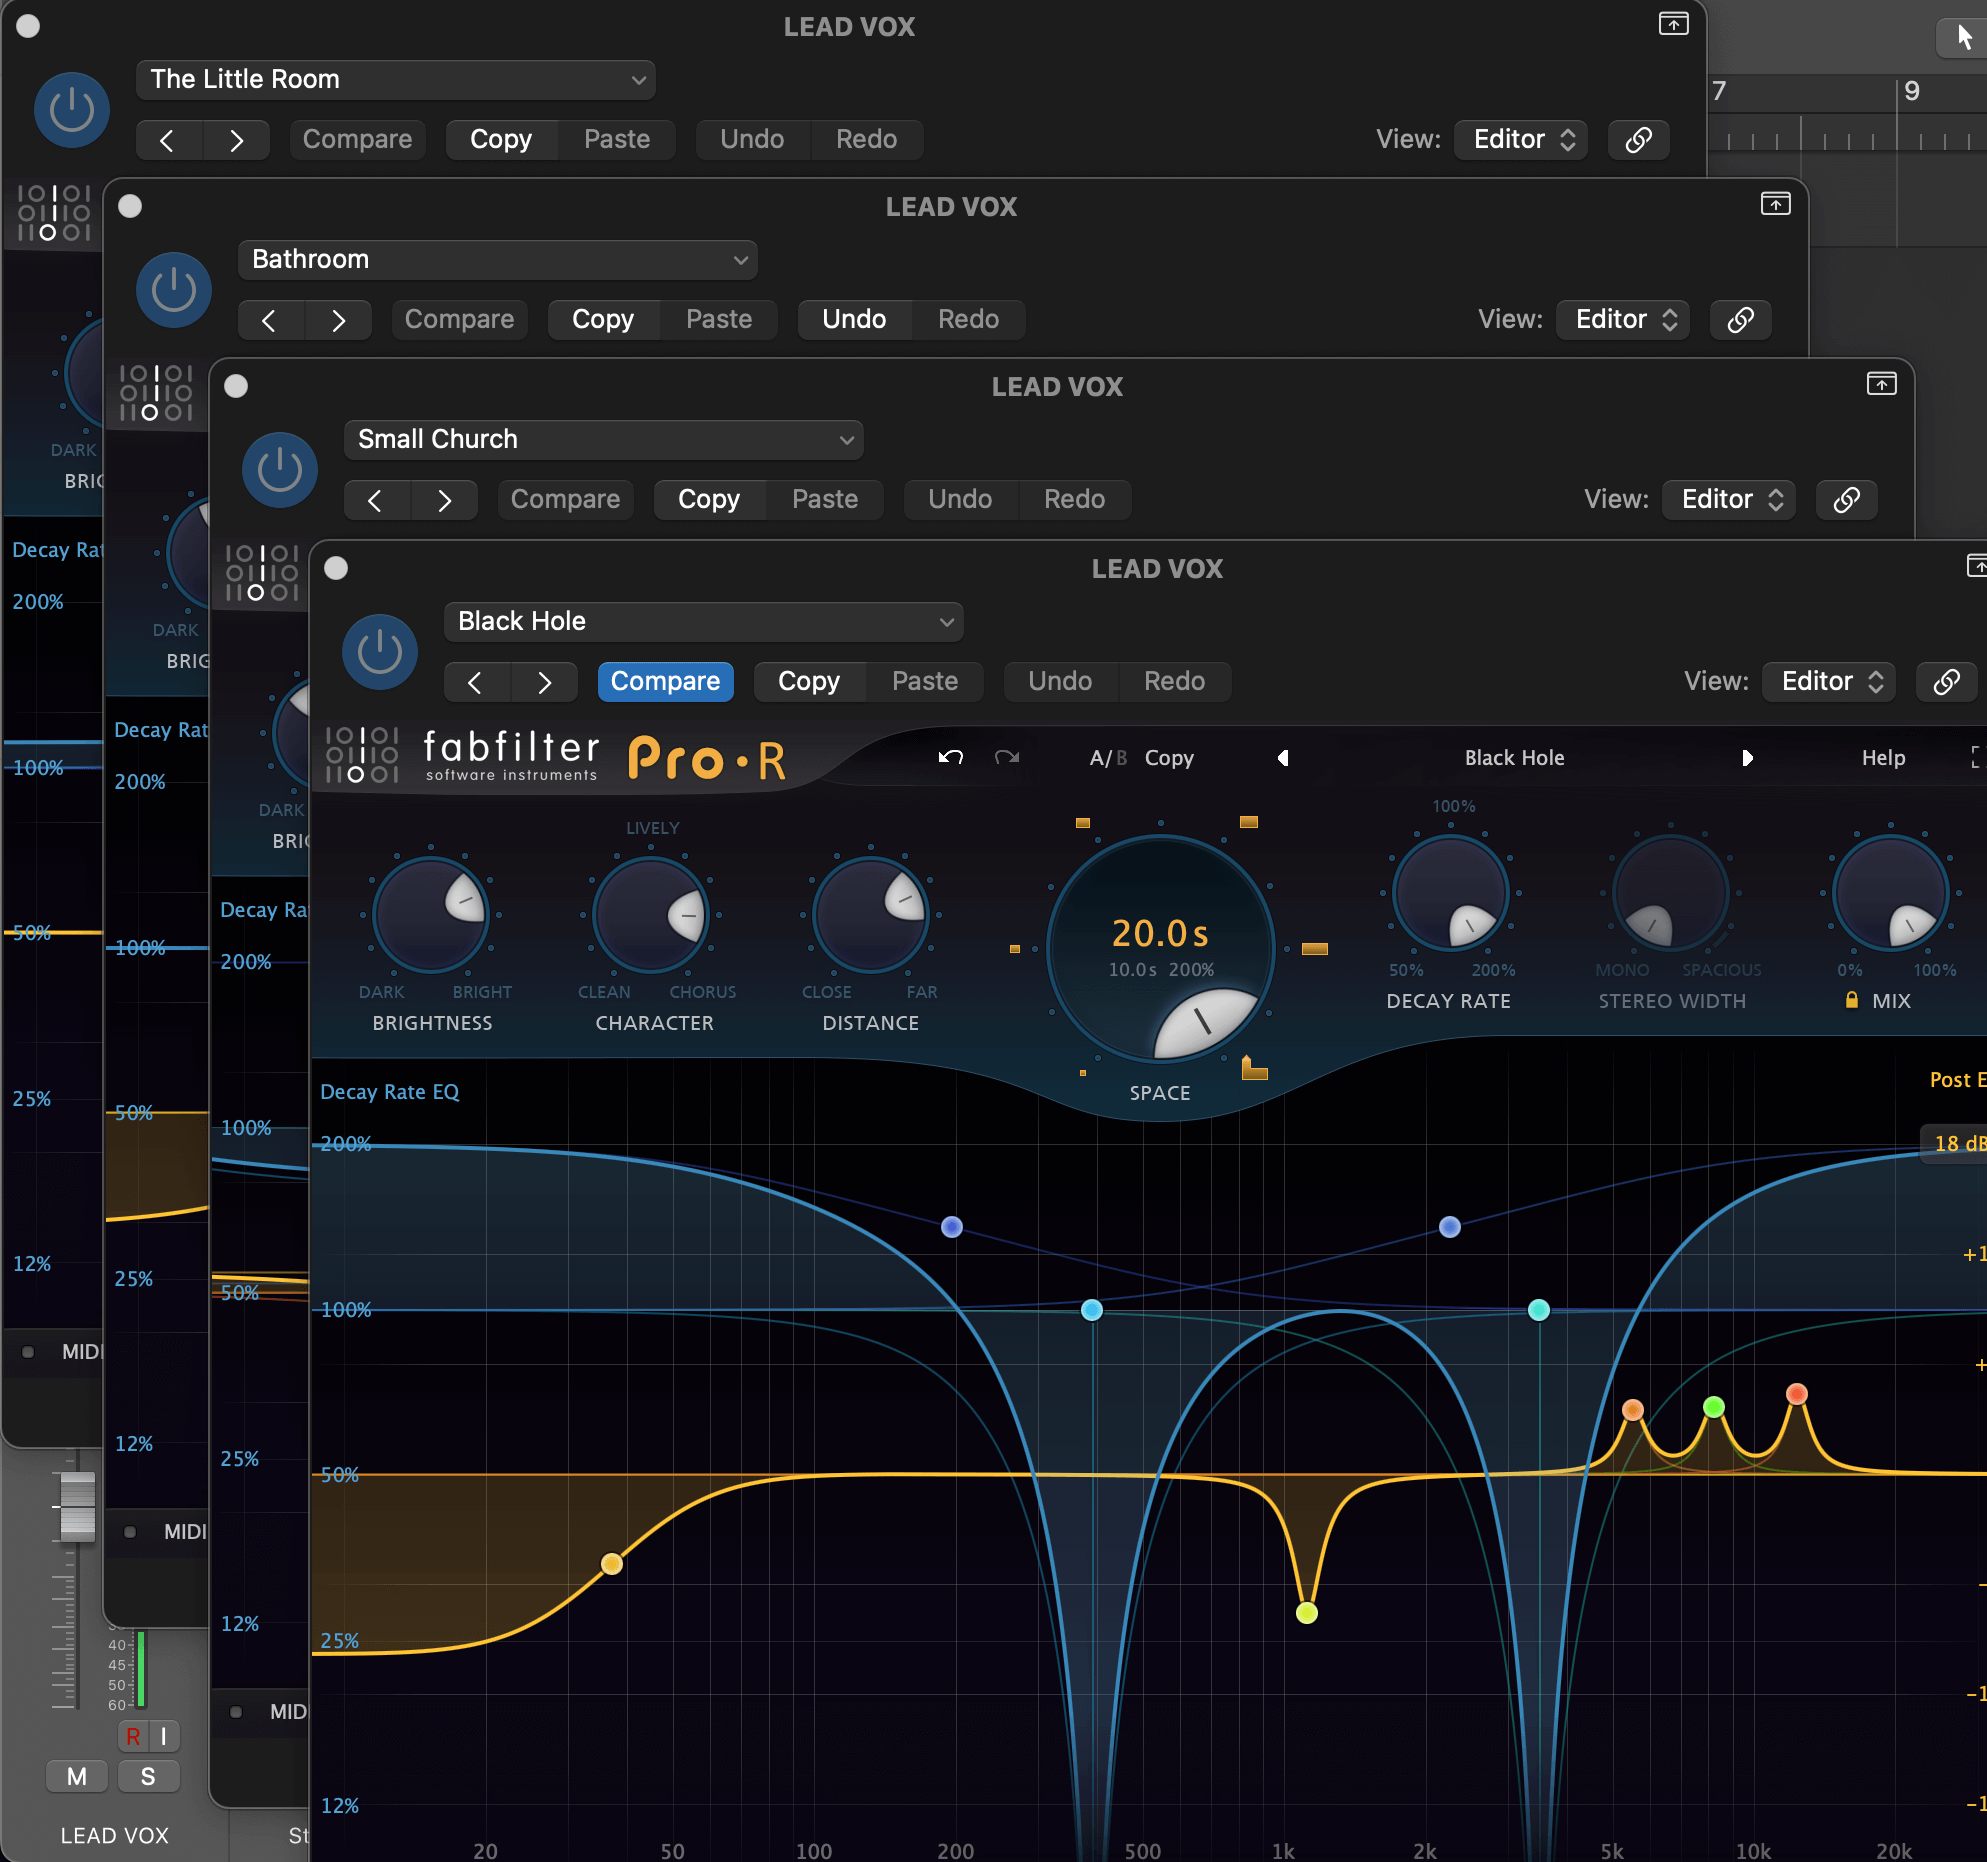
One error frequently made by newcomers to music production is throwing a separate reverb plugin on every channel that ‘needs’ it, inevitably leading to a cluttered mix with a thoroughly confused sense of space. However, even more advanced practitioners are sometimes known to commit the same offence, if to a lesser extent. Most mixes should feature no more than two or three reverbs, not taking into account those used as special spot effects. This is, after all, what auxiliary returns with send controls from individual mixer channels were invented for: routing multiple parts to a single reverb together not only results in a much more coherent mix, but also enables independent processing of dry and wet signals (see below), and saves on precious CPU cycles.
Of course, if you need to fire up a dedicated plate reverb just for the snare, or a particular space for the backing vocals, don’t be shy about doing so. But do keep an ear on how your reverbs are all coming together as a whole. Even with multiple ambiences and tails going on at once, the overall effect should be of the whole mix occupying a broadly cohesive space.
Choosing the wrong algorithm for the job
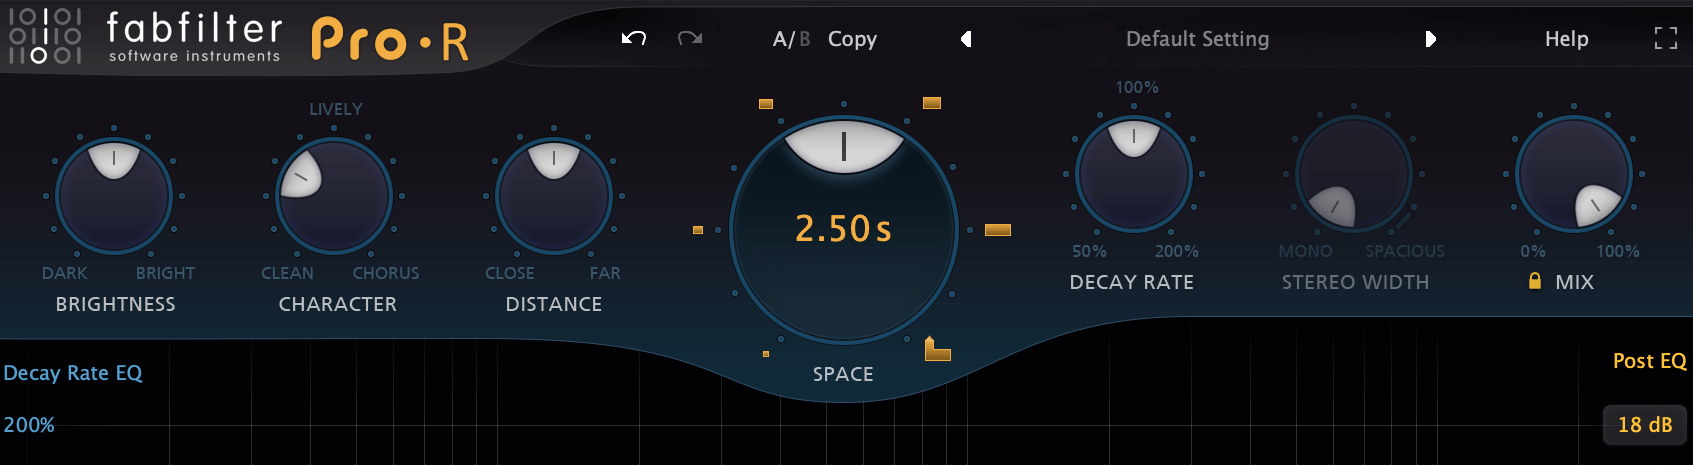
While there are no hard and fast rules when it comes to selecting the ‘right’ algorithm for a reverb under any circumstances, if you’re working on an intimate acoustic-guitar-and-vocals number, say, that ‘Epic Stadium’ preset probably isn’t the appropriate choice – a chamber, room or small hall would clearly be a better fit. That’s not to say that said stadium might not make for an interesting experiment if you edit its size, reverb time and all the rest of it, but why make more work for yourself when your reverb plugin will make it perfectly apparent which algorithm you should generally be considering in any given scenario by the naming of its presets?
Neglecting EQ
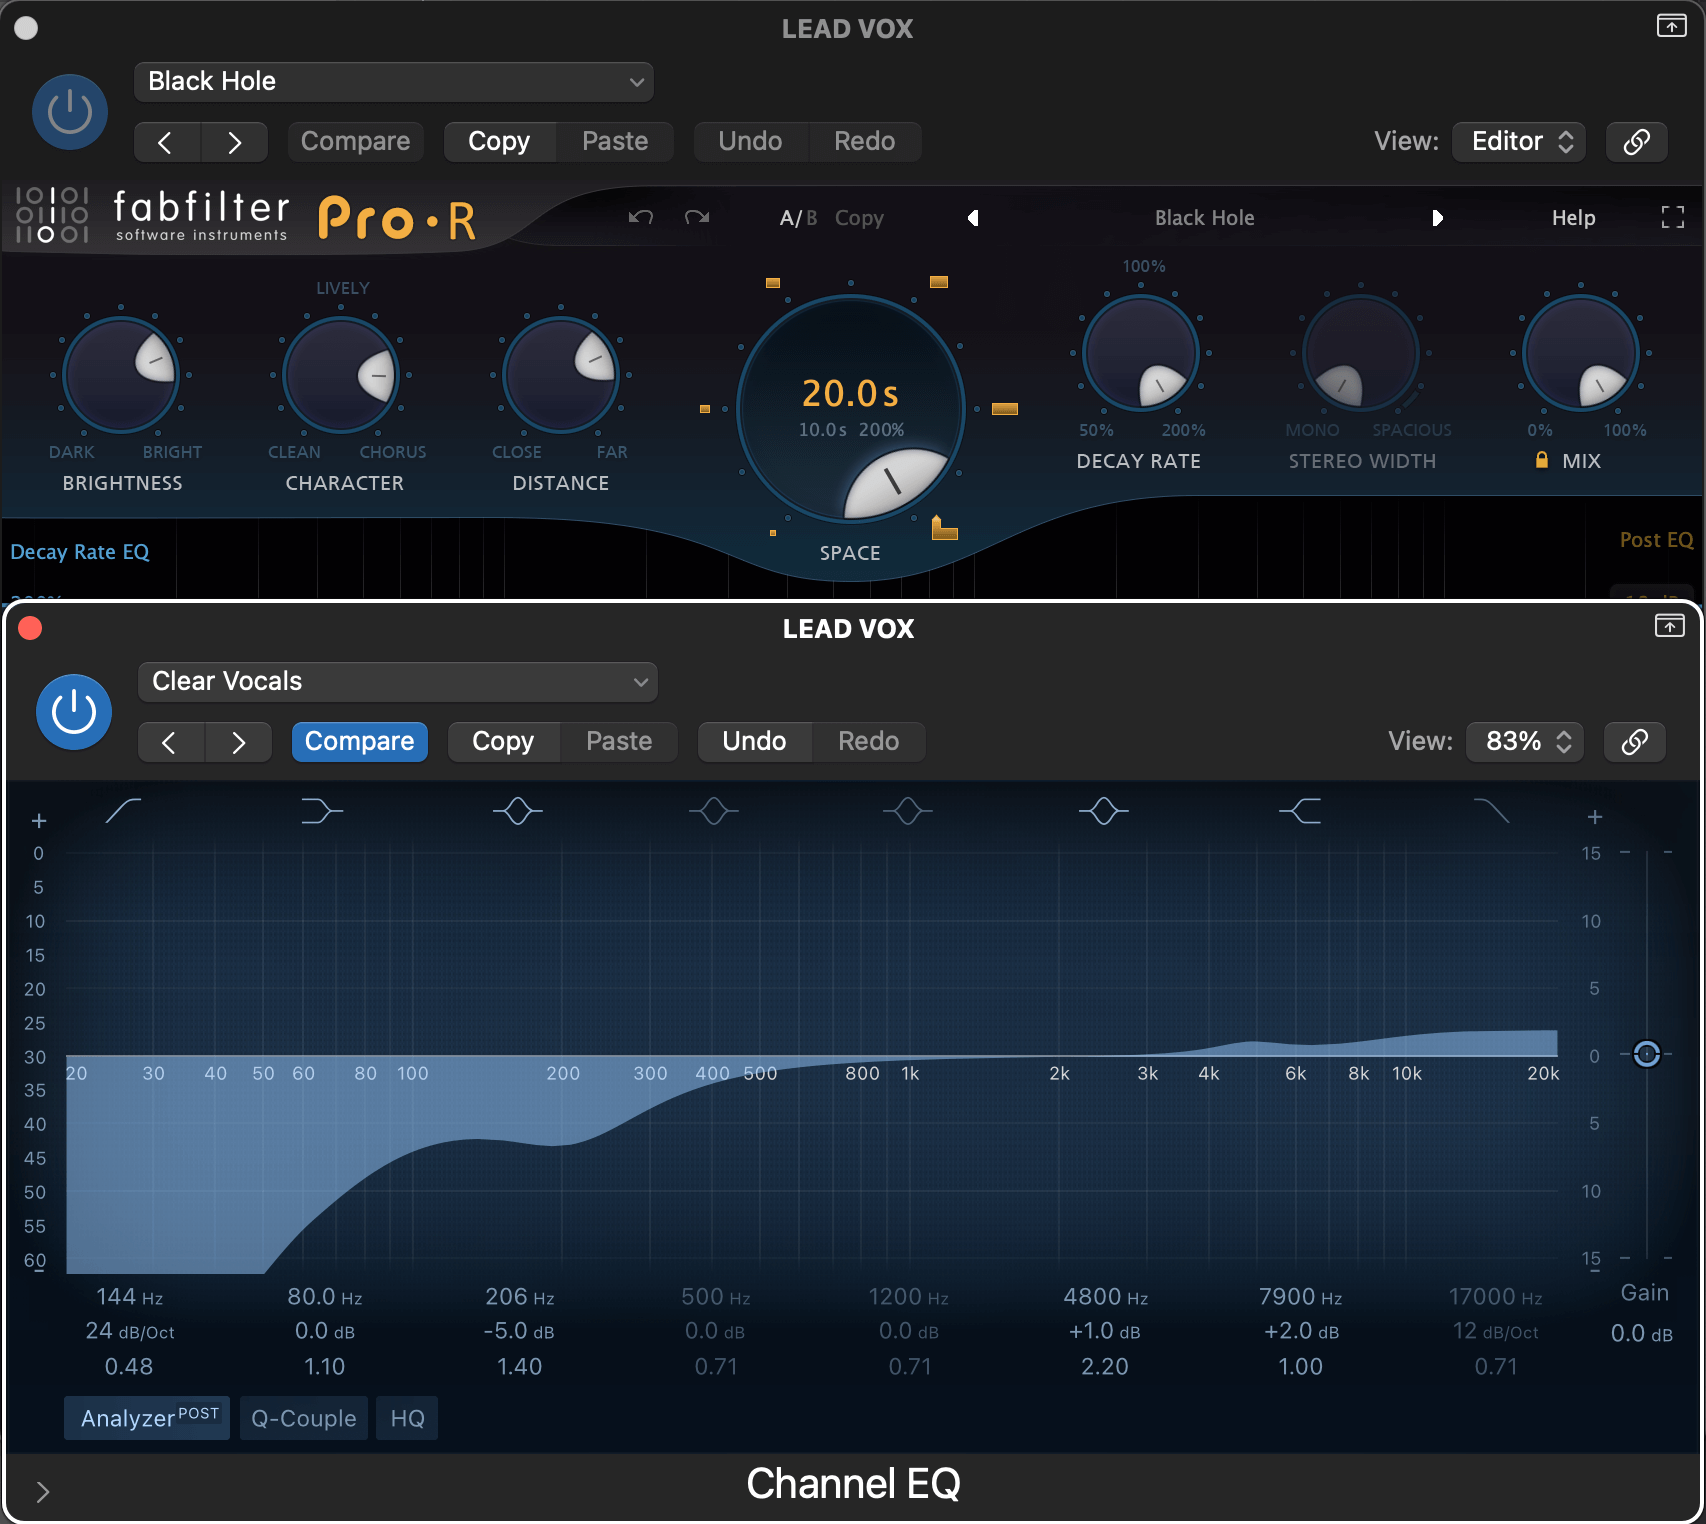
It’s almost always sacrosanct that the dry signals in any mix should be the priority and clearly audible all times, with reverb (and other effects) sitting behind or underneath them. While dry/wet balancing and ducking offer effective broad-strokes functions for separating source material and reverb, the most powerful tool for fitting reflections and tails around their input sources is EQ. If you’re not using it on most if not all your reverbs, you certainly should be, even if just to shave off invariably destructive low frequencies.
Most reverb plugins have filters and sometimes more versatile EQ sections built in, but if yours doesn’t or you need more control, fire up an EQ plugin instead. Whether to insert your EQ before or after the reverb (or both!) will depend on whether you prefer to alter the response of the reverb to the frequency content of the input (before) or sculpt the wet signal itself (after). The overall goal, though, is to make cuts in the reverb wherever it masks or clashes with any dry signal happening at the same time.
Note that this is one of the main reasons for running reverbs on auxiliary buses, as shaping a track-inserted reverb with a dedicated EQ plugin will obviously also affect the dry signal. Sometimes, that might actually be desirable (spot FX and sound design, for example), but for most instrumental and vocal processing purposes, the sounds of the source signal and reverb should be treated as separate elements.
Not taking advantage of automation
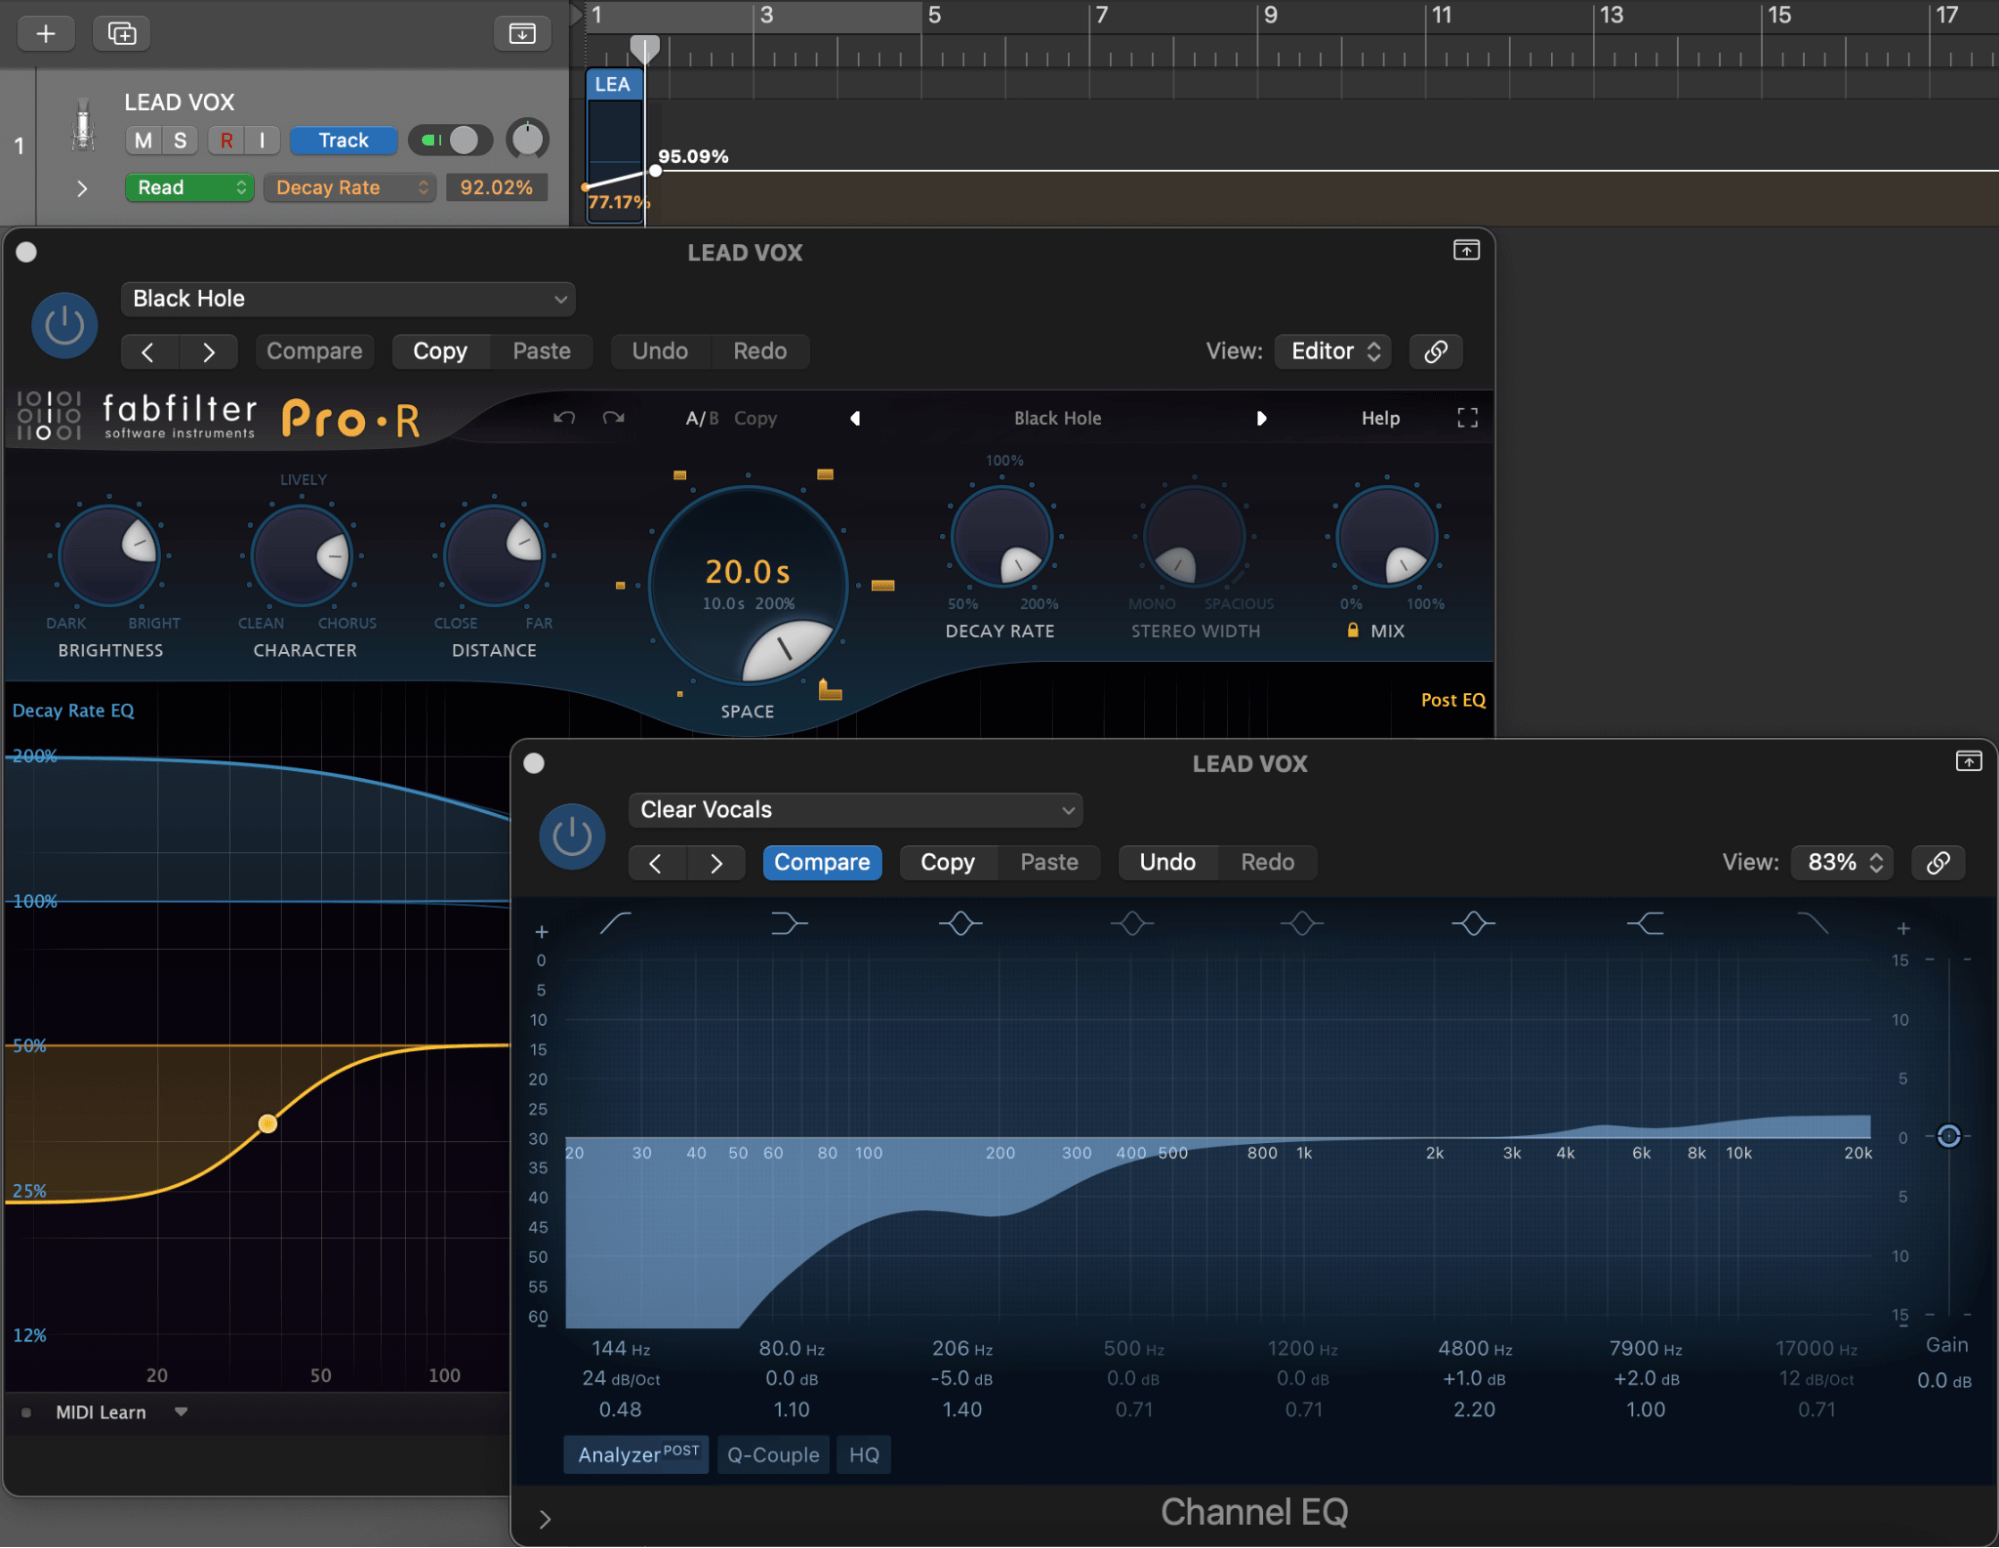
Just like everything else in the mix, changes to the context in which an individual reverb sits can’t help but alter – and, indeed, be altered by – its perceived sound and presence, so don’t just treat it as a set-and-forget process. The reverb on your drum kit, for example, might sound amazing when the track is in full swing but too wet in the drop to just drums and bass; or perhaps your short vocal reverb is overwhelmed by the piano notes that accompany it in the second verse…
The automation system in your DAW lets you program or record real-time changes to every aspect of your reverb plugins, from volume, size, time and dry/wet mix to EQ and ducking amount, so use it to dynamically shift those parameters around as required, enabling focal track elements to shine through and the ambience of the mix to make sense at all times. Don’t go overboard, though – such movements should be essentially imperceptible to the listener.


Our Products
-

Interface audio 2 entrées - 2 sorties
-

Interface audio 10 entrées - 6 sorties
-

10in | 14out Audio Interface
-

Interface audio 20 entrées - 24 sorties
-

24in | 32out Audio Interface
-
Interface audio 10 entrées - 14 sorties
-
Interface audio 10 entrées - 4 sorties
-

Interface audio 2 entrées - 2 sorties
-

Interface audio 4 entrées - 4 sorties
-

24in | 24out Audio Interface
-

Tout ce dont vous avez besoin pour débuter l'enregistrement
-

8 Channel Smart Preamp with AD/DA
-

Préampli micro 8 canaux avec CA/N
-

Préampli micro 8 canaux + Tone Control
-

Console d'enregistrement analogique modulaire
-

Small Format Analogue Recording Console
-

Small Format Analogue Recording Console
-

Immersive Audio Interface and Monitor Controller
-

Contrôleur de monitoring de bureau
-
Contrôleur de monitoring multicanal