


Read Time: 10 Minutes
Step 1: Preparing Your Vocal Track
Before diving into EQ, it’s crucial to start with a well-recorded vocal. Ensure your recording environment is treated to minimise reflections and background noise. Use a high-quality microphone and maintain a consistent distance from the mic.
Example: Record a vocal take with a condenser microphone, ensuring the room is treated with acoustic panels. Listen to the raw recording to identify any immediate issues like room noise or excessive sibilance.
Step 2: Cleaning Up the Low End
Vocals often contain low-frequency rumble and unwanted noises that can muddy the mix. Use a high-pass filter to remove these frequencies.
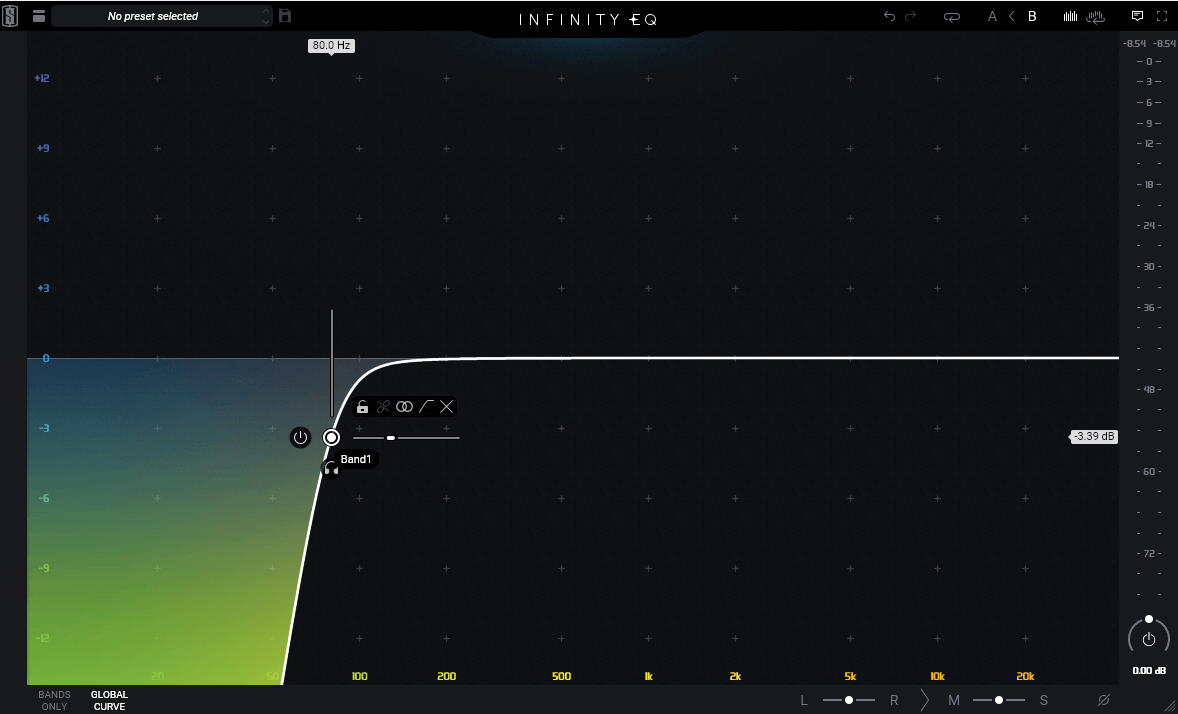
- Set a High-Pass Filter: Start around 80 Hz and adjust the cutoff frequency to remove unnecessary low-end while preserving the vocal’s warmth.
- Listen for Clarity: Ensure that the vocal remains natural and full-bodied without any low-end clutter.
In the audio clips below, we have applied a low pass filter at 80 and 100hz, we’ve also included different roll-offs, which is a control of how steep this high pass filter will be. We’ve included some screenshots below to illustrate the roll-off.

80hz 6dB per octave roll-off

80hz 12dB per octave roll-off
80hz 24dB per octave roll-off.
Step 3: Reducing Muddy Frequencies
Muddiness in vocals usually occurs in the 200-500 Hz range. Carefully attenuate these frequencies to add clarity.
- Find the Muddy Area: Sweep a narrow band EQ boost through this range to pinpoint the muddiness.
- Apply Attenuation: Once identified, apply a gentle cut (3-6 dB) to reduce the muddiness without making the vocal sound thin.
In the video above, we demonstrate how we’d go about finding and fixing the muddy frequencies. When certain notes are sung, a “node” is formed around 300hz. A small cut of around 3dB tames this. Usually with vocals you don’t need a huge amount of low end, as the human voice typically doesn’t produce frequencies below 100hz.
Step 4: Enhancing Presence and Clarity
To make the vocal stand out in the mix, boost frequencies that enhance its presence and clarity.
- Identify the Presence Range: Typically, this is between 1-4 kHz. Sweep a boost through this range to find the sweet spot.
- Boost with Caution: Apply a gentle boost (2-4 dB) to enhance the vocal’s presence.
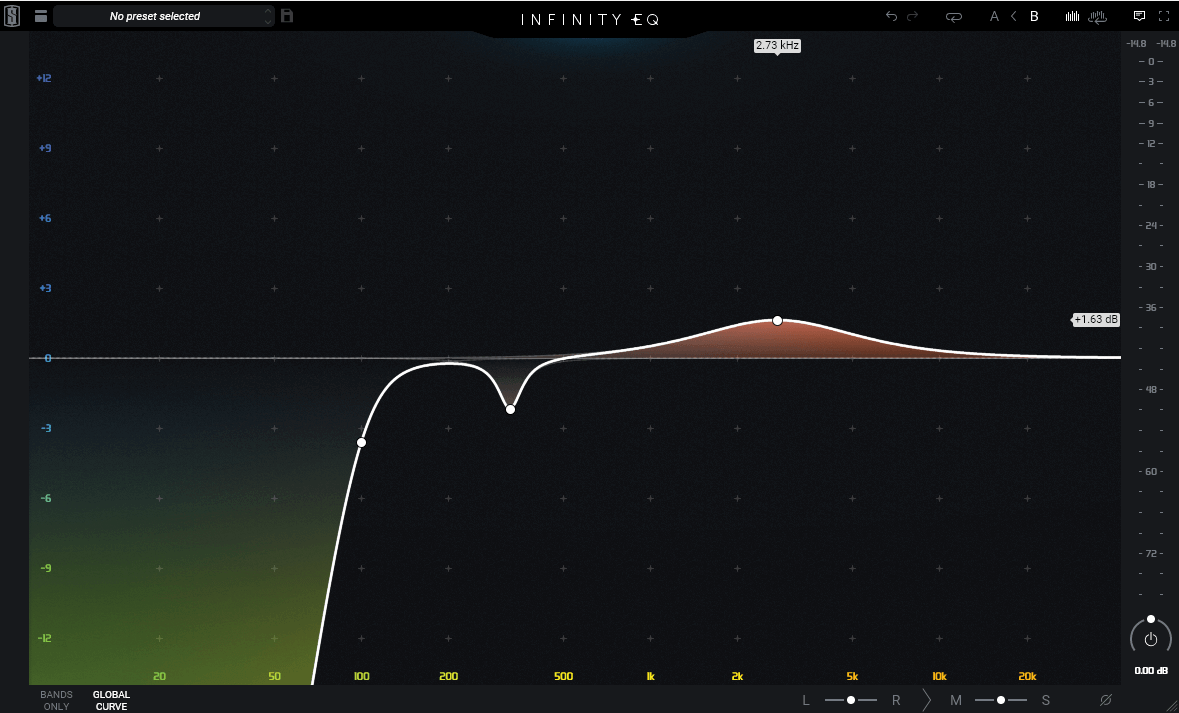
Using the same approach as in the video clip above, we’ve swept through the frequencies in the 1-4Khz range and found that a small boost around 2.6Khz adds a subtle enhancement to the clarity.
Step 5: Addressing Sibilance
Sibilance can be harsh and unpleasant. Use EQ to locate these high-frequency issues.
- Locate the Sibilance: Sibilance usually lies between 5-10 kHz. Sweep a narrow band to find the exact frequency.
- Apply Reduction: Use a de-esser to tame the sibilance.
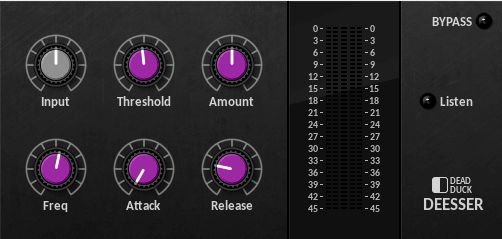
We’ve gone into more detail on using De-essers in our article here
Step 6: Adding Air and Shine
For a polished and airy vocal sound, boost the high frequencies.
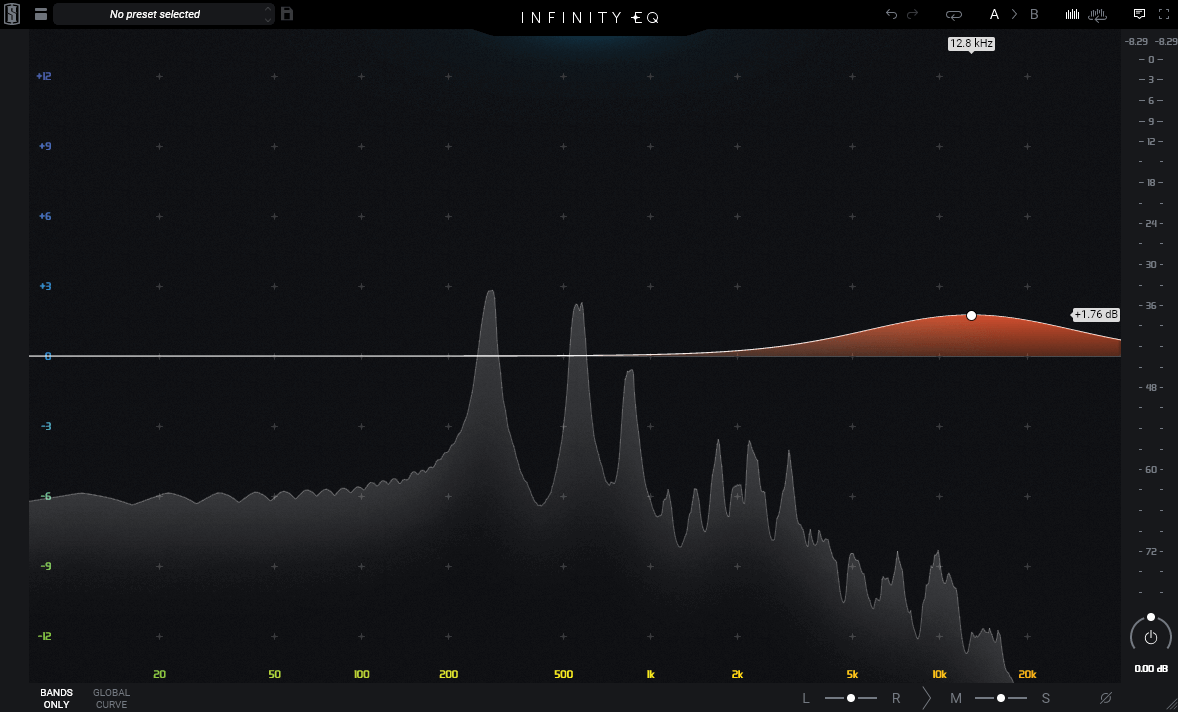
- Find the Air Band: Frequencies above 10 kHz add air and openness. Apply a subtle boost to these frequencies.
- Enhance with Care: A gentle boost (2-3 dB) is usually sufficient to add the desired shine.
In this case, I’ve added a second EQ to the channel, after the first EQ and de-esser. This ensures you’re not boosting sibilance into the de-esser, but rather are adding some extra shine after it’s been treated for sibilance.
Step 7: Final Adjustments
After making the primary EQ adjustments, listen to the vocal in the context of the full mix. Make any necessary tweaks to ensure the vocal sits well with other instruments.
- Contextual Listening: Always check your EQ adjustments in the context of the mix to avoid over-processing, and try repeatedly engaging and disabling the band you are adjusting to ensure you’re making a positive impact on your mix. With EQ less really can be more!
- Subtle Refinements: Make small adjustments as needed to maintain a balanced and cohesive mix.
Conclusion
By following these steps, you’ll be able to EQ vocals effectively, enhancing their clarity, presence, and overall impact in your mix. Remember, EQ is about making subtle adjustments to achieve the best possible sound. Practise these techniques, and you’ll be on your way to creating professional-sounding vocals.
For more detailed tutorials and recording tips, stay tuned to our channel and check out our other Audient tutorials. Happy mixing!


Our Products
-

2输入 | 2输出 音频接口
-

10输入 | 6输出 音频接口
-
6输入 | 4输出 音频接口
-
14输入 | 8输出 音频接口
-

10输入 | 14输出 音频接口
-

20输入 | 24输出 音频接口
-

24输入 | 32输出 音频接口
-
10输入 | 14输出 音频接口
-
10输入 | 4输出 音频接口
-

2输入 | 2输出 音频接口
-

4输入 | 4输出 音频接口
-

24输入 | 24输出 音频接口
-

开始录音所需的一切
-

8 通道智能前置放大器带 AD/DA
-

具有ADC的8通道麦克风前置放大器
-

具有 HMX 和 IRON 的 8 通道麦克风前置放大器
-

大型录音控制台
-

小型模拟录音控制台
-
小型模拟录音控制台
-

沉浸式音频接口与监听控制器
-

桌面监听控制器
-
环绕声控制器