Here are five tricks and techniques to help you along in your stereo manipulation ventures.
The miracle of mid-side processing
When it comes to reining in excessively wide sounding stereo signals, a mid-side processing plugin of some sort should be your first port of call. In a nutshell, these internally separate the incoming signal into its mono ‘mid’ (all the information equally present in the left and right channels) and stereo ‘side’ (the information present only in the left and right channels) components, and facilitate independent adjustment of their respective levels. Lowering the volume of the side signal on an overly wide sound makes it narrower, while lowering the mid on an overly centre-heavy sound can make it appear to be wider.
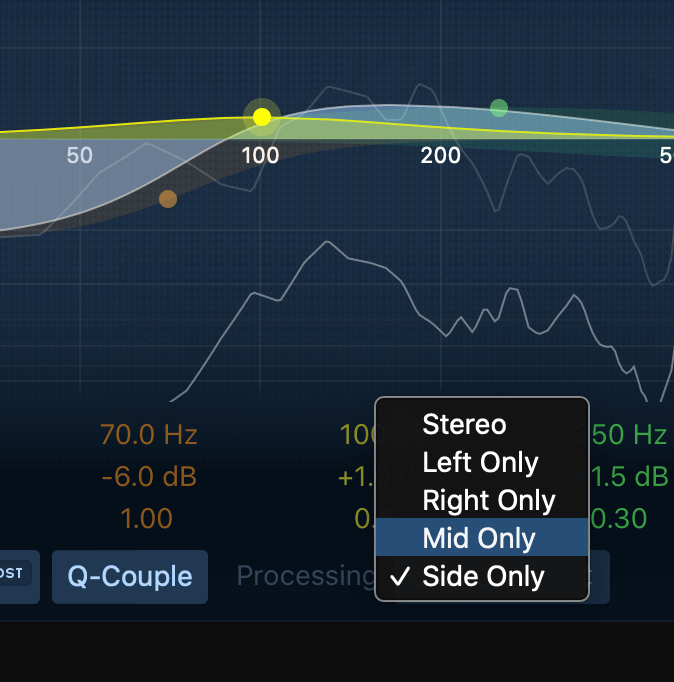
Your DAW likely includes some form of utility plugin for mid-side balancing, but if it doesn’t, there are endless mid-side-enabled EQ, compressor and other plugins available that make light work of mid-side level adjustment as well as their actual designated effect. Be aware, though, that mid-side processing of any kind can introduce phase issues if used without due care and attention – always check your mix in mono to make sure the stereo image collapses down effectively.
Widen mono sources with stereo effects
Of course, with no stereo side component to raise or lower relative to the mid, mono signals can’t be widened using mid-side processing, so if you want to broaden a single-channel part out from the centre of the mix (without panning it left or right, which is often the best option and should probably be tried first), the easiest way is to send it through a stereo effect – reverb, delay, chorus, etc.
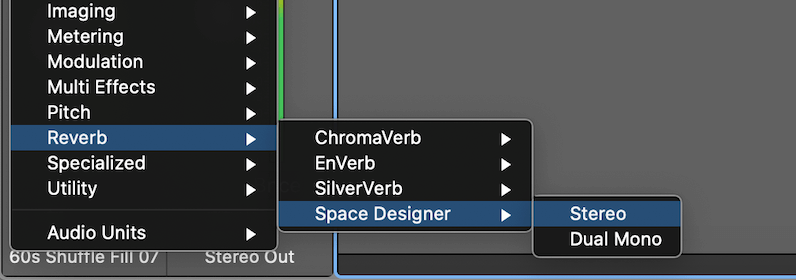
Obviously, this won’t magically turn, say, a mono drum kit recording into a crafted stereo mix, complete with panned hi-hats and overheads, and the nature of the effect itself will define the quality of the resulting sound; but when you just need to give a mono track more presence in the stereo field, this has always been the easiest way to do it.
Widen mono sounds with the Haas effect
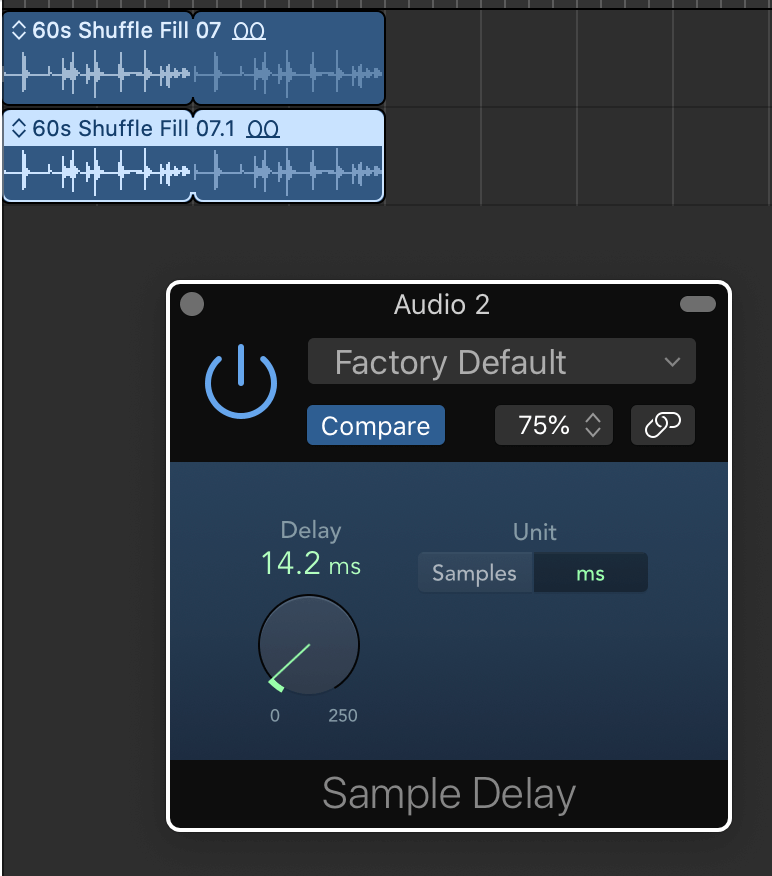
Alternatively, you could exploit the psychoacoustic phenomenon known as the Haas effect to spread your mono instrumental or vocal recording out to the sides of the stereo image. Named after Dr Helmut Haas, who formally documented it in his 1949 PhD thesis, the Haas effect states that any two sounds arriving at the listener’s ears within up to 40ms of each other are perceived as a single entity. So, by duplicating a mono track, then panning one copy to the left, the other to the right, and delaying either one by a few milliseconds, a convincing stereo representation is created. (Without the delay, you’d just get the mono signal doubled in volume.) Applying the delay can be done directly in any DAW featuring a track delay setting, or via a delay plugin set 100% wet.
If all that seems like too much effort, however, you could instead insert a dedicated Haas plugin into your mono track, such as Kilohearts free Haas or Cableguys’ powerful WidthShaper, which is a veritable Swiss army knife of stereo wrangling.
Keep low frequencies in mono
Generally speaking, the low frequency elements of a mix – that is, the kick drum, bass and everything else below around 100-200Hz – should always be in mono. This is because the human auditory system can’t really derive directional information in that range anyway, so such frequencies just needlessly eat up headroom at the sides, and many club PA systems are mono, which can result in major phase-related headaches with stereo sub bass in particular. What to do, then, if a stereo bass sound is actually working to the sonic benefit of a given track? Fret not – you don’t have to compromise the lush spatial splendour of that lovingly crafted chorused b-line in order to maintain mono compatibility.
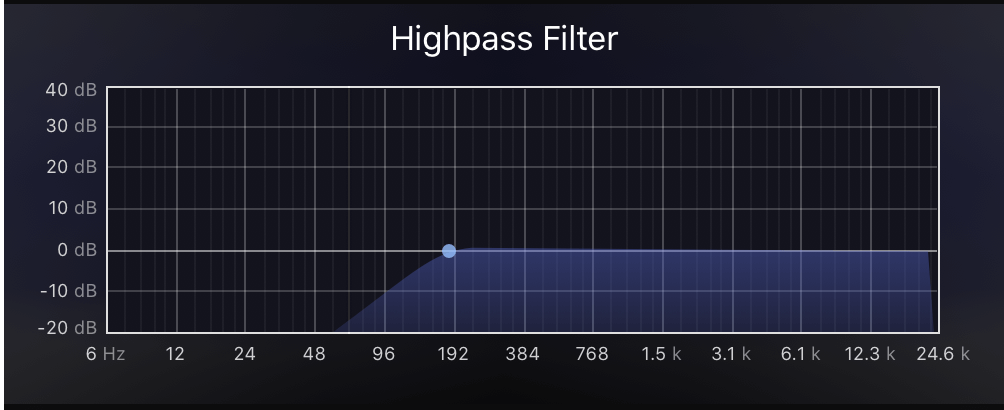
Your DAW’s stock plugins almost certainly include a ‘mono-ising’ effect with a knob or slider for setting a crossover frequency below which said processing is applied, leaving the stereophony of everything above it unaffected; but if not, simply set a high-pass filter to that same frequency in the side channel of any mid-side EQ. Easy.
Automate stereo widening for creative effect
Although stereo widening/narrowing is largely approached as a ‘static’ process that’s set once then left well alone for any given signal, it can also serve as a viable target for automation (of mid and/or side volume levels, EQ gains, compression parameters, etc), creating a spatial dynamism throughout the course of a track as a whole or any of its components. For example, having the drum kit overheads, guitars, backing vocals and/or other stereo parts widen out a little for the chorus adds to the sense of change and ‘expansion’ at that crucial point in the song, while gently undulating the width of a synth pad as it progresses can imbue a dance or electronic mix with an extra dimension of ear-catching motion and organic liveliness. Cableguys’ WidthShaper is worth mentioning again here, centring, as it does, on the fully customisable multiband manipulation of the side signal via hand-drawn LFOs, over a looping range of up to 32 bars.

Finally, we’ll wrap up with a reminder that, as with any signal-transforming engineering process, stereo widening (and, to a lesser extent, narrowing) shouldn’t be over-deployed. Keep the centre of the image tight and punchy, don’t overemphasise the sides or push them out too far, and always make sure your stereo mix also works well in mono.
Our Products
-

2输入 | 2输出 音频接口
-

10输入 | 6输出 音频接口
-
6输入 | 4输出 音频接口
-
14输入 | 8输出 音频接口
-

10输入 | 14输出 音频接口
-

20输入 | 24输出 音频接口
-

24输入 | 32输出 音频接口
-
10输入 | 14输出 音频接口
-
10输入 | 4输出 音频接口
-

2输入 | 2输出 音频接口
-

4输入 | 4输出 音频接口
-

24输入 | 24输出 音频接口
-

开始录音所需的一切
-

8 通道智能前置放大器带 AD/DA
-

具有ADC的8通道麦克风前置放大器
-

具有 HMX 和 IRON 的 8 通道麦克风前置放大器
-

大型录音控制台
-

小型模拟录音控制台
-
小型模拟录音控制台
-

沉浸式音频接口与监听控制器
-

桌面监听控制器
-
环绕声控制器


