


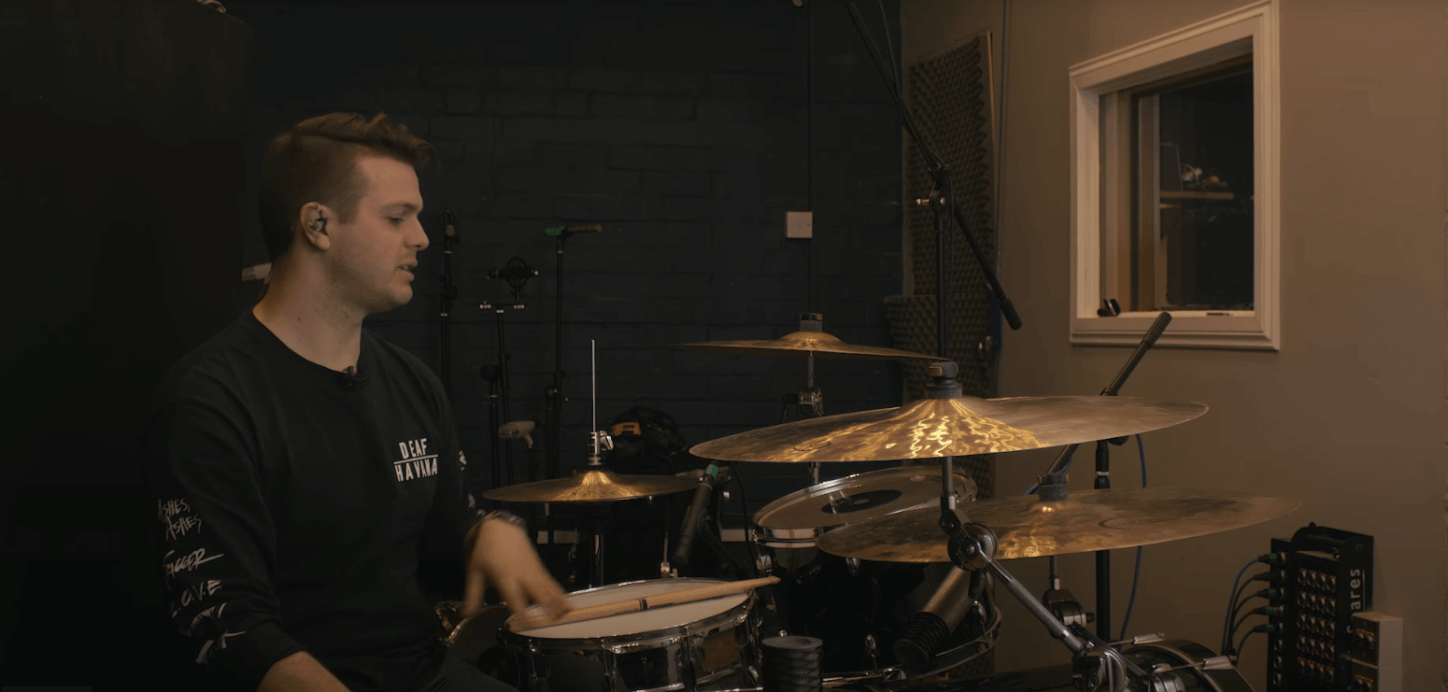
Intro
Now this process is super easy if you are a drummer (and let’s face it most drummers have already screamed at me for suggesting the programming of drums) but for those of you that aren’t gifted with groove and are looking for tips to get realistic drums in your productions here are my 5 tips for programming drums.
1. Get Your Tracks In Order
1. Know Where The Drums Are
OK so this one may seem obvious but it’s something I hear a lot when listening to demos or even some productions when drums have been programmed.
Remember, drummers on have 2 arms and 2 legs – they can only play 4 different things at once!
A couple of examples of this would be playing a tom fill while the previous drum beat is still playing or playing too many drums on the same side of the kit in a way that if a drummer would play it for real, would feel, look and sound awkward.
The way I get around this is with good old-fashioned air drumming. Work on the part you are programming and think about where you would naturally go in terms of what cymbal you would reach for or what you would have to stop playing in order to perform that tom fill.
This should be you writing your drum parts…
The best way to do this if you aren’t a drummer is to make friends with one and either invite them over or send the file to them and ask, “does this make sense?”
They will probably ask to just play it for you in which case (if you have a MIDI kit to use) problem solved! But at the very least, they will give you an insight into where you may have gone wrong.
2. Vary Your Velocity
2. Vary Your Velocity
This is crucial if you want realistic drum programming. Drummers do not hit things with the same intensity every single hit of a performance. This is what consistent velocity information will give you.
What ends up happening here is a machine gun or robotic effect in digital drums, which granted some of you, and some genres call for but we are talking about realistic programming here.
So, how do you get around this? I personally would write a drum part in and not worry about the velocity at first, focus on getting a good part down and take into considerations the points from section 1 in the article.
Then I would take each drum and randomize the velocity a little. What I mean by this is once you’ve found a hit strength or velocity you like, highlight every hit on that drum and in most DAWs you will have a “Randomise velocity” feature allowing you to do just that, make every hit slightly louder or softer within a given set of parameters. You could also draw this information in manually.
The real art of this process though is in the details and this is where having a drummer friend or studying drum performances comes in to play.
If they are playing two kicks close together, the second hit is usually slightly louder than the first. If there is a double kick pattern, one foot will be slightly weaker than the other. The same can be true for snare rolls. If there is a flam on the snare, the beat that is last should be louder.
This list could go on for hours but its this subtlety in your programming that will make people question if a drummer played it or not and that is something you should look to study and improve if you aren’t doing so already.
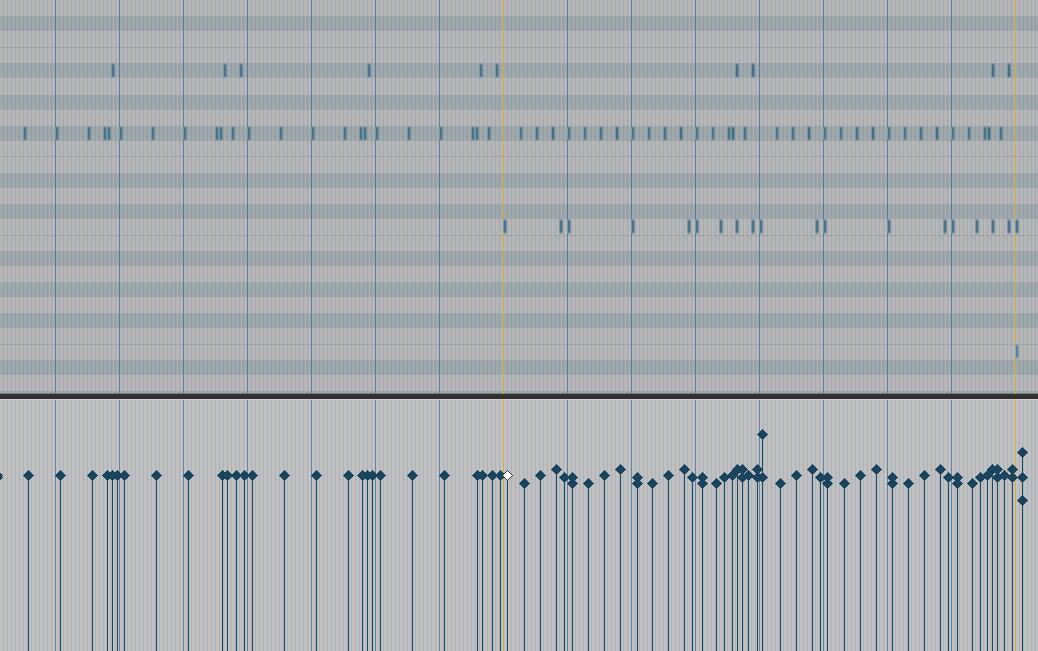
The left half of this track will sound like programed drums – The right half will sound like a real drummer. The power of velocity.
One other thing to look at would be not always thinking, “louder is better” in terms of velocity. Yes, the higher the velocity the more attack you have from each drum, it’s a thing drummers call “burying the beater” or “burying the stick” but at the cost of tone. This is what’s happening there (insert nerd alert).
When a drummer hits very hard the beater or stick moves into the head and “sticks” briefly causing the resonance of the drum to stop but the attack to be huge. What happens here is the tone gets very harsh and not full.
Try backing off of the full 127 hits and try putting the loudest hits around 115 in terms of velocity. What you will notice more often than not is the life of the drum starts to come back and hey, if it’s not loud enough…TURN IT UP!
3. The Grid Is Not Always Golden
3. The Grid Is Not Always Golden
There are some times where robotic, militant levels of “in time” are appropriate and “perfection” is what is required. There are other genres or occasions where pushing or dragging a groove is appropriate.
Sometimes it’s a combination of the two but there is one thing to note here. Feel, vibe, groove are all things that make us tap our toes and nod our heads along to music and it shows up in all genres of music.
It just doesn’t always show up on time. Sometimes it’s the imperfections that add groove and feel to a performance and you can program those in.

This is what a realistic drum part would look like. Experiment with moving your notes off grid.
For example, does your drummer drag a tom fill leading into that bridge to add tension?
Are you programming tip hop or neo soul where a dragging beat is advantageous?
Are you doing old school punk where pushing the beat in sections might add excitement?
You can create this in any DAW by either manually pushing or dragging each hit or using the randomize feature to go one-way or the other with the timing by a certain percentage.
However, I find the best results here come from manual work and experimentation to find the right groove.
Don’t be a robot, program in some humanity and soul into your digital drums.
4. Ghosts = Groove
4. Ghosts = Groove
Further to the point above, groove and humanity in playing also comes from ghost notes.
I know some of you are wondering what ghost notes are. Ghost notes or grace notes are subtle, barely audible hits of a drum, typically the snare, which add to the feel or groove of a song.
A perfect example of this is the intro to Rosanna by Toto. Listen to the subtle notes playing between the main snare hits on the snare drum.
How do those make you feel? Groovy right!?
(You can thank me later for getting you to listen to Toto. What a tune!)
Get them into your drum programming where you think it is appropriate by adding very low velocity snare hits – usually a velocity of 30ish.
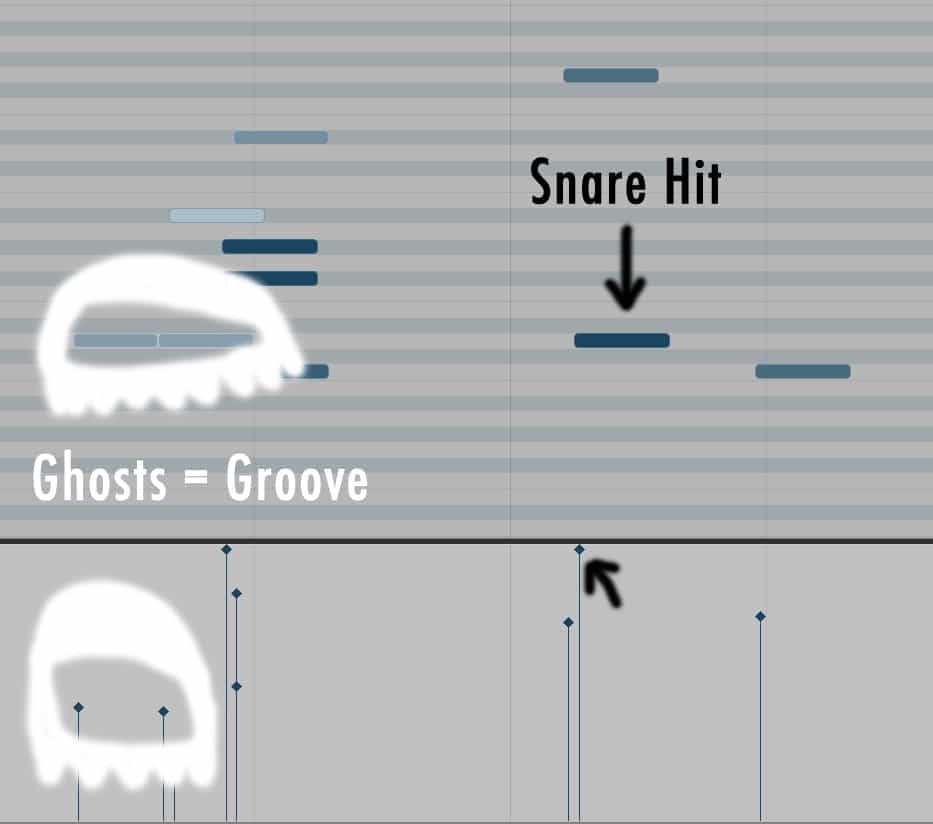
An example of how ghost notes should look in your DAW.
5a. Practice Makes Perfect
5a. Practice Makes Perfect
Lastly, nobody ever learnt anything by getting it right. I would practice this skill and be thinking, “Does this sound realistic?”. Send it out to your drummer friends for feedback too and work on the points they mention.
What I do for practice and even for demoing songs out for productions I work on is get footage of a drummer performing a song at rehearsal and program the performance exactly how they played it.
Listen carefully to the parts and watch their playing. What side of the kit is that ride cymbal? What instruments do they hit throughout that tom fill, how hard are they hit? Are there ghost notes?
Really dig in and match what the drummer is doing. By doing so you’ll get faster at programming realistic drums and notice things that drummers do which you may not have thought to program before.
If you can get hold of a MIDI drum kit and invite a drummer round for coffee or dinner (they generally love both of those things) get them to play the performance in or just jam some ideas out.
You’ll get the performance done quicker but also, you will be able to see properly what timing and velocity information is involved in a real drum performance by looking at the MIDI information.
This is incredibly enlightening and once you start paying attention to what is going on in a performance, you will truly understand how to program realistic sounding drums.
5. Practice Makes Perfect
5b. Tracks To Practise
Here are a few tracks to listen and practise writing parts to. Some are harder than others but all are great to work out how a drummer plays their parts. All are great for using as inspiration for your own drum parts.
Classic Rock Beat in 4/4
For those of you looking for a challenge. It’s in 5/4 so make sure to set your DAW correctly!
Great for drum fill inspiration
Conclusion
With this knowledge you should be on your way to great sounding realistic drum parts.

About the author
Graham is a Freelance Audio Engineer from Kent, UK specialising in recording, mixing and online mixing/ mastering via his website www.grahamwaller.com.
With 15 years of freelance work under his belt, he works with a wide variety of studios/ artists across London and the South East in host of different genres mostly guitar based rock and metal. In addition to this, he has taught music and music technology at Mid Kent College in Kent.
Our Products
-

2in | 2out Audio Interface
-

10in | 6out Audio Interface
-

10in | 14out Audio Interface
-

20in | 24out Audio Interface
-
10in | 14out Audio Interface + Monitor Controller
-
10in | 4out Guitar Interface
-

2in | 2out Audio Interface
-

4in | 4out Audio Interface
-

Everything you need to start recording
-

24in | 24out Audio Interface
-

8 Channel Smart Preamp with AD/DA
-

8 Channel Mic Pre & ADC
-

8 Channel Mic Pre + Tone Control
-

Modular Analogue Recording Console
-

Small Format Analogue Recording Console
-

Small Format Analogue Recording Console
-

Immersive Audio Interface and Monitor Controller
-

Desktop Monitor Controller
-
Surround Sound Monitor Controller