


Blurb
Portuguese producer and musician João Medeiros explains how to route backing tracks and click in a live scenario with the iD44. To learn how, continue reading!
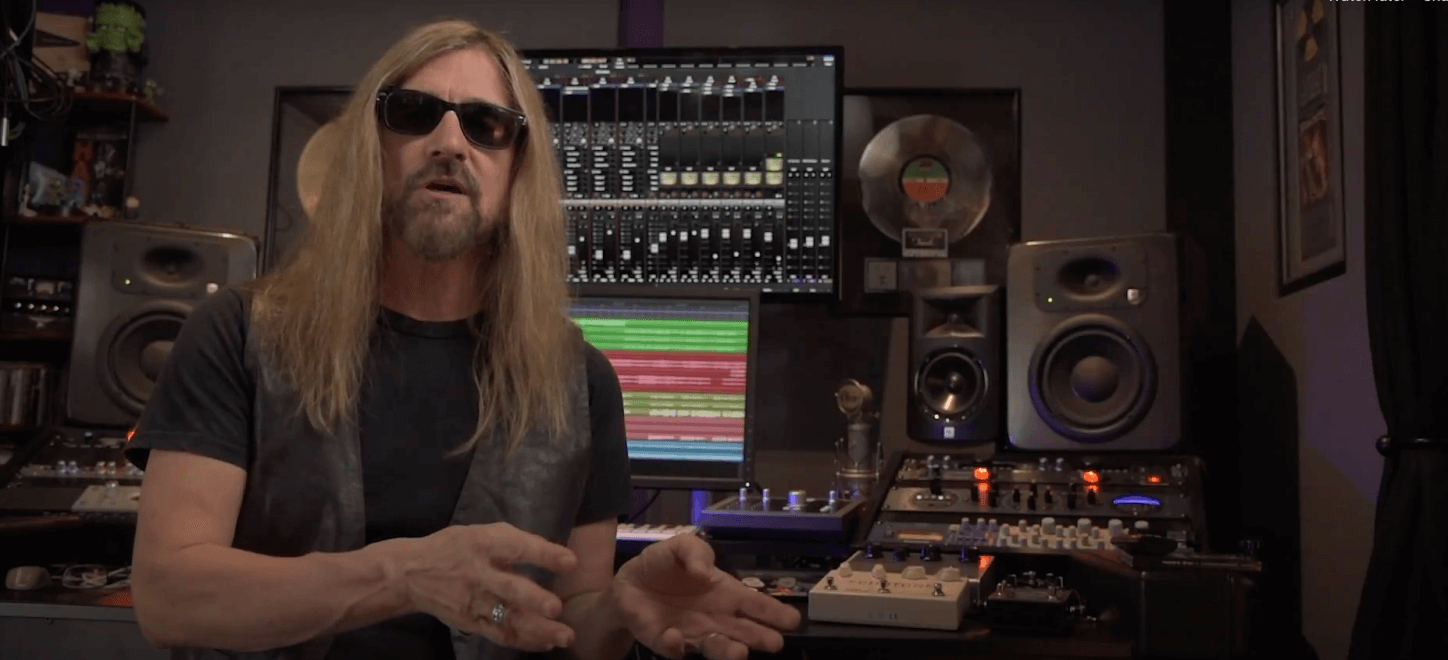
João Medeiros Intro
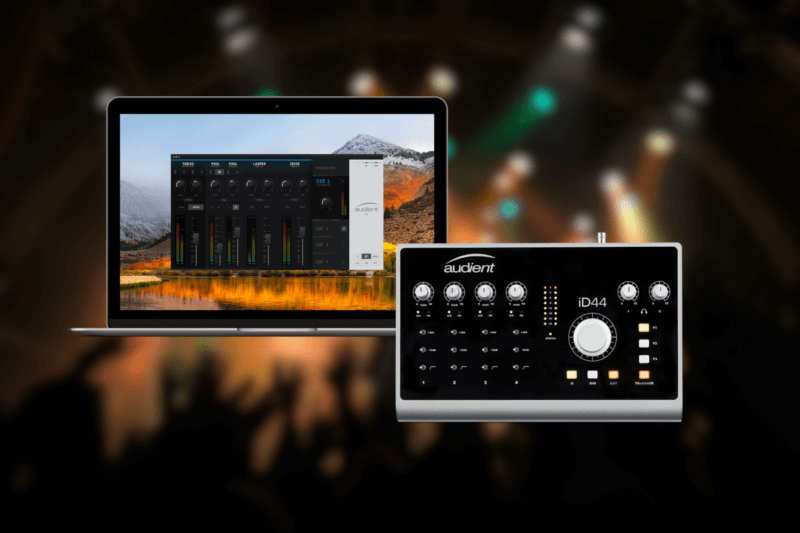
The Audient iD44 is not only an incredible centrepiece to any studio, but also a great on-the-road solution for all your live show backing track needs. All thanks to its driver stability, sturdy construction and – as we’ll demonstrate in this article – the extended output and routing capabilities.
If you’re in a band and you need to play live shows in perfect sync with backing tracks, you’ve probably seen some pretty crafty – albeit not optimal – solutions to make this happen with only one stereo output.
These might include things like rendering your tracks to a mono track and panning it 100% right, while also printing a click and panning it 100% left. Then splitting the signal to send them separately to front of house, involving complicated setups with tiny adapters, cables, so many small things that can go wrong! And in the end, you only get a mono backing track???
If you’re lucky enough to own an interface like the iD44 or iD22, which both have 4 outputs, you can forget all about this nightmare I’ve described.
Let’s set up a proper stereo backing track, metronome track, and even get creative with the extra output – making the audience experience our music better, your live experience a more comfortable one, and the monitor and front of house engineers not want to kick you out.
Setting up the Session Image
1.Setting up the Session
Setting up the Session
To make this work all you’ll need is your laptop and your iD44. You’ll be setting up the backing tracks and metronome for your show in a session in your preffered DAW, and playing them back from there.
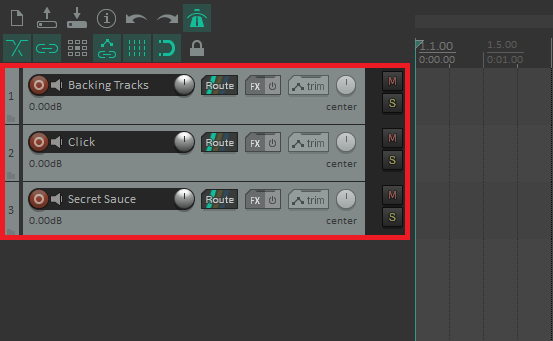
Step 1 – Create a new DAW session
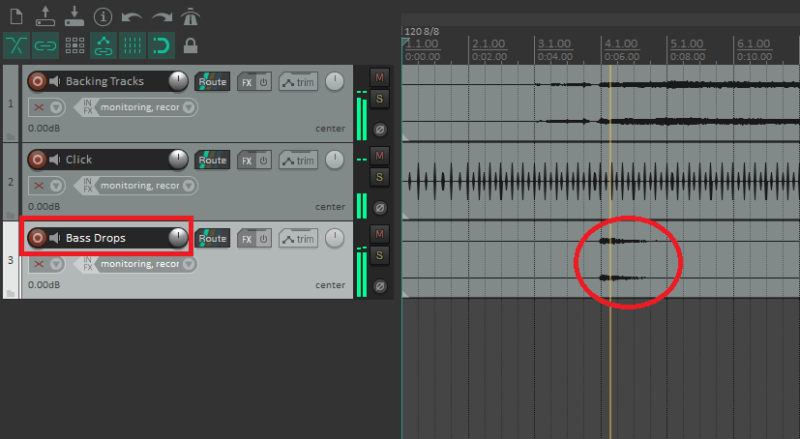
A very simple session, which will consist of nothing more than 3 tracks – 1 stereo track (backing tracks), 1 mono track (click), and a wild card mono track (think of anything you’d like to send to the live mixing engineer for extra control – I’ll show you my suggestion soon).
Setting up the Session Image
2. Import your Material
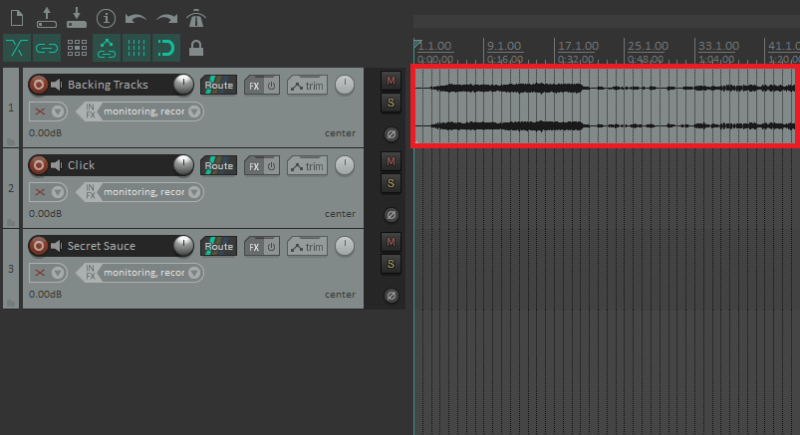
Let’s get the backing track into the session. If you have access to the recording session for the song you’re performing live, just open it and mute all the instruments you’ll actually be performing, then render the result.
If you don’t, be sure to ask the mixing engineer you worked with for stems of the different instruments, so you can make your backing track.
2. Import your material image
2. Import your Material – after image
Next, import the metronome. Once again, if you have access to the session file this is very easy to print. No matter what DAW you’re using, it shouldn’t be hard to produce an audio track of the metronome for the song in question.
If you don’t have access to the session, it’s unfortunately time to nag your mixing engineer again (get in the habit of asking for stems as you wrap up work in an album, it’s easier for your engineer to do them right then and there than to dig your files back up months or years after!).
2. Import your material 2nd image
2. Import your Material – after image
For the remaining output, I like to send my subdrops. I play in a metal band with many climactic moments that make use of bass drops and explosion sounds, and giving the front of house mixing engineer extra control of those can be the difference between an amazing live moment or a distorted low end mess (or in worst case scenario – damaged equipment – bass drops are no joke!).
2. Import your material 3rd image
3.Step 3 – Routing
Routing
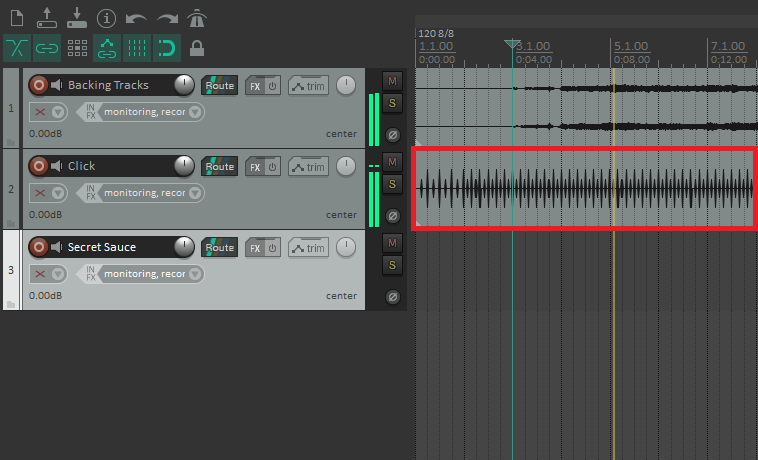
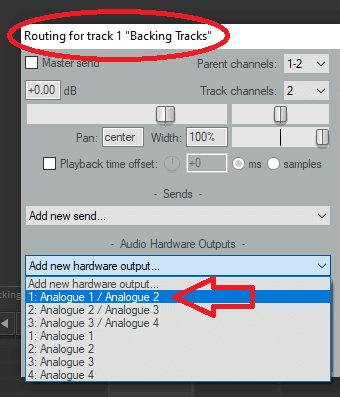
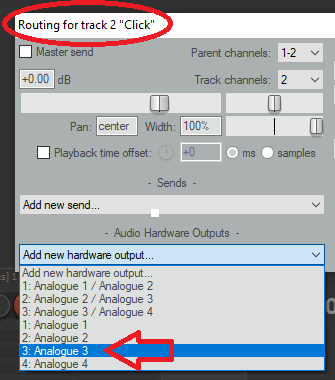
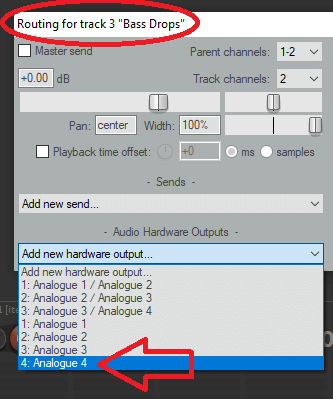
Now that everything is nicely synced and ready to be played back, we need to route the different tracks! Here’s our planned setup:
- Outputs 1/2 – Backing Tracks
- Output 3 – Metronome
- Output 4 – Bass Drops
Route away! Here’s what this looks like in my DAW of choice, Reaper:
Pic 6
Pic 7
pic 8
4.iD Mixer
iD Mixer
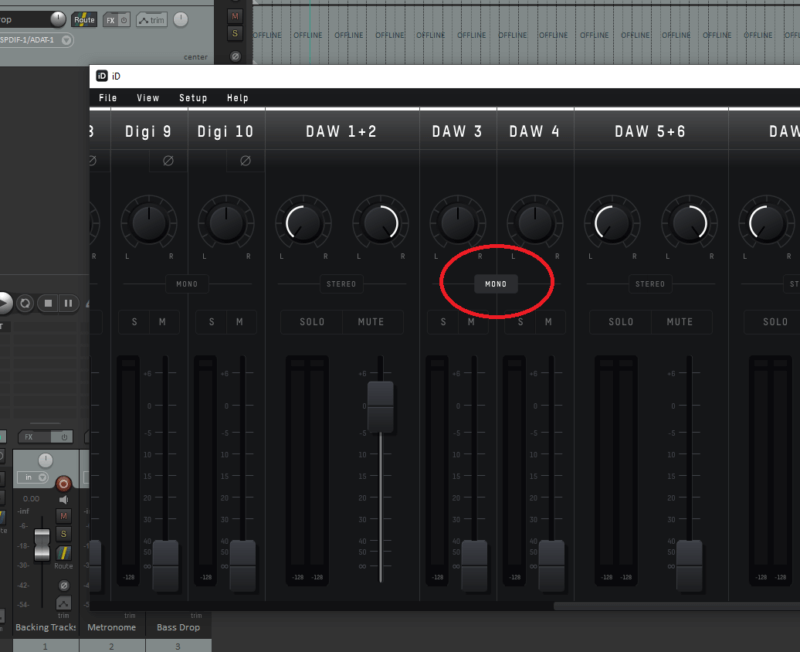
The final steps are taken in the iD Mixer application. Here we will create two CUE mixes to output the metronome and bass drops separately, while leaving the backing track in the default master mix.
Firstly, we will separate the DAW 3+4 output into two mono outputs.
4. pic 9
4.iD Mixer
After that, we will create the very simple cue mixes. Move into CUE A, and turn up the metronome. (DAW 3)
4. pic 10

4.pic 10 sentence
Now in CUE B – you’ve guessed it – we turn up DAW 4, the output for the bass drops.
4. pic 11
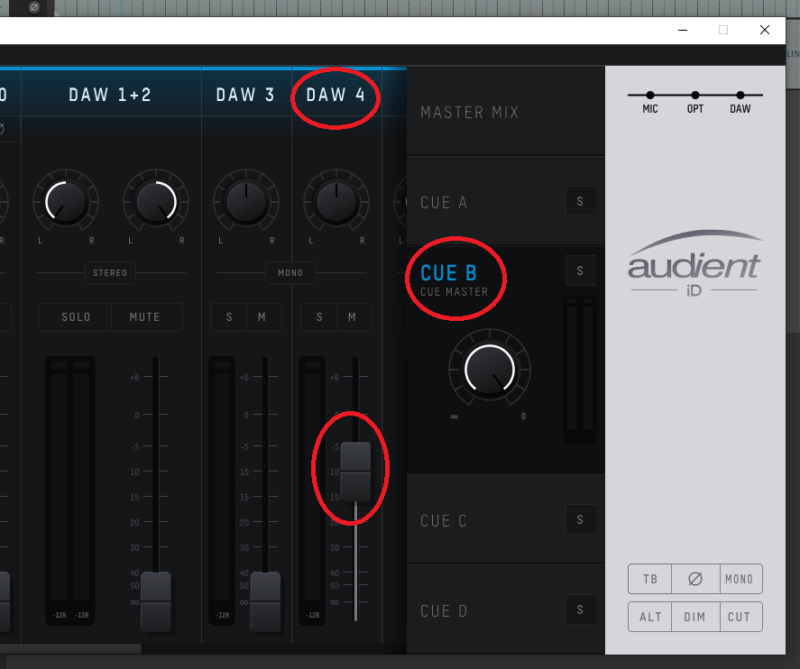
4.pic 11 sentence
And finally, in the System Panel, we will assign these CUE mixes to their respective outputs!
4. pic 12
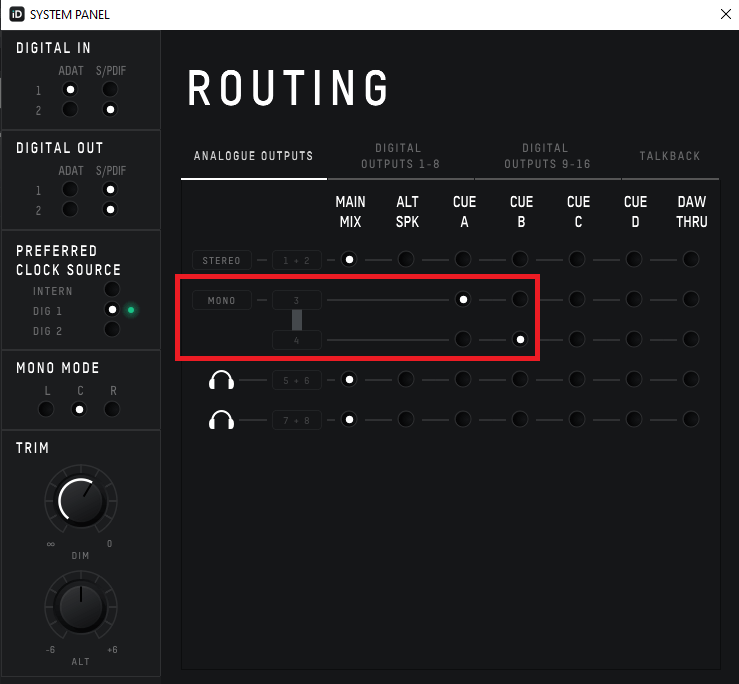
4.pic 11 sentence
When you hit play now, your backing tracks will correctly be going into the main master mix and out of outputs 1/2, the metronome into CUE A and out of output 3, and the bass drops into CUE A and out of output 4!
5. Conclusion
Conclusion
When upgrading my home studio with the iD44, I was very pleased to later find out that with some preparation – thanks to its extended output capabilities – my live show would also get an upgrade in quality of sound and production thanks to that same piece of gear. With this information you too can experience the same happy feeling! Happy live playing.

About the author
Between growing a music YouTube channel from zero to 1 million+ views from a small bedroom studio; as well as enrolling in academic degrees in music performance, theory and pedagogy; João is looking to harness this experience to be of value to everyone he can reach through his content – be it entertaining, educational, or a mix of both (usually the latter).
Our Products
-

2in | 2out Audio Interface
-

10in | 6out Audio Interface
-

10in | 14out Audio Interface
-

20in | 24out Audio Interface
-
10in | 14out Audio Interface + Monitor Controller
-
10in | 4out Guitar Interface
-

2in | 2out Audio Interface
-

4in | 4out Audio Interface
-

Everything you need to start recording
-

24in | 24out Audio Interface
-

8 Channel Smart Preamp with AD/DA
-

8 Channel Mic Pre & ADC
-

8 Channel Mic Pre + Tone Control
-

Modular Analogue Recording Console
-

Small Format Analogue Recording Console
-

Small Format Analogue Recording Console
-

Immersive Audio Interface and Monitor Controller
-

Desktop Monitor Controller
-
Surround Sound Monitor Controller