


1. Finding A Space
1. Finding A Space
So obviously this is a pretty obvious point but it’s also probably the most important because without a space you can’t have a studio really…. Can you?
When it comes to looking for a space, the thing to keep at the forefront of your mind is ‘What is the studio going to be used for?’ This probably sounds like a dumb question to ask yourself because obviously it’s for making music… duh.
What I mean by ‘What is the studio going to be used for? Are you going to be recording bands live? Are you going to need enough space to fit a Grand Piano in? Are you going to want to record choirs? Are you just producing beats, record voice overs, writing music?
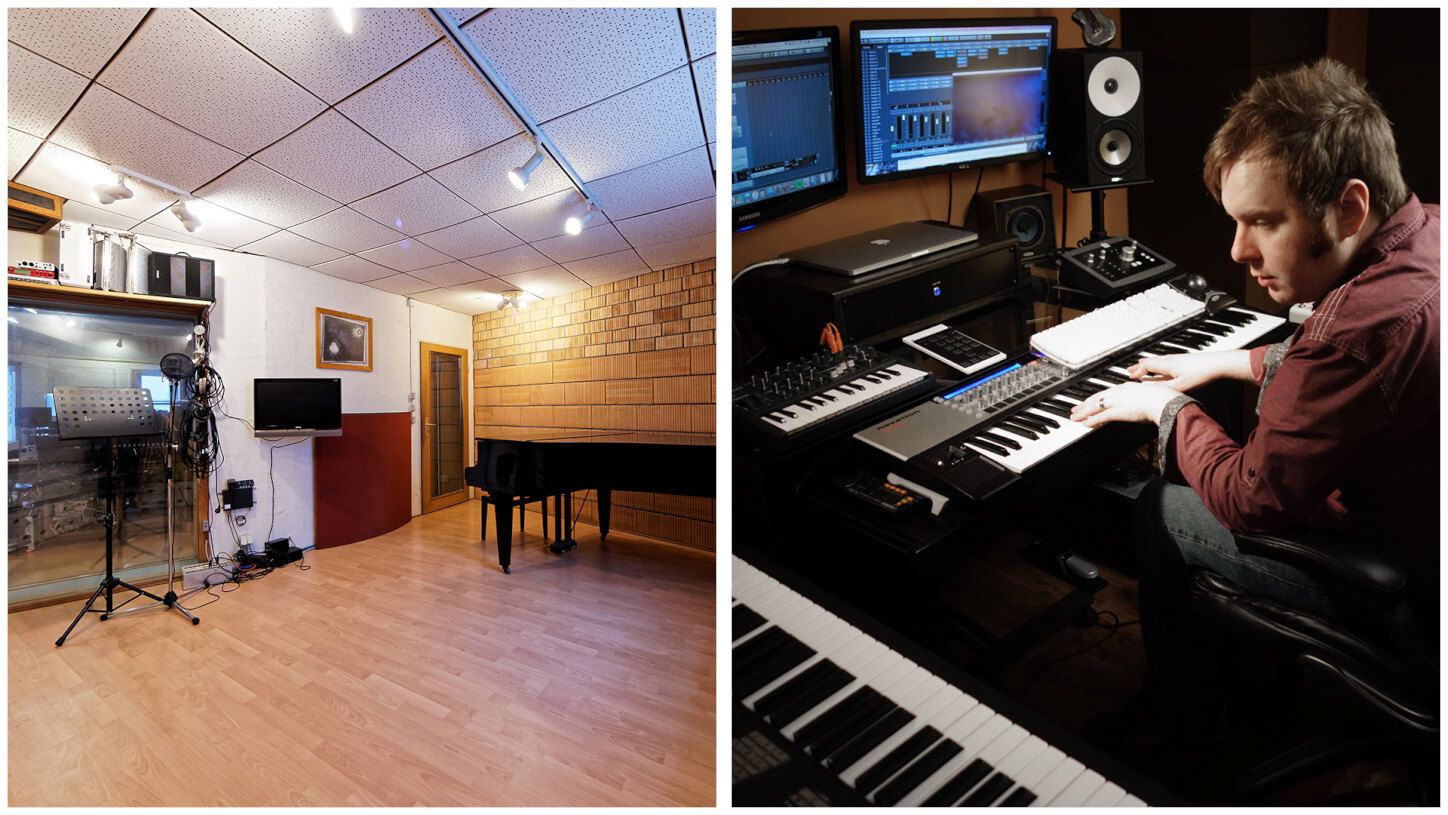
2 different types of studios: one for recording, one for composing.
1. Finding A Space 2
The reason this is important is that essentially this determines the size of your studio. If you’re just using the space for writing and maybe some vocal work, do you really need a live room big enough for a drum kit and some amps? Do you even need a live room?
Of course all of this factors into the cost of the space as well. Whether you’re renting or attempting to buy a space outright. Make sure you know exactly what you’re looking for and make sure you have a good understanding of property and space prices in the area you are looking.
A good thing to remember is that, although you probably want a really sick looking studio with loads of room that matches up to those of AIR or Real World, you probably don’t have that budget and not only that, your clients starting out probably don’t have budget to record in a space like that so look for somewhere that is within your means.
Remember that if all goes well and you grow out of that space, you can always move and expand. It’s better to start small and crush it than go huge and let it crush you.
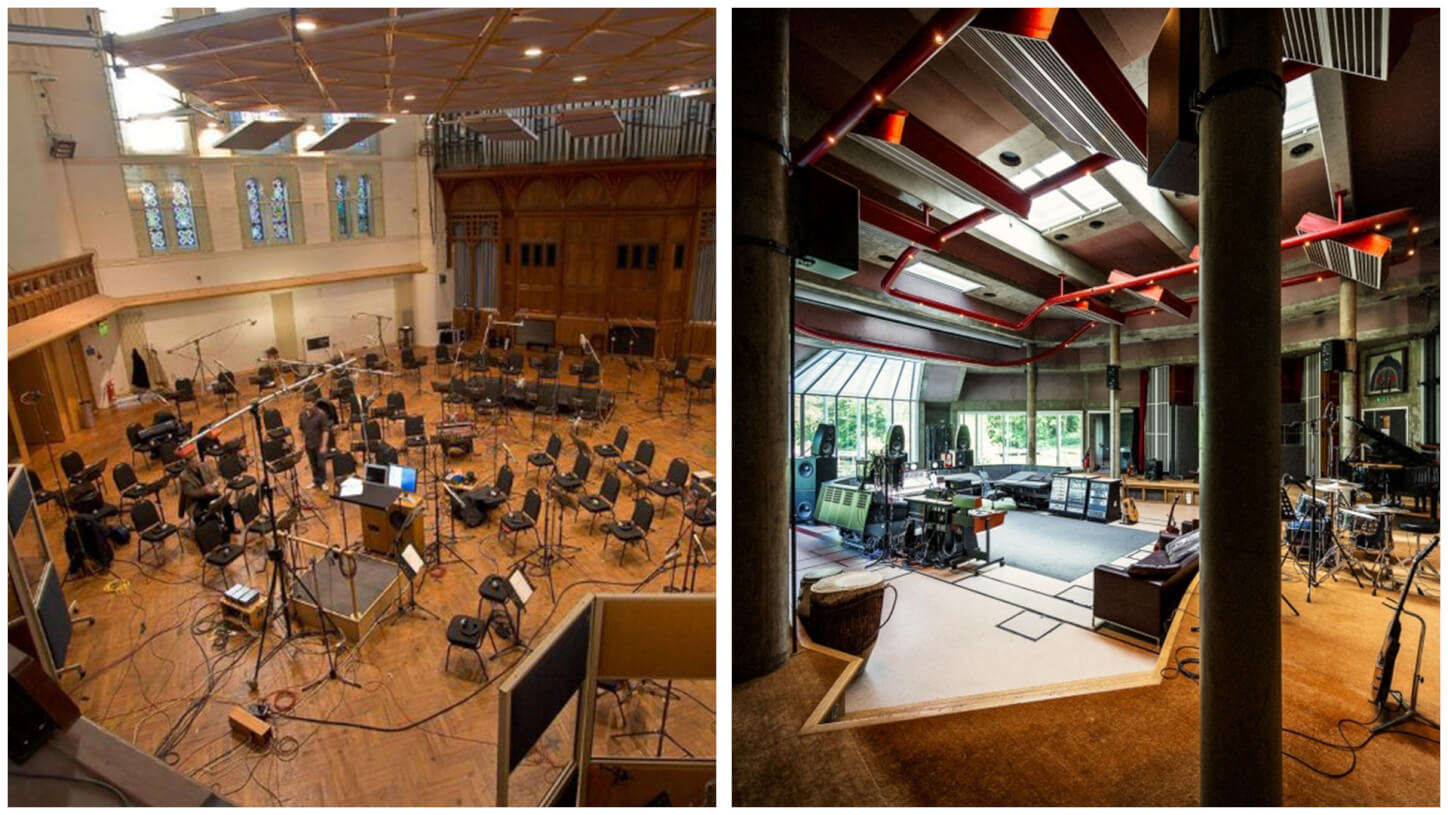
The Live Rooms at AIR and Real World Studios… They’re quite big.
2. Room Requirements
2. Room Requirements
Once all that is in place, make sure that the room/space you’ve found is correct for what you need. What is it made of? What will you need to do to tame the sonic properties of the space? Then make sure you think about things like whether you’re too close to a residential area, this is important because if they start complaining and you’ve not checked with your local council or authority they will just close you down or at least make a good go of it.
2. Room Requirements
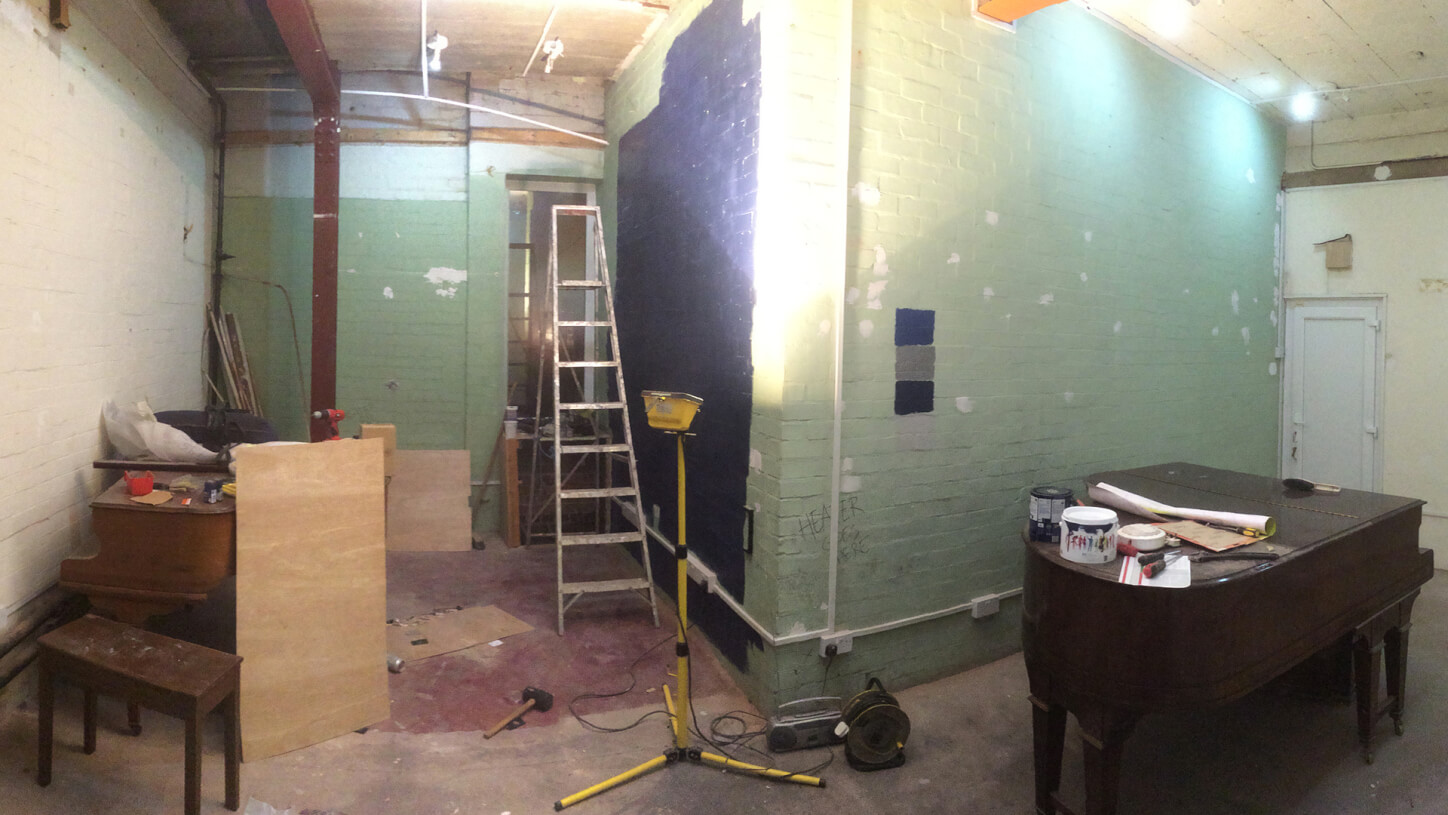
This is the studio before anything was built.
2. Room Requirements 2
Lastly, just make sure that the space/room is in decent condition. You don’t want any damp issues or crumbly walls etc. You’re going to be putting thousands of pounds worth of gear in there why risk it getting broken due to damp or poor conditions?
This also leads me to the final point regarding the space… IS IT SECURE?! I cannot stress this enough. Nothing worse that someone finding out what you have in there and then stealing it all because it wasn’t very secure. Take in to consideration how easy it is to secure if it isn’t already very secure and make sure you look at alarming it and whether that’s possible.
3. Creating Your Space 1
3. Creating Your Space
Ok, so you’ve found a unit or building or space that is going to work for you so what’s next?
- Do you need to do any renovation work?
- Are there any building requirements?
- Sound limitations?
- What do you need to take into consideration?
First things first, and I’m only saying this because I learnt the hard way, how much bleed is there from your live room to the outside of the building/surrounding units etc? Make sure that if your space has an external wall that you have checked just how loud it is on the other side of that wall.
My unit leads onto a residential street and I ended up with the local authority at my door with a dB meter. I ended up having to build in a second wall on the inside to combat this. Just make sure you’ve checked before you start. It’s also very easy to check with your local authority what the limitations are etc so as boring as it is, it is worth doing.

Here’s the outside of Phoenix Sound Studio. You don’t want any noise getting out here.
3. Creating Your Space 2
Do you need to build any structures within your space? A dividing wall? A Vocal Booth? If you’re building a studio to have a control and a live room you’re going to need to have a dividing wall. If you’re lucky enough to have found a space that is already divided into two rooms then you’re a good step ahead, if not, don’t fear it’s genuinely not that hard.
In my case, as you can see from the photos, there was no dividing wall and we took it upon ourselves to create one. We got a local joiner in to put the stud frame up and after that we took care of the rest.
We used the highest density rock wool as the foundation of the ‘sound proofing’ and after that there are layers of different sound absorption the symmetrically extend on either side including high density rubber, high density foam, two layers of ‘Soundbloc’ plasterboard and a few other things before a layer of plaster and paint.
The wall measures just under a foot in depth and it most definitely works. Realistically if you’re space is in good shape, this will be the most expensive part and honestly, it’s worth spending a bit on. Including the joiners fee I think in total it came to about £1500.00.
We designed and hand built the door by using a solid wood B&Q door and using the same insulation as the wall and fixing it to the back. The window is very simply two triple glazed units with a 8” gap between them set into a hand built frame and secured with sound blocking silicone gel. This same principal for the wall can be used for building a small vocal booth if needed.
If you’re not a dab hand at joinery I would always recommend getting a trained joiner in as you don’t want any structure falling on yourself or any clients.
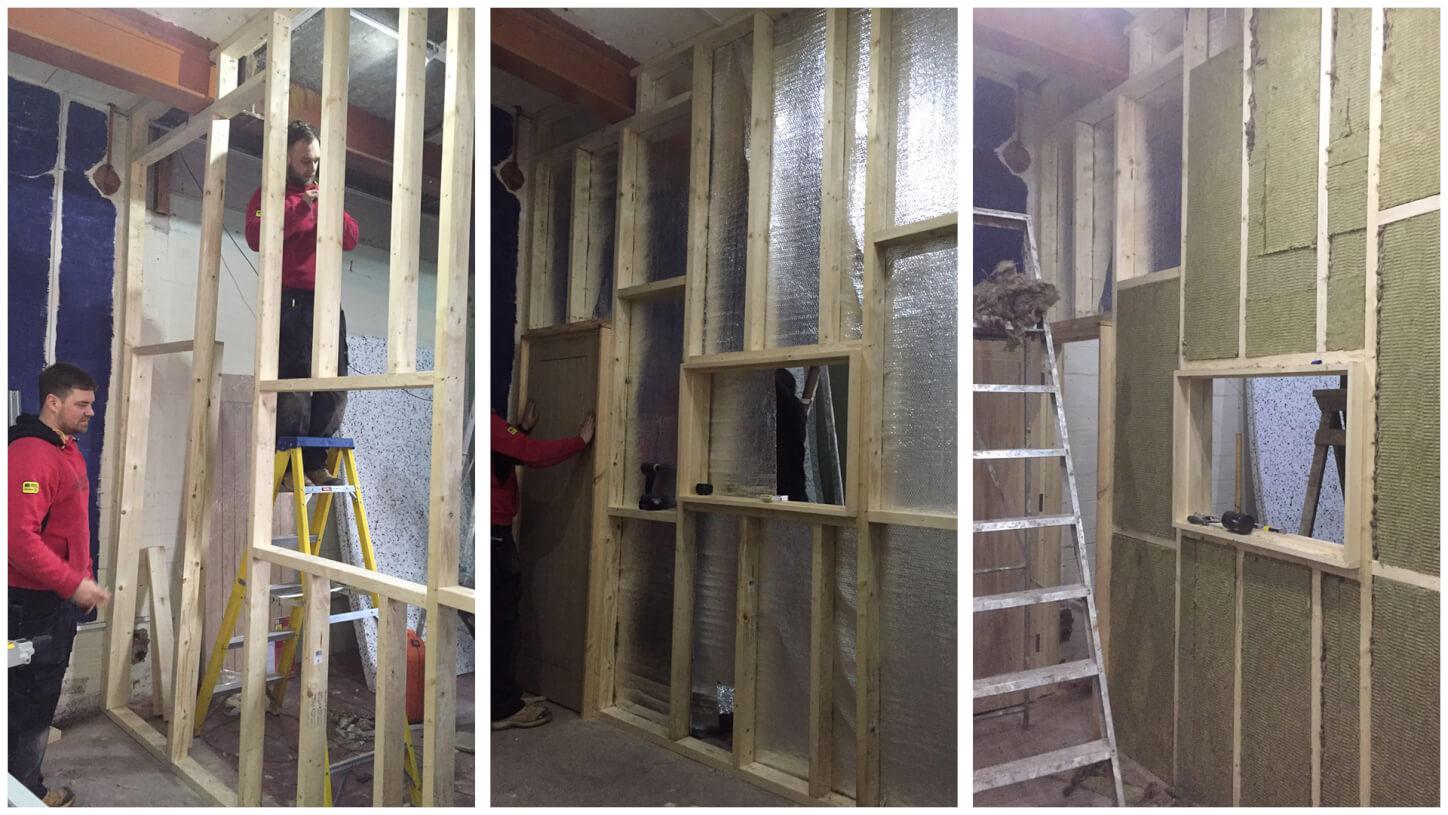
Building the wall that divides the control room from the live room.
3. Creating Your Space 3
Floor surface may not be an issue for most of you but in my case the floor was just raw, unfinished concrete which isn’t ideal so I bought and put down a really simple tongue and groove wood laminate floor with a slightly denser underlay than what may be typical.
Concrete floors can have their benefits sonically especially with big bombastic sounding drums but given that the rest of the room is exposed bricks and concrete walls I didn’t want the floor to be that reflective as well.
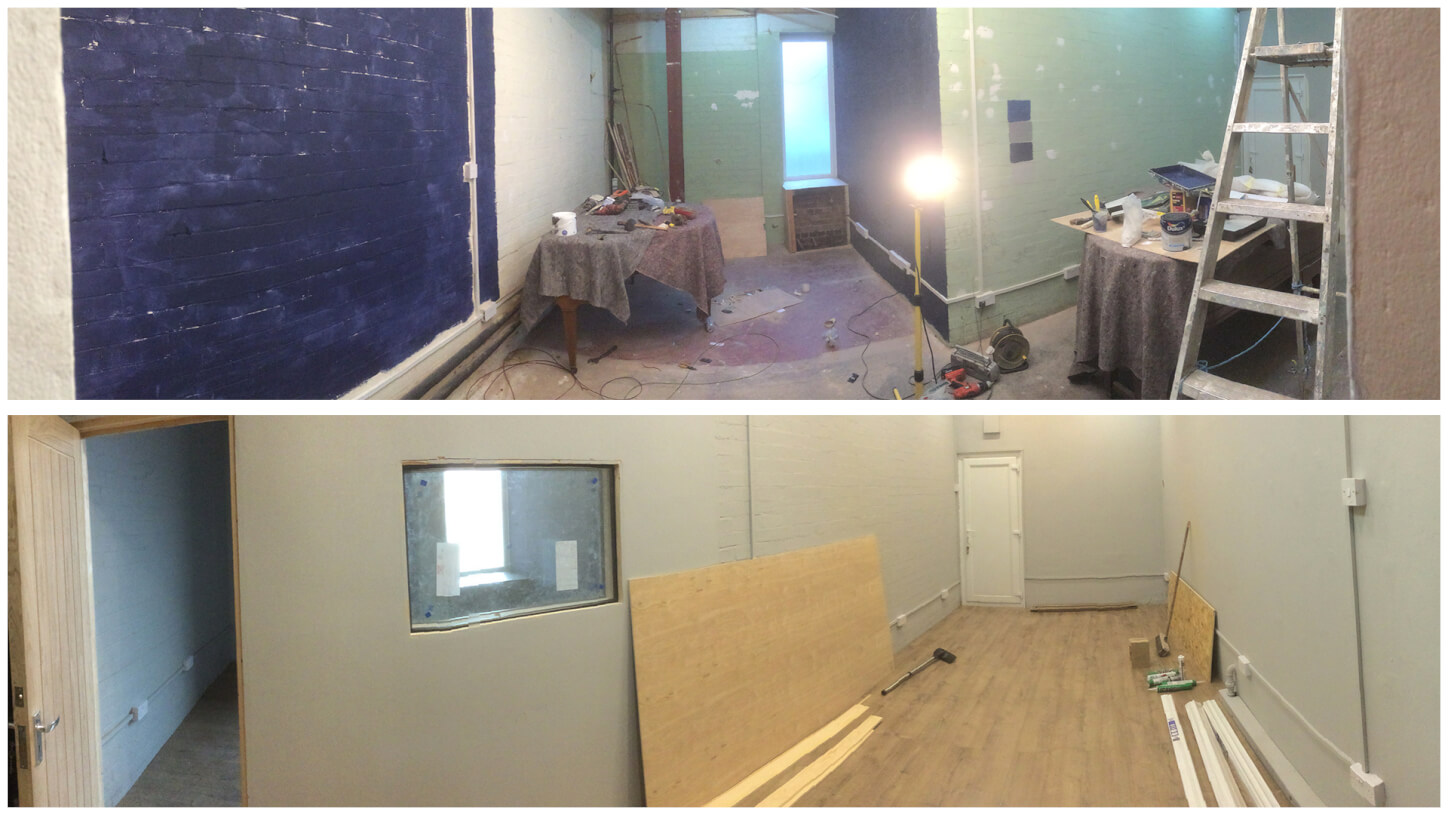
Here’s the floor before and after laying down the wood laminate.
3. Creating Your Space 4
So once all this main structural stuff is done it’s important (in my opinion) to make sure that the space is aesthetically pleasing as well. Lighting and furnishings go a long way to making the space comfortable and inviting as well as inspiring for both yourself and your clients.
It doesn’t have to cost the earth either. String lights are super cheap on amazon and IKEA is your best friend for soft, low floor standing style lights and trust me it makes all the difference. It takes away that clinical feeling and is much more welcoming and dare I say it…. ‘vibey’.
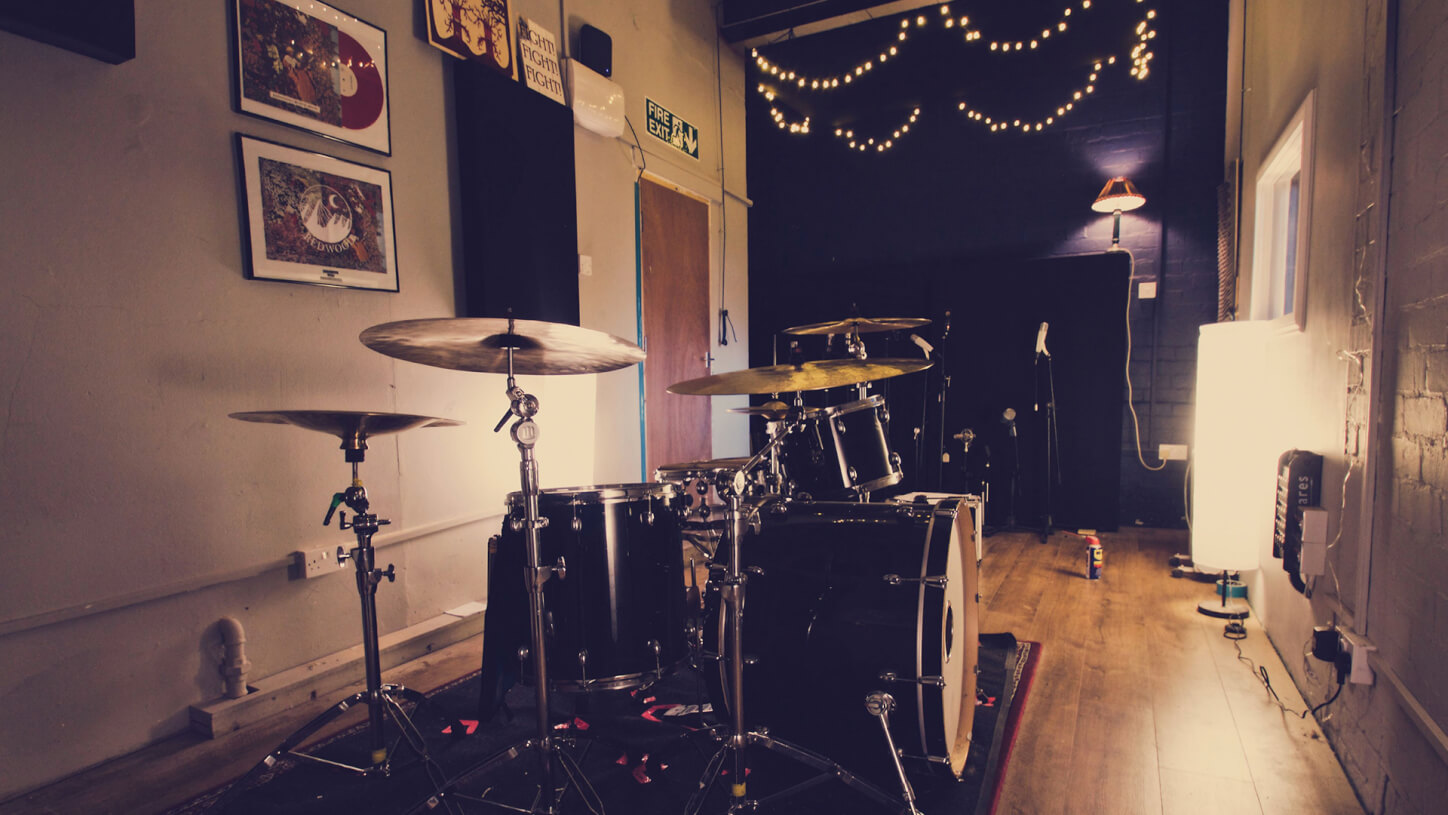
A great space will always enhance a performance, so make the artist feel as comfortable as possible!
3. Creating Your Space 5
Pick paint colours that work too. You want to aim for something that isn’t too dark and dingy but at the same time something that isn’t too bright and clinical. In my studio I went for a really deep midnight blue on one wall in both the control and live room and a light grey on the rest of the walls. It might seem dumb but it makes all the difference.
After all, you are going to be in those rooms anywhere between 8 – 16 hours a day, you want it to be comfortable. Also, don’t be afraid to put artwork and ‘trinkets’ etc up. I have loads of art done by mates and members of bands that I’ve recorded as well as bits of memorabilia etc that I have picked up along the way. It might not be what you want but for me, it makes the studio a much nicer place to be.

The initial colour palette vs the final colours.
3. Creating Your Space 6
Also…. It’s not a studio unless it has a Turkish/Persian style rug.
4. Gear, Gear and more Gear…
4. Gear, Gear and more Gear…
So this point is slightly harder to cover because naturally everyone is setting up shop for slightly different reasons and hoping to achieve slightly different outcomes / goals BUT that said, there is one piece of advice I would always give anyone setting up a studio whether it’s at their home or in a rented space or anywhere… start small and grow. I touched upon this earlier in regards to the size of space you’re looking for and the same goes for the gear you’re putting in it.
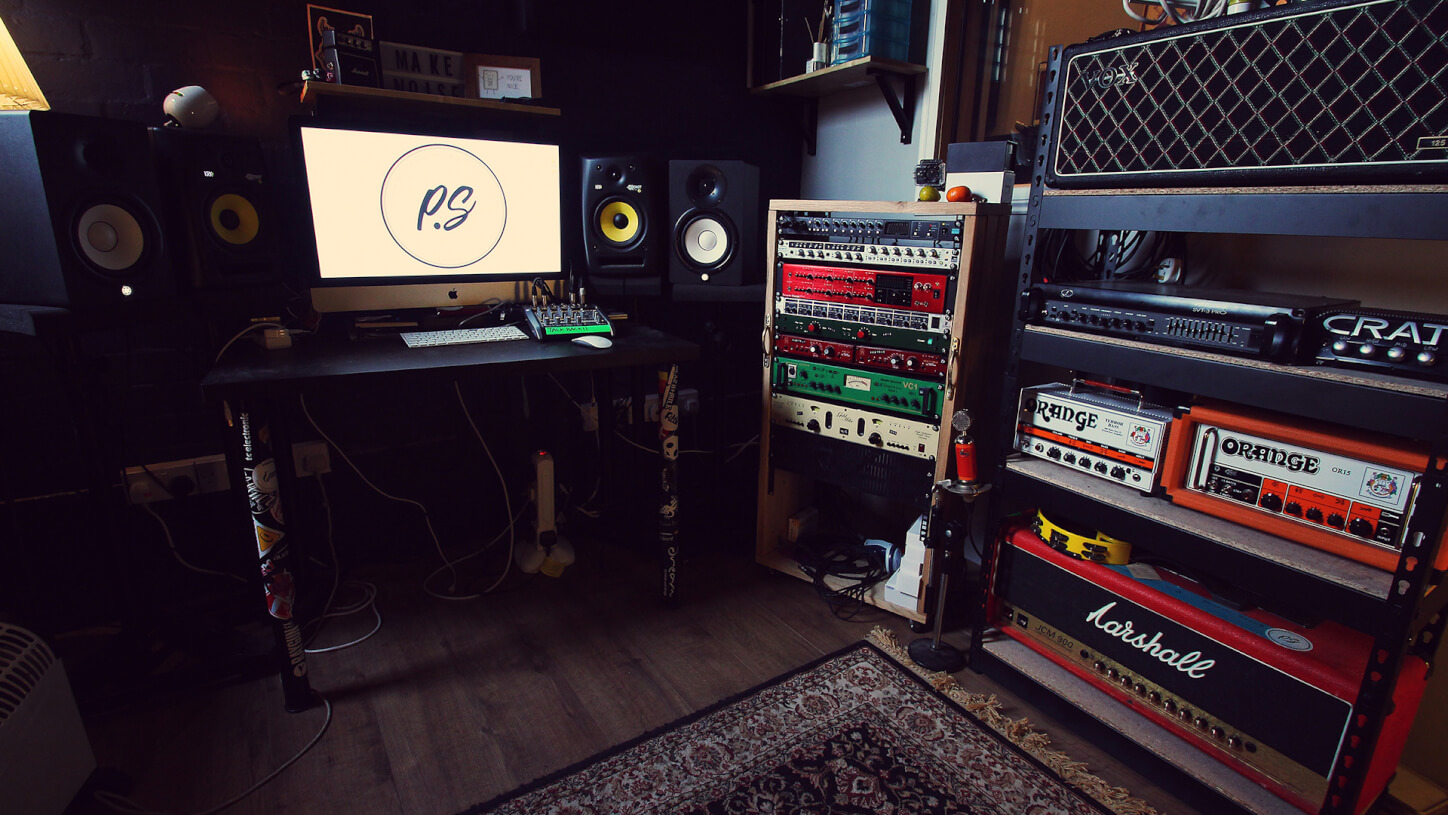
When I first started I knew I wanted to record bands which meant I needed to be able to record a drum kit so I bought an 8 channel interface. Two years later after I had worked with a bunch of bands and got a bit more under my belt I bought an expansion for that interface in the form of another 8 preamp unit so I had a total of 16 pres.
When I first opened the studio I still had these same two units and only one extra pre-amp that I ran into a line input of one of my two other units. It wasn’t until the last 18 or so months that I really started to expand on the gear front across all aspects. Mics, Pres, Outboard, Amps, Drums, Guitars, Plugins etc.
I didn’t have enough money to buy everything I wanted outright and to be honest, when I first started I hadn’t had enough experience with all the great gear out there or done enough research and if I had bought a load of stuff in the first instance I probably would have ended up selling most of it and having to buy all the stuff I have now anyway.
Buying within your means allows you to really and truly get to know bits of gear and how they behave and how they sound. It teaches you to make the absolute best music/sound you can within your limits and this subsequently is what allows you to grow as an engineer/producer/musician.
Once you have more of a name for yourself and a client base then you can start adding to the gear. Just make sure you’re continuously making the best work you can regardless of what gear you have. You can still make huge sounding records on very limited gear, there are countless stories of this being the case, especially in recent years.
Assuming you have a Computer and a DAW the few things I think are an absolute essential thereafter are as follows:
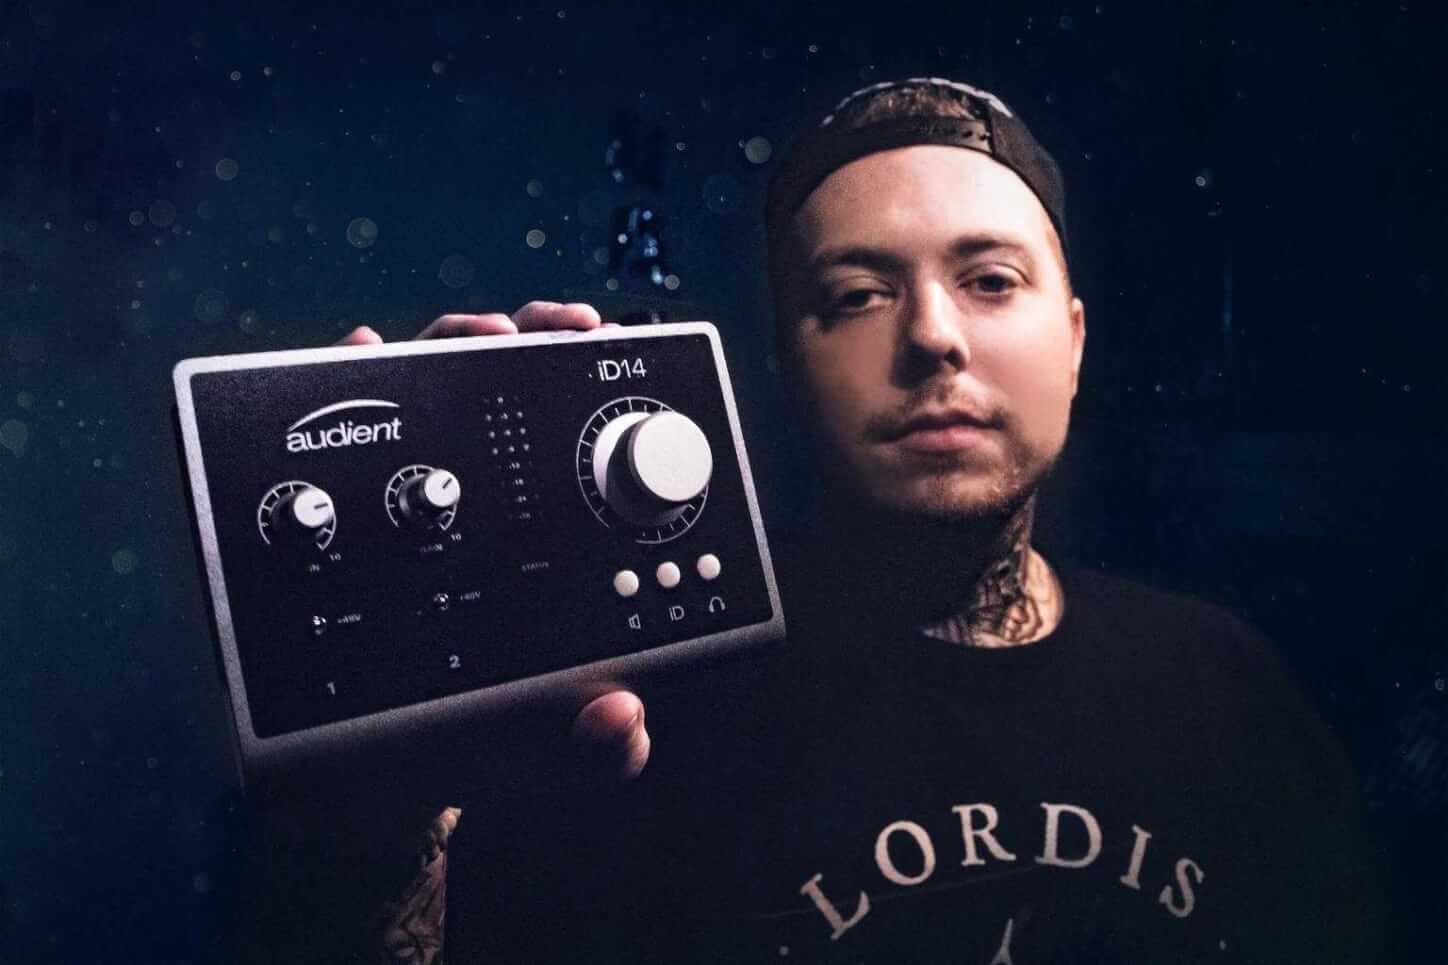
- A great interface. There are so many out there but find the one that best suits what you need. 1 input, 2, 3, 8? Then buy the best that you can afford – Check out the iD series range for some great options.
- One really good microphone. I would suggest a Large Diaphragm Condenser and preferably something that has a couple of extra features like a pad, roll off and switchable polar patterns if possible. (Rode NT2a, Aston Spirit, Audio Technica AT2050)
- A quality pair of headphones such as the Beyerdynamic DT770s or AT ATH-M50Xs.
- A set of mid – high end studio monitors. The Yamaha HS series are great for the money – Again, get the best you can afford.
4. Expected Costs
5. Expected Costs
Now having read all that you may be wondering ‘how much does all that cost?’ So I will give you a rough idea of what it cost me. It is important to bare in mind that myself and some friends did nearly all the work ourselves and only hired in the Joiners for the stud frame and a plasterer for the plastering.
In total for the following:
- Dividing wall
- Acoustic Panelling
- Window
- Door
- Plastering
- Flooring
- Paint
- Lighting
Roughly £5000.00 give or take a couple of hundred pounds.
This is based on my studio which is a medium sized space and was built to accommodate full band set ups including full drum kits etc. You may only need the one room in which case the figure would be considerably less but have a look at the photos in the article and it will give you a good example of what you can achieve on what is really quite a small budget.
6. Final Shots
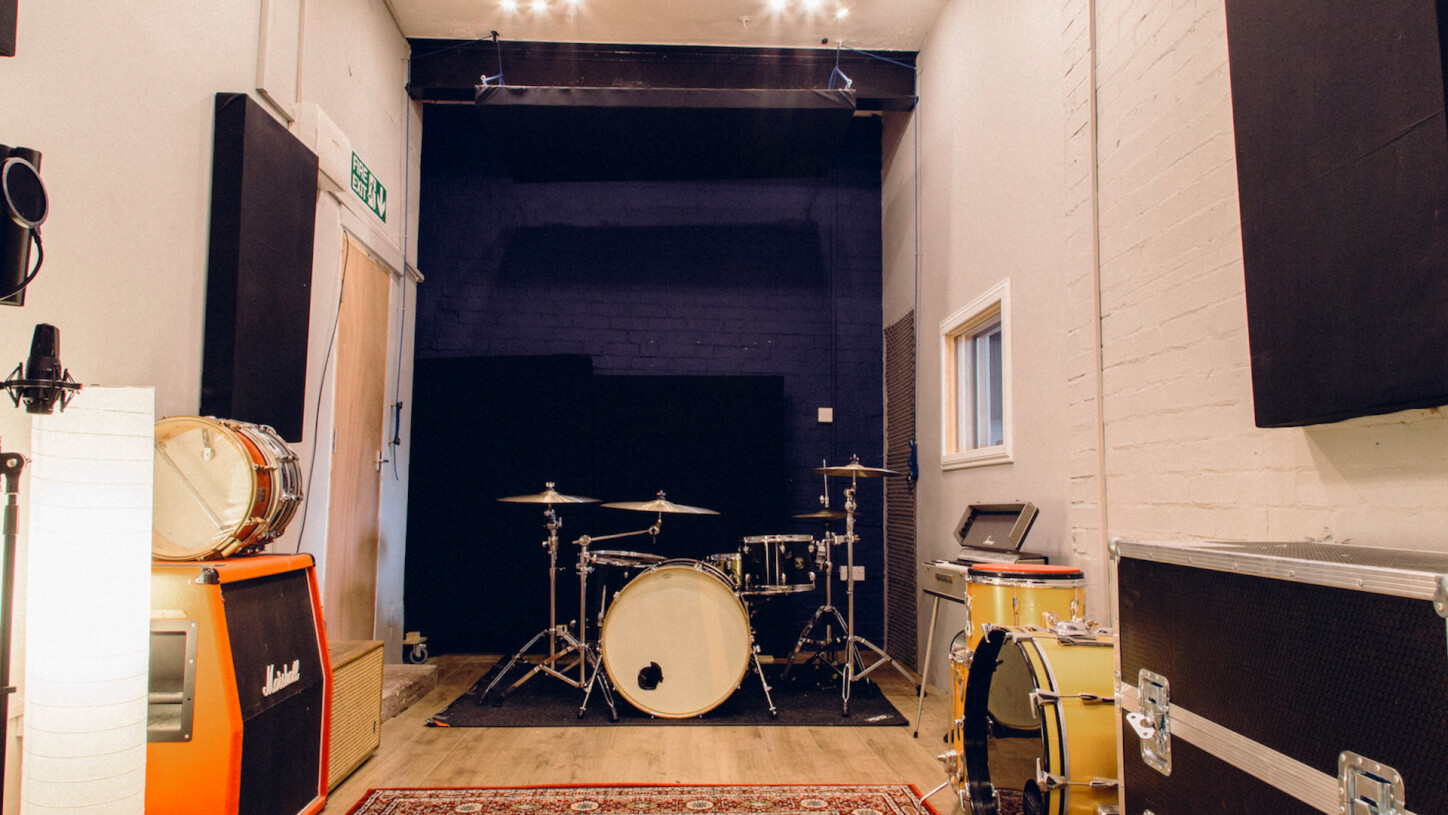
Here are some shots of the finished studio:
6. Final Shots
6. Final Shots
About the author
Hamish Dickinson & Phoenix Sound provides a personal, individually tailored recording experience for musicians and businesses in a beautiful purpose-built studio in Mansfield, Nottinghamshire. Hamish works one-on-one with bands and artists across different genres, producing their albums and E.P.s, from first recording, through mixing and mastering, to the final product.

Our Products
-

2in | 2out Audio Interface
-

10in | 6out Audio Interface
-

10in | 14out Audio Interface
-

20in | 24out Audio Interface
-
10in | 14out Audio Interface + Monitor Controller
-
10in | 4out Guitar Interface
-

2in | 2out Audio Interface
-

4in | 4out Audio Interface
-

Everything you need to start recording
-

24in | 24out Audio Interface
-

8 Channel Smart Preamp with AD/DA
-

8 Channel Mic Pre & ADC
-

8 Channel Mic Pre + Tone Control
-

Modular Analogue Recording Console
-

Small Format Analogue Recording Console
-

Small Format Analogue Recording Console
-

Immersive Audio Interface and Monitor Controller
-

Desktop Monitor Controller
-
Surround Sound Monitor Controller