


A crucial factor in the way any sound presents itself to the human auditory system is the cumulative effect of its many constituent airwaves bouncing off the surfaces around it and returning to the listener’s ears some time after those arriving directly from the source. These delayed waves – or ‘reverberations’ – provide your brain the cues necessary to define the size, shape and surface properties of the environment in which the sound exists; and if you’ve ever experienced the thoroughly unsettling deadness of an anechoic chamber, you’ll appreciate how profoundly important they are in our day-to-day life.
This spatial imperative is every bit as vital in music production as it is in the real world, where it’s simulated through the use of reverb plugins and/or hardware effects units. Reverb enables you to freely position instruments, vocals and other signals in pretty much any virtual space you can imagine, from convincing rooms and halls to vast caverns, clattering stadiums and strange hyper-real spaces that defy physics. As ubiquitous in mixing as compression and EQ, reverb is an effect you’ll use in every track you make to some extent, and here we’ll get you up to speed on the fundamentals.
Using reverb: the basics
Unlike the aforementioned compression and EQ, reverb is an effect intended to be heard around the source signal rather than replace it completely – ie, the source is being added to with reverb, not transformed by it. For this reason, every reverb will feature a dry/wet mix control, with which the balance of ‘dry’ input signal and ‘wet’ reverb signal can be adjusted to achieve the desired blend. Standard mixing practise, however, is to insert your reverb plugin into an auxiliary return channel (called an FX channel in some DAWs), set 100% wet, and use the Send controls on each instrument channel that you want to apply reverb to to control the amount of wet signal returned instead. Routing multiple channels to a shared reverb or two (one long, one short, say) in this way helps to keep the whole mix sounding consistent by making it appear that your instrumental elements all reside in the same ‘space’, and reduces the impact on your computer’s CPU that giving each element its own reverb would have.
Although there are no hard and fast rules with reverb (or any other effect), the idea in general mixing terms is to maintain the presence of the all-important dry signal on top of the wet signal, not swamp it in so much reverberation that you can’t hear it properly. So, always exercise caution with the dry/wet mix or Send amount controls, and if in doubt, back it off a bit.
Reverb type and other controls
While any given plugin might offer certain specific ‘non-standard’ controls, there are a number of typical parameters that you can expect to find on any reverb. In an algorithmic reverb (see below), the first of these is the reverb type, which sets out the base attributes of the space being simulated, and traditionally comes in four main variants:
Room
A natural-sounding, versatile space of variable size that works well for the spatial placement of all kinds of instrumentation.
Hall
Much more expansive and sonically flamboyant than the smaller-scale room type, the hall specifically simulates a concert hall and so is ideal for orchestral material and anything that you want to sound huge. Handle with care, though, lest you drown the mix.
Chamber
Before the advent of the plate (coming next), applying reverb to a track involved sending it to a loudspeaker in a small chamber with highly reflective walls, wherein a microphone would pick up the resulting signal and return it to the mixing console. Sounding unmistakably old-school, the reverb chamber plays a major role in classic rock and pop, and your plugin may well offer a simulation of it among its menu of types.
Plate
The original dedicated reverb effect unit, the plate reverb is a large, heavy sheet of metal that vibrates in response to a signal inputted via an attached transducer and returns its output via a pickup to to create a very characterful type of reverberation that sounds as fabulously luxe today as it did when it was invented back in the ’50s. If your reverb plugin features a plate algorithm, don’t hesitate to give it a try on drums and vocals…
You’ll no doubt come across other reverb types such as Spring, Shimmer and Non-Linear in the course of your musical adventures, but for the majority of conventional applications, the above four are the go-tos.
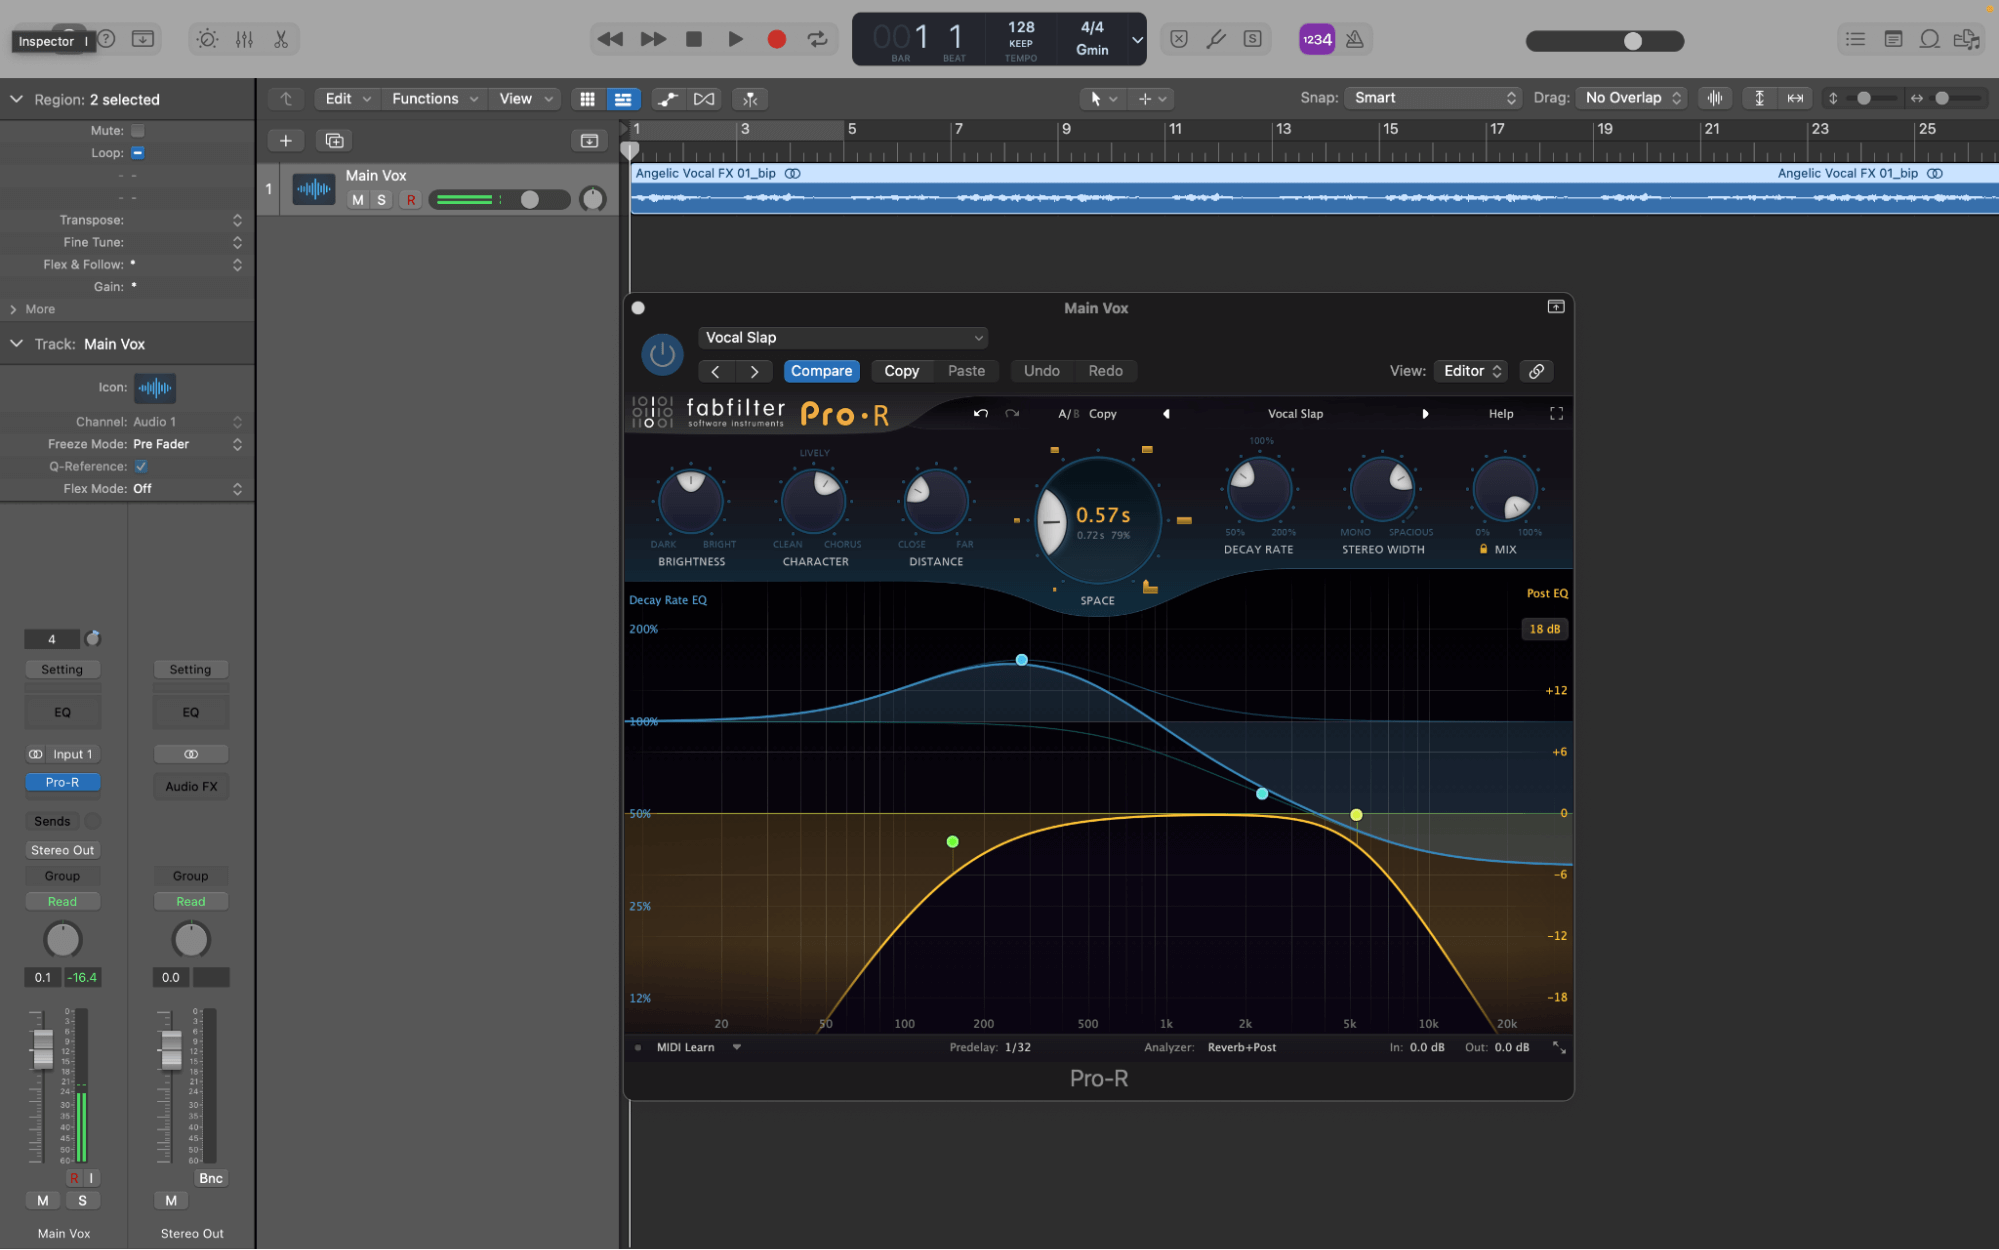
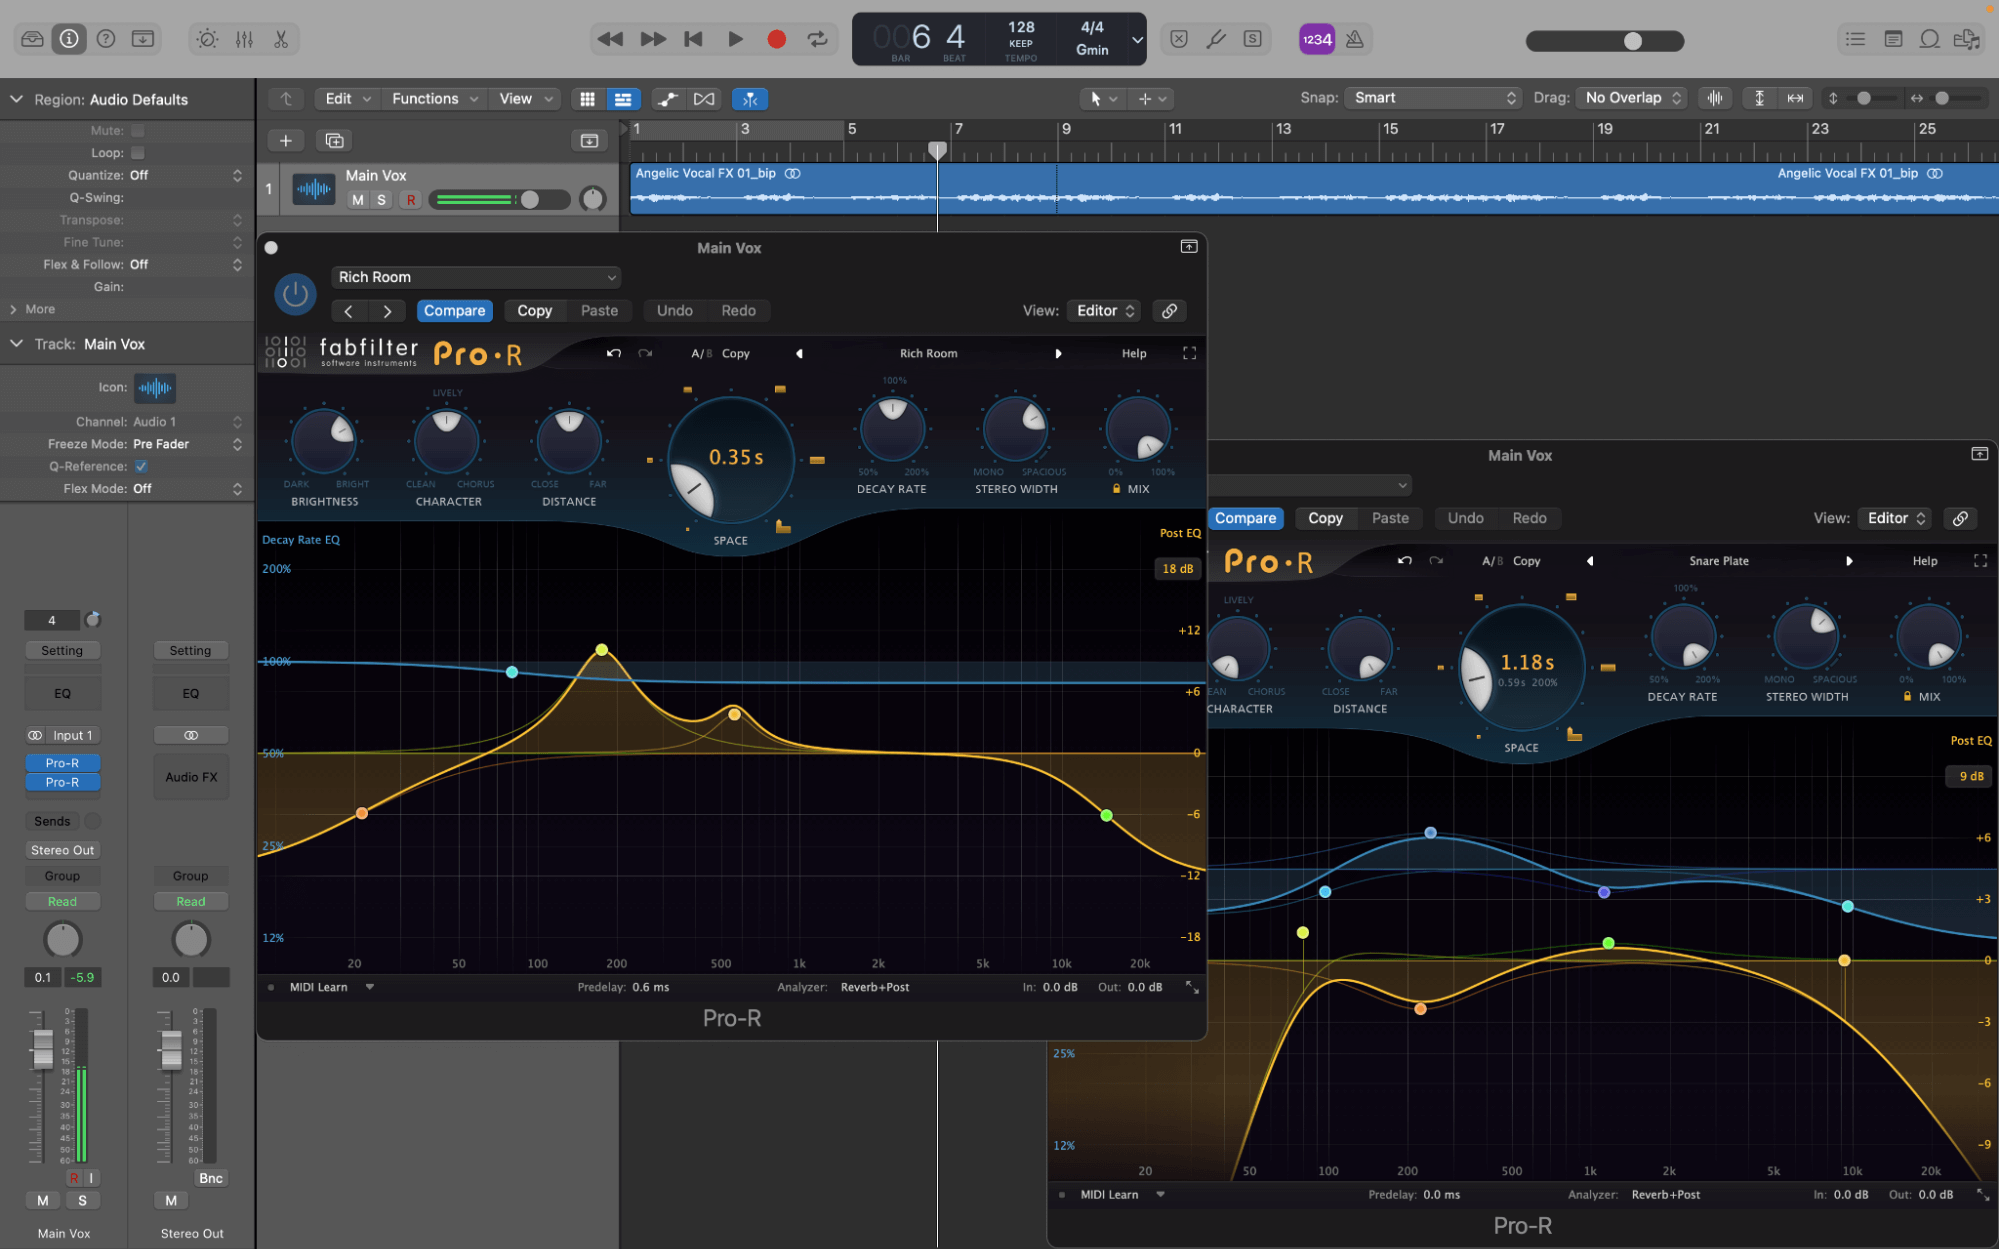
The reverb type algorithm is shaped and tailored using the controls provided by the plugin. You”ll be able to tweak the timing and levels of the early reflections (the very first sound waves to bounce back off the ‘walls’) and tail (the following reflections, ultimately dying away to silence), as well as adjust the size of the space, and the density and damping of the tail. Filters and EQ are often onboard, too – very useful for sculpting the frequency profile of the reverb to bed it into the mix. And, of course, any reverb plugin worth its salt will come with a sizeable library of descriptively named presets, which should always be the first port of call for any production newbie.
Algorithmic vs convolution reverb
Lastly, you may be aware that reverb plugins and hardware units actually come in two different technological forms: algorithmic and convolution – but what are they and how do they differ?
Most reverb effects available today can be considered descendants of the first ever digital reverbs, designed and built in the 1970s. These worked by adjusting various parameters of multiple delay lines in real time using mathematical algorithms in order to emulate physical spaces, and although modern reverb plugins are far more complex in every regard than their vintage forebears, the central principles and technical styling remain essentially unchanged.
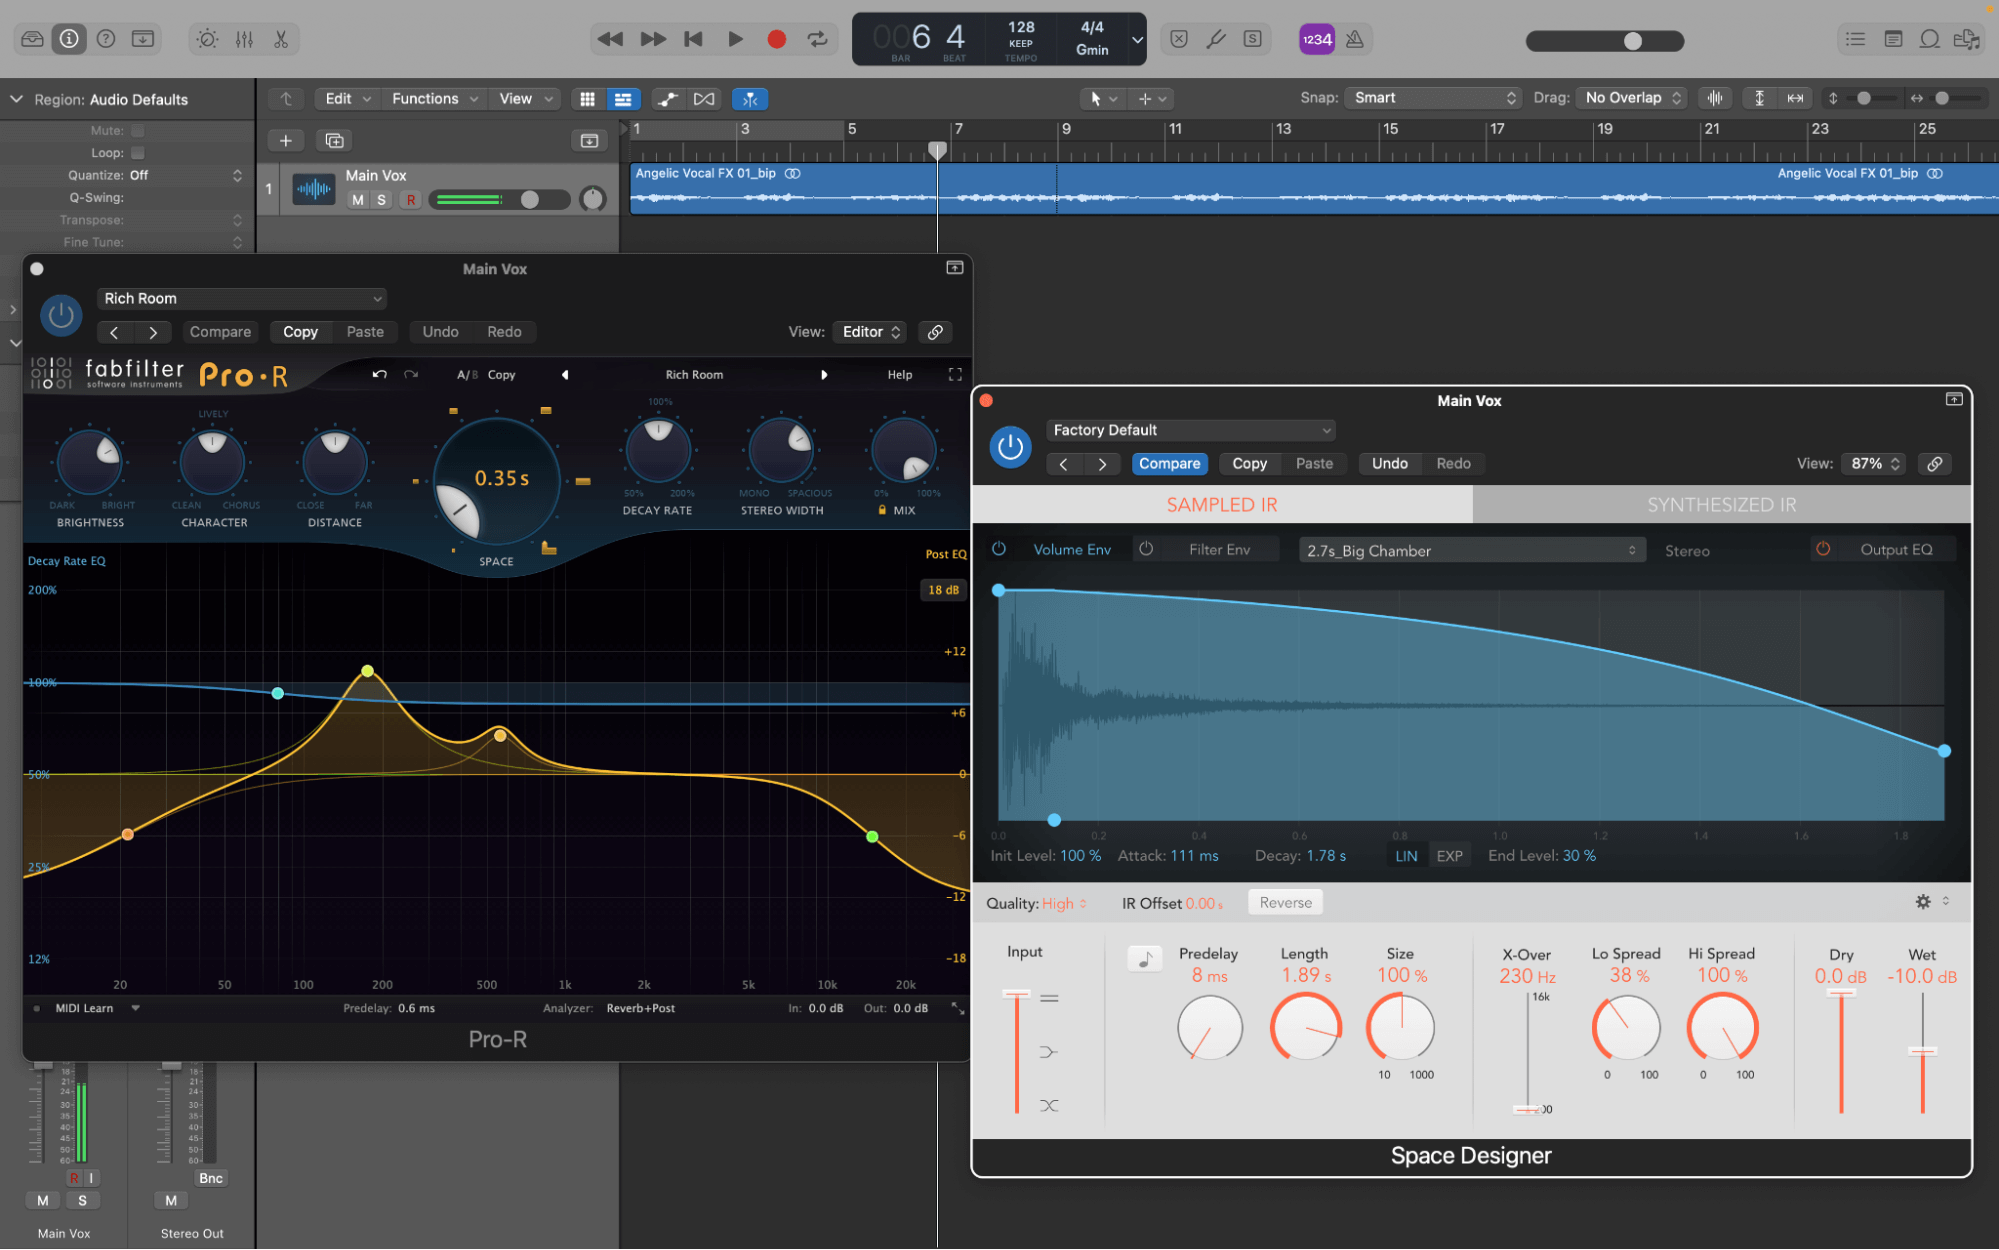
In the late 1990s, Sony introduced a hugely exciting new form of reverb to the world with their groundbreaking DRE-777 rackmount convolution effect. In a nutshell, this used very short samples of real-world spaces, called ‘impulse responses’, to create simulations thereof that were considerably more realistic than their algorithmic counterparts. Once the prohibitively expensive stuff of dreams for the average home producer, convolution reverbs are now commonplace in the software domain at prices ranging all the way down to free.
Which of the two types you should use for any particular sound or mix will depend on how realistic you need your reverberant space to be and how much control you want to take of its characteristics. As a very general rule, if you’re working with acoustic or electric instrumentation, the natural authenticity of convolution can deliver breathtaking results; while for electronic music, where total sonic realism is less of a consideration, an algorithmic reverb offers much more in the way of adaptability and control and places less demand on your CPU. Horses for courses, then, but once again, the rule is that there are no rules, so if you want to blast that aggressive neuro lead line through an impulse response captured in the Albert Hall, who are we to suggest otherwise?


Our Products
-

Interface audio 2 entrées - 2 sorties
-

Interface audio 10 entrées - 6 sorties
-

10in | 14out Audio Interface
-

Interface audio 20 entrées - 24 sorties
-
Interface audio 10 entrées - 14 sorties
-

Interface audio 2 entrées - 2 sorties
-

Interface audio 4 entrées - 4 sorties
-

Tout ce dont vous avez besoin pour débuter l'enregistrement
-
Interface audio 10 entrées - 4 sorties
-

Préampli micro 8 canaux avec CA/N
-

Préampli micro 8 canaux + Tone Control
-

Console d'enregistrement analogique modulaire
-

Small Format Analogue Recording Console
-

Small Format Analogue Recording Console
-

Immersive Audio Interface and Monitor Controller
-

Contrôleur de monitoring de bureau
-
Contrôleur de monitoring multicanal