


1. Do Your Homework
1. Do Your Homework
Now in an industry where there is now a wide variety of studios with an equally wide variety of equipment, styles of engineering and prices, finding the right fit for you or your band can be quite a daunting task.
However, if you choose to book a studio instead of going down the DIY route, there are some things you can do. Hitting the Internet is an obvious starting point. Find studios or engineers that specialise in your genre of music.
Try and listen to their work and see if it is a good fit for you. Find other artists who have worked with them and reach out to them to ask what their experience with that studio or engineer was (Google reviews will also help you here).
Get as much information as you can before making your decision, as this will save you a lot of headaches later down the line. Most importantly, consider your budget and agree on what the payment terms are and the channels through which you will be paying for the services of the studio you are using.
Allmusic
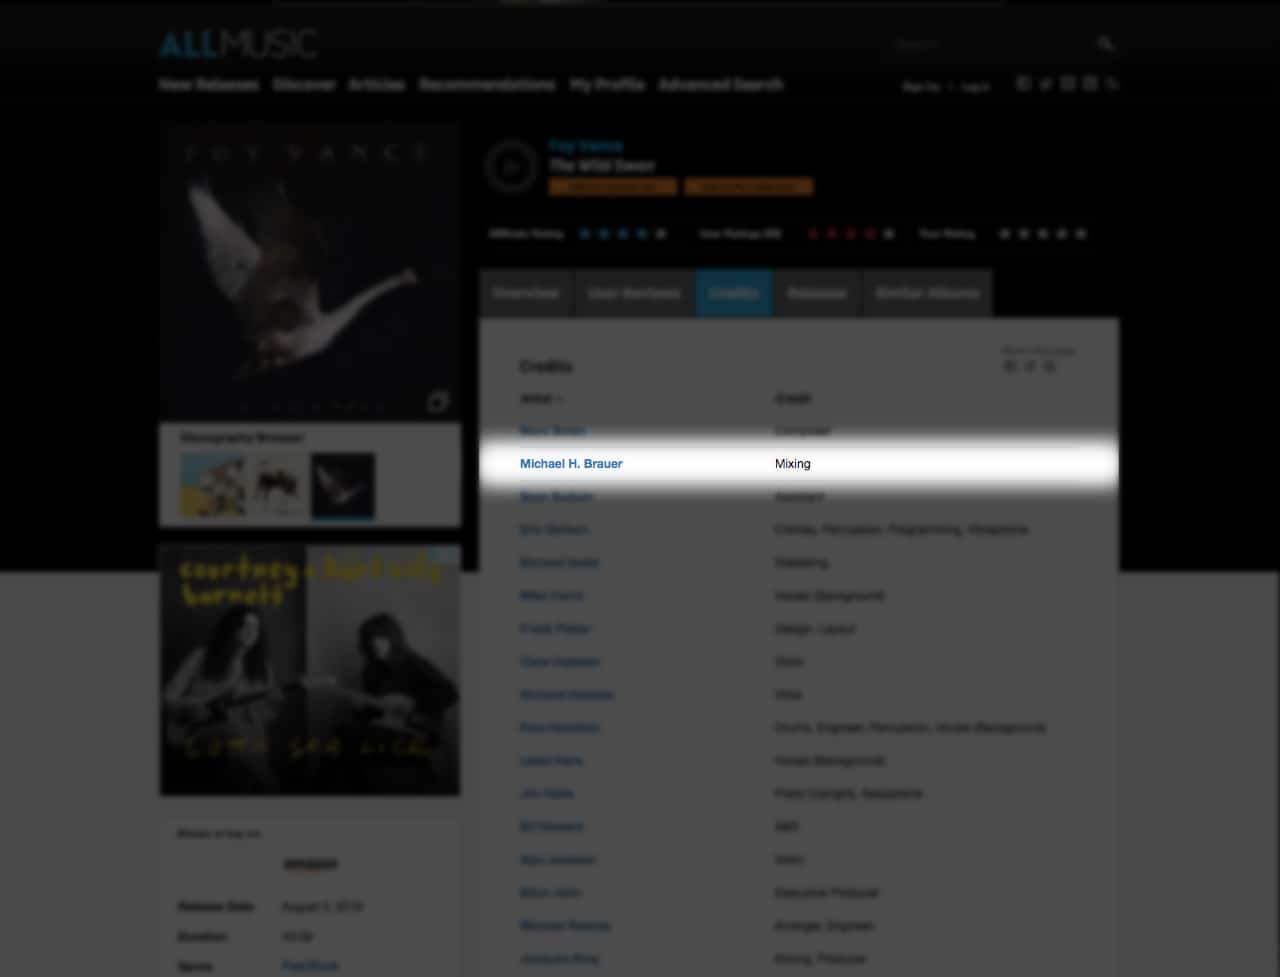
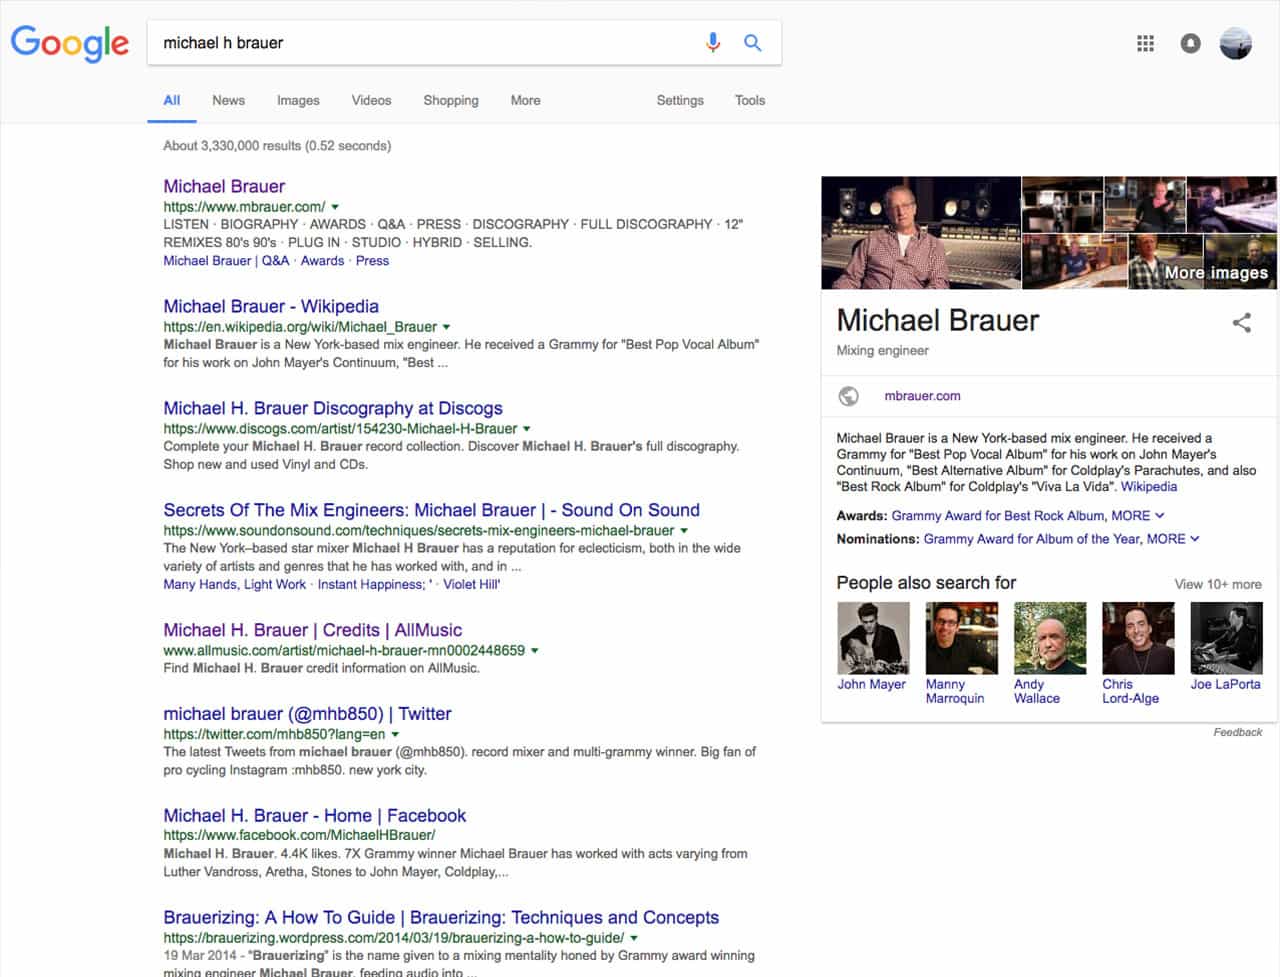
Google Search
1 . Tip
Finding out who engineered/mixed/mastered your favourite albums might point you in the right direction of which person to hire.
1. Do Your Homework Pt2
On that note, also consider the media triangle. The sides are labeled as follows; Time, Budget and Quality. If you shorten or lengthen any one of those sides the other two will shorten or lengthen with it.
For example, if you give a studio less time to do their job, yes it will also cost you less but the quality will also go down. The opposite also being true where the longer you give a studio the more it will cost you but the quality will go up.
Media Triangle

1 . Tip
Unless you are made of money you’ll more than likely have to settle with two of the above.
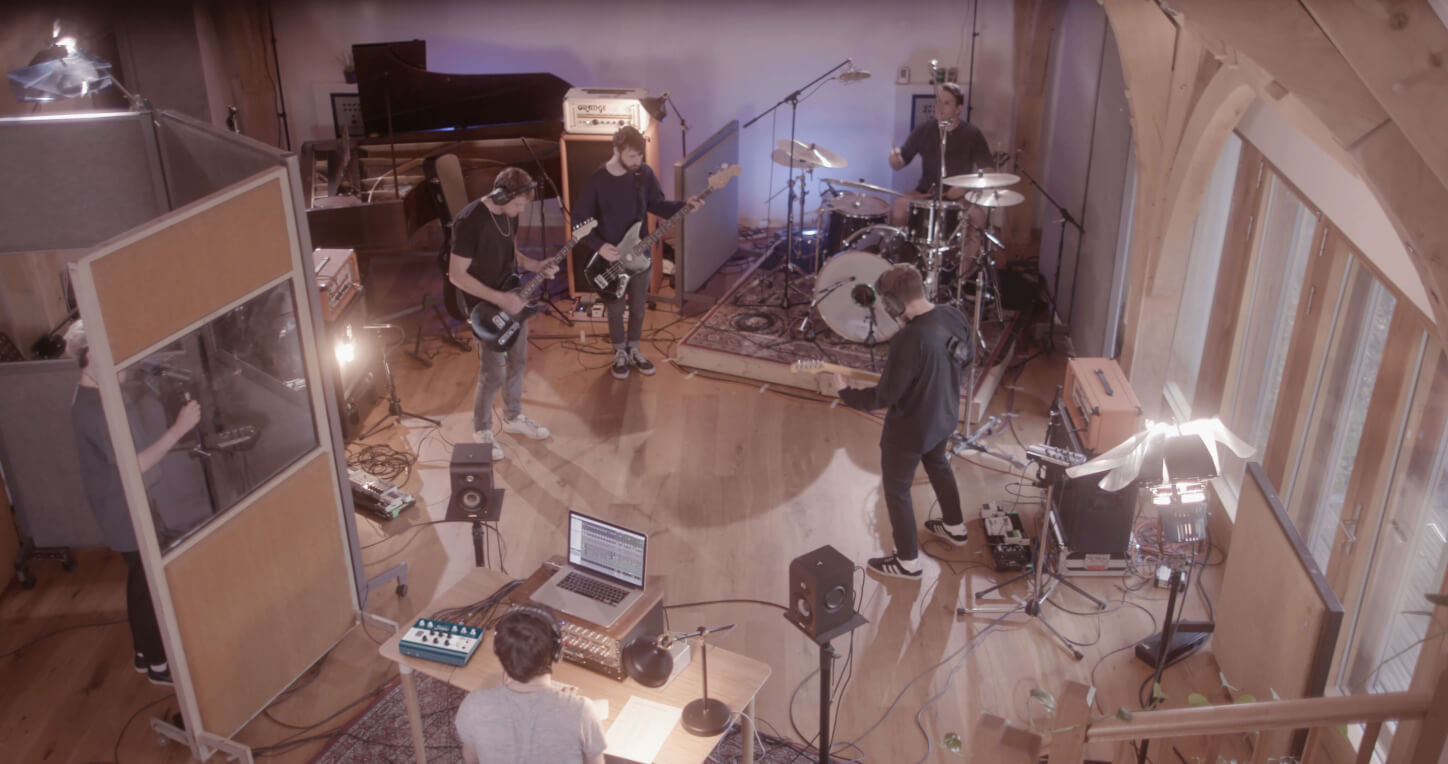
2. Proper Rehearsal
2. Proper Rehearsal
So, you’ve chosen your studio and booked some time to lay it all down. Your next step should be getting as much focused rehearsal time in to maximize the amount of time you have in the studio.
There is one thing that will annoy your engineer and that is writing in the studio. I find the best course of action here is to make sure that firstly the songs are well structured and everyone knows exactly what everyone is doing at each point in each song.
I have had numerous “oh is that what you’re playing?… well that’s not right” moments in the studio and nothing eats up more time than fixing/ learning parts that have not been rehearsed properly.
I find that sometimes writing tabs, lead sheets or music out also really helps people get to know their parts. Do this if you can and bring copies for your engineer. Some of the best sessions I have worked on have been ones where the bands have handed me music to read so I also know what part is being played and how it should be performed. It makes life a lot easier.
I would also establish who is going to be tracking what part. I know this is going to be a controversial opinion but the point of recording is that the end result sounds good.
I’ve had numerous sessions where the guitarist has tracked the bass parts or the keyboard player has played the guitar solos simply because they were getting a better end result.
It is better to establish who is doing what in rehearsal than it is to waste time having those debates in the studio when you are on the clock.

The Beatles rehearsing in 1966 – They recorded some pretty good songs right?
3. Pre Production
3. Pre Production
OK, so you now know your songs, you’ve established who is performing what parts and now it is time to prepare your productions.
This may sound daunting but this is a lot simpler than it sounds. In most productions I consider this the final stage of rehearsal where you plan out your tempo map and if you can, lay down scratch tracks for people to play along to.
There are numerous ways to do this and as most people have some form of recording software available to them these days on their computer, tablet or phone this step is fairly easy.
Recording to a click:
First and foremost, unless you are recording live (or in my case even if you are recording live) you will be recording to a click track. I can’t stress enough that the more you perform to a metronome or click the easier it is and the less time it will take you to record your parts to a professional standard in the studio.
BPM and Tempo Maps:
So, with that in mind establish what BPM you are playing in, how many bars each BPM is (if you have changing tempos) and in what time signature. Make notes or dial that into your software. Once you have established this, there are two ways you can help your engineer out.
Make a document and make notes of your tempos / time signatures for each section or produce a MIDI click with any drum sound firing on each beat and export this for each song to take with you.
In the studio your engineer will be able to use this information to produce a tempo map in their recording software and you will be good to go.
With my freelance work I try and do this step with the band in my home studio so we are all on the same page. Some studios may offer this to you as well so it is best to ask.
Guide Tracks:
Secondly, at the very least track a guide guitar or rhythm instrument for the drummer to play to. If this is done in advance this will aid your drummer in performing their parts instead of tracking to nothing but a metronome and using their memory!
As long as the guide part is tracked properly to a click this will help to save you time later. You can do this in the studio but the goal here is to save time.
Some productions will track the entire production in a guide form before they hit the studio so they can demo the parts out and try ideas out before recording for real.
This is nice but not always essential. Whatever guide parts you track, just make sure you bring them with you to the studio along with your tempo map.
Recording a live version:
As a last fail safe on the final rehearsal before tracking, record your songs as a band on one of your phones or via any other method so you have a record of song structure and so the engineer can familiarise themselves with your songs before you start. This will also help you to maximize your time.
4. Check Lists
I find check lists a great way of making sure you don’t forget anything when its time to record. Personally I call them idiot checklists.
Nothing is worse than arriving at a session and forgetting an essential piece of equipment. The best attitude to have is to not rely on the studio having everything (even the most equipped studio could be missing something that you may have forgotten).
So, I would make sure you have had your instrument set up by a professional as close to recording as possible, you have fresh drum heads, strings and picks.
Have sorted all of your dodgy cables and connections, have your throat sweets etc whatever it is that you need to being, make a list and check it off before loading in.
Also, bring spare strings, spare cables, spare picks etc as it will be typical that the one time you do not expect something to break it will break once your are in the middle of your once in a lifetime take! You cannot be too prepared.
Evernote

Google Keep

4. Tip
Use Apps like Evernote and Google Keep so you always have your checklist handy.
5. Personnel
5. Personnel
Lastly, I have had this a few times on sessions where the band will bring in non essential people into the studio to hang around. This could be friends, partners etc. I find that these people generally are a distraction that will cost you time and money in the studio.
If the person is not there to record on your project, film, take photos for promotional material, produce or engineer, do not bring them to your session.
That said, in the final stages of recording or mix if you want to bring friends along to record gang vocals or hand claps etc or to listen to the final mixes this can be fine within reason.
But please clear it with the studio or engineer first, as they may not have the space in the facility to accommodate more than the band and one or two other people.
Video
The engineer doesn’t look too happy here, does he?
Conclusion
Hopefully this has given you a better insight in to how to prepare to record in the studio. Now go out there and make the best music you can!

About the author
Graham is a Freelance Audio Engineer from Kent, UK specialising in recording, mixing and online mixing/ mastering via his website www.grahamwaller.com.
With 15 years of freelance work under his belt, he works with a wide variety of studios/ artists across London and the South East in host of different genres mostly guitar based rock and metal. In addition to this, he has taught music and music technology at Mid Kent College in Kent.
Our Products
-

Interfaz de audio 2 entradas | 2 salidas
-

10in | 14out Audio Interface
-

Interfaz de audio 10 entradas | 6 salidas
-

Interfaz de audio 20 entradas | 24 salidas
-
Interfaz de audio 10 entradas | 14 salidas
-

Interfaz de audio 2 entradas | 2 salidas
-

Interfaz de audio 4 entradas | 4 salidas
-

Todo lo que necesitas para empezar a grabar
-
Interfaz de audio 10 entradas | 4 salidas
-

Previo de micro y ADC de 8 canales
-

Previo de micro y control de tono de 8 canales
-

Consola de grabación analógica modular
-

Small Format Analogue Recording Console
-

Small Format Analogue Recording Console
-

Immersive Audio Interface and Monitor Controller
-

Controlador de sobremesa para monitores
-
Controlador de monitores de sonido surround